
This article describes necessary processes for installing the latest security updates or feature updates in a ggRock System Image.
Problem
Microsoft has released security and/or feature updates that are desirable to install in your System Image for compatibility, security, or other reasons.
Solution
General Outline
-
Turn On the VM you would like to apply changes from
-
Install Windows Security, Critical, or Feature Updates
-
Shut down the VM you would like to apply changes from
-
Commit Writebacks
-
Reboot all systems to ensure the changes propagate to them
Full Procedure
1. Create a VM.
Create (if not already created) and Turn On a ggRock VM with desired Image in local drives mode (This is for compatibility purposes - if the VM were booted in network mode and the network driver were removed during the OS upgrade, the System Image would be rendered un-bootable over the network - not to worry, there are mitigations for this if the issue presents itself, but we need to side-step the issue here while installing OS updates). (See the Virtual Machines Administration Manual for more information). Additionally, please refer to "Controlling a Virtual Machine" for more information on how to control VMs.
 NOTE:
NOTE:
If you do not yet have a VM set up on your ggRock server, please follow the steps in "Creating a Virtual Machine" to do so.
2. Enable "Keep Writebacks" in the Settings of the VM.
(See the Machines Administration Manual for more information).
NOTE:
This is a precautionary measure in the event that an update you are installing requires a reboot - without "Keep Writebacks" enabled the changes will be lost on reboot.
 3. Turn on the VM.
 4. Control the VM.
 5. Enable Windows Update
(It is recommended to keep Windows Update disabled during normal operation)
There are multiple methods to achieve this goal - please refer to "Disabling Windows Updates" for further information.
NOTE:
If you are using a Windows 10 Home image downloaded through ggRock, please use the "WUB" method to enable Windows Update, or if using the "Pro" image, please refer to the Microsoft Article on Configuring Windows Update.
6. Check for Updates
Open the "Check for updates" facility from the Start Menu.
 7. Install All Available Updates.
Click "Check for Updates", allowing all available updates to install.
NOTE 1:
It may be necessary to check for and install updates multiple times. Perform any necessary reboots during (and after) installation. Because we enabled "Keep Writebacks", all changes will be saved across reboots.
NOTE 2:
Microsoft rolls out major updates in a staggered fashion. This means that your Machine may show that it is up-to-date even when you know that a feature update should be available. In this case, it may be necessary to force your Machine to see the latest feature update using the Update Assistant, or you may download and launch the full Windows 10 installer from the Download Windows 10 Disc Image Page at Microsoft. (As of the last update of this article, the latest Windows 10 Build available is version 21H1). There may be other reasons that the release does not appear to you, including major compatibility issues that should be resolved prior to installing (although with ggRock you can easily revert to a previous snapshot if issues arise). See the Windows Release Health page for information on known issues.
8. Disable Windows Updates
(It is recommended to keep Windows Update disabled during normal operation)
There are multiple methods to achieve this goal - please refer to "Disabling Windows Updates" for further information.
NOTE:
If you are using a Windows 10 Home image downloaded through ggRock, please use the "WUB" method to enable Windows Update, or if using the "Pro" image, please refer to the Microsoft Article on Configuring Windows Update.
9. Confirm Disk Defragmentation is Still Disabled
Ensure Defragmentation is still in the disabled state after a major feature update is installed (e.g. upgrading from Windows 10 20H2 to 21H1, etc).
Refer to "Disabling Defragmentation" for further information.
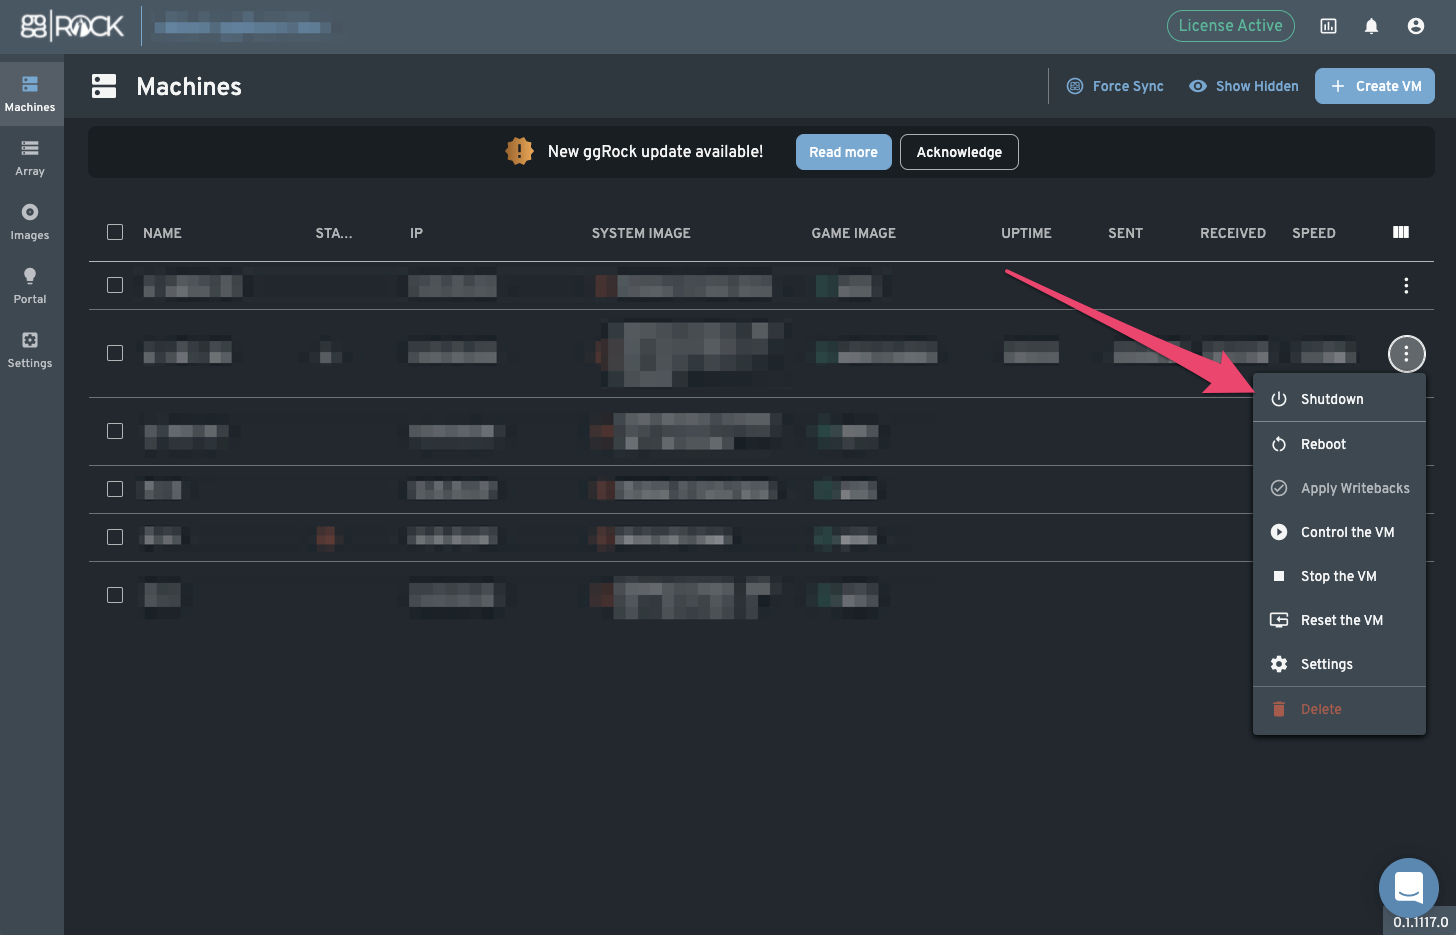
10. Shut down the Virtual Machine.
11. Disable "Keep Writebacks" in the Settings of the VM.
(See the Machines Administration Manual for more information).
 12. Apply Writebacks.
(See Applying Writebacks for more information).
 Enter a comment when prompted (typically initials of the administrator, the date, and the contents (e.g. games, applications updated).
Example:
ABC - 01-12-2021 - Updated Fortnite, COD:MW (launched to install shaders), and Google Chrome.
 13. Attempt to boot a PC to ggRock, if it fails you must re-add the network driver using seamless boot.
If boot fails, the network driver may have been removed by the update process - in this case, simply run the "Add Hardware" wizard on the system image you just updated, following the steps in "Adding a New Machine Type to a ggRock Image using the ggRock Seamless Boot Procedure".
NOTE:
If booting a VM fails with your system image when updating to 20H2+ versions of Windows, it may be necessary to run the ggRock Image Creation Tool one time in order to update network configuration and crash dump settings that may otherwise prevent boot.
If this is the case, please follow the instructions in the article "How to update network configuration using the ggRock Image Creation Tool".