
Creating a System Image Using the ggRock Image Creation Tool (Deprecated) This article details the (deprecated) process for creating a system image using the ggRock Image creation tool.
General Process Outline
-
Configure the new machine's BIOS appropriately for UEFI or Legacy mode based on the needs of your center, ensuring that the machine in question is powered off, as well as configure network boot as the first boot device.
-
Install Windows, enacting provisions to prevent Automatic Updates and Defragmentation.
-
Using the ggRock IC tool, capture the image
-
Copy the image to your ggRock server
Image Creation Requirements
-
Two USB drives (USB 3.0 is recommended), each at least 16GB in size (one for the Windows Installation media, one to transfer the final VHD image to your ggRock server)
NOTE:
You may re-use the same 16GB drive for both operations, but you must format it to make room to copy the final VHD image to your ggRock server. -
Empty Boot SSD/HDD 64GB to 2TB in size
NOTE:
Drives larger than 2TB are not supported for the purposes of Image creation.
-
Your Client Machine. This should be a 1:1 example of a Machine or Machines present in your center.
For the purposes of this manual, we assume that all Machines in your center share the same motherboard. If you have multiple system types or motherboards, please refer to "Adding a New PC Type to a ggRock System Image" for additional steps.
1. Download ggRock Image Creation Tool.
Download the latest version of the ggRock Image Creation Tool.
2. Download Windows 20H2+.
ggRock supports any modern version of Windows 10 (1809, 1903, 2004, 20H2) as of the writing of this article.
Any edition of Windows may be used as well (Home, Professional, Enterprise, etc).
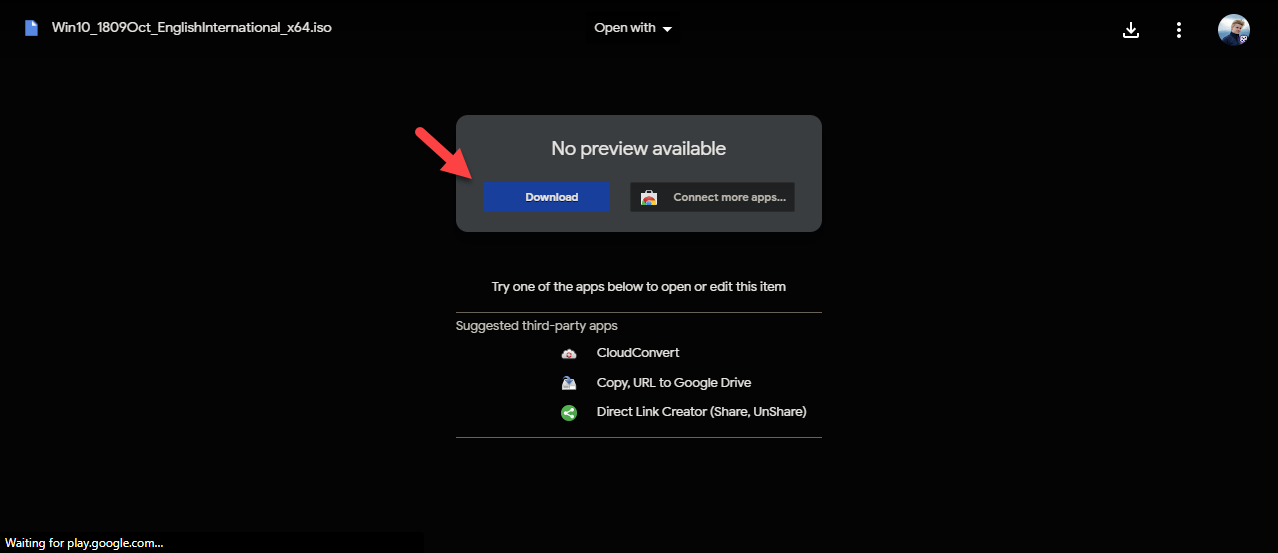
Download a copy of the Windows Installation Media using the Media Creation Tool.
3. Download and install Rufus.
In this example, we will use the Rufus (https://rufus.ie) utility to create a USB boot device.
Direct link to the latest version:Download Rufus Tool
4. Create Windows OS boot flash.
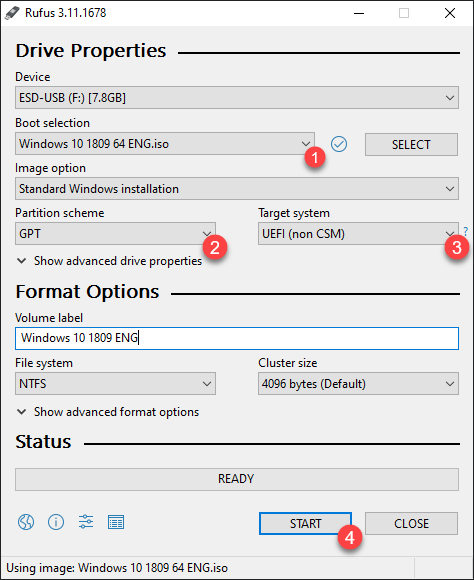
Using Rufus to create a bootable USB Windows Installer
(1) - Windows Installation Media
(2) - Depending on your needs, select a Partition scheme based UEFI or Legacy below.
(3) - Depending on your needs, select a Target system based on UEFI or Legacy below.
If in doubt, configure your system BIOS in UEFI Mode, otherwise if UEFI mode is unsuccessful it may be necessary to fall back to Legacy Mode.
UEFI :
-
Partition scheme: GPT
-
Target system: UEFI (non CSM)
-
File system: FAT32
Legacy:
-
Partition scheme: MBR
-
Target system: BIOS (or UEFI-CSM)
-
File system: NTFS
(4) - start flash creation
It will take Rufus up to 30 minutes to write the ISO image to your flash drive.
5. Insert empty boot SSD and remove all other drives
Insert an empty boot drive into the client machine we will be capturing the image from and remove all other drives from the machine.
-
For SATA drives you can simply pull the SATA cable.
-
For M.2 drives it's required to remove them from the sockets.
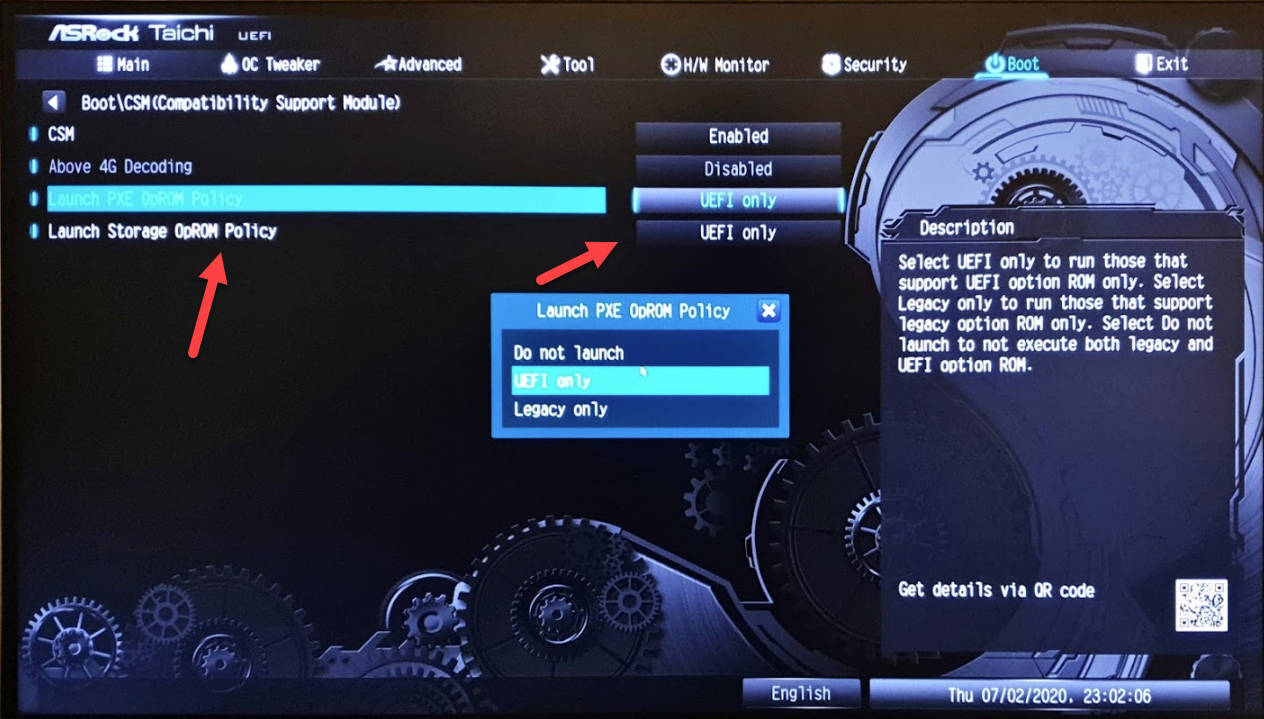
6. Disable Secure Boot.
ASRock x570 Taichi BIOS menu for reference

Make sure that your Storage Boot Policy is also set to UEFI only.
This will ensure that the Machine will boot from your USB drive in UEFI mode.
ASRock x570 Taichi BIOS menu for reference
7. Set your USB flash as first device during boot.
Insert your newly created Windows OS USB, configure it to be first boot device (usually via Boot Order menu by F11 during Client Machine startup).
NOTE:
You may elect to press F12 or Esc (typically) to access the boot menu in order to perform a one-time boot to your USB Windows Installation Media.
8. Disable Internet access.
At this stage it's important to disable internet access for the machine - this will prevent Windows from staging any updates that might interfere with the setup process.
You can do it by simply pulling the Ethernet cable.
9. Perform Windows Installation.
10. Select Custom installation.
Make sure to select Custom: Install Windows only (advanced)

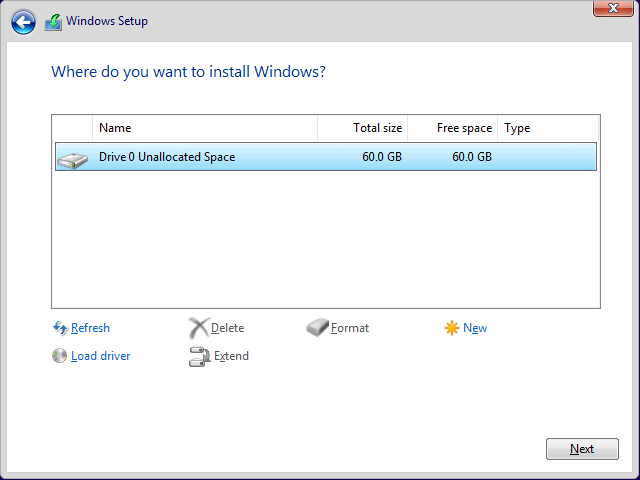
11. Leave unallocated space only.
Make sure to Format/Delete all partitions on the Boot Drive, so there is only one Unallocated Space entry in Windows Setup.
NOTE:
The formatted capacity of the drive installed in the machine you are creating your image on will be the maximum size of the System Image that will be created in ggRock.
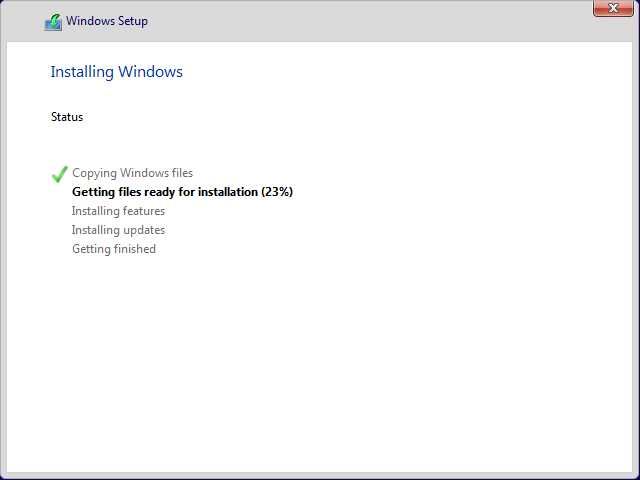
12. Windows Installation.
13. Windows Configuration.
14. Disable Windows Updates.
Right away after installing ggRock you need to prevent Windows from updating itself, since a feature update or driver update may cause the image to stop booting successfully.
Please refer to the "Disabling Windows Updates" article for details.
Make sure that this step is complete right after Windows is loaded to prevent it from starting the updates before you address it.
15. Disable Defragmentation.
Right away after installing ggRock you need to prevent Windows from running automated defragmentation tasks as these can balloon your writeback cache for each Machine causing your array to run out of space.
Please refer to the "Disabling Defragmentation" article for details.
16. Prepare ggRock IC Tool.
Copy over ggRock IC Tool from a usb to the Desktop.
Detach the USB (IMPORTANT)
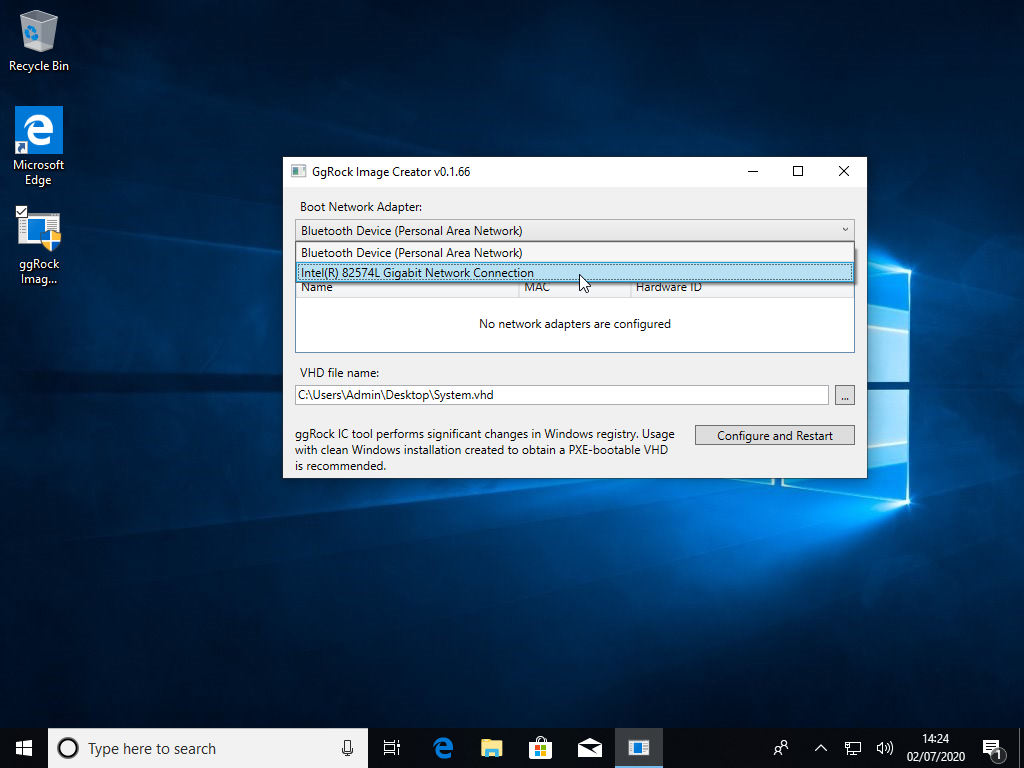
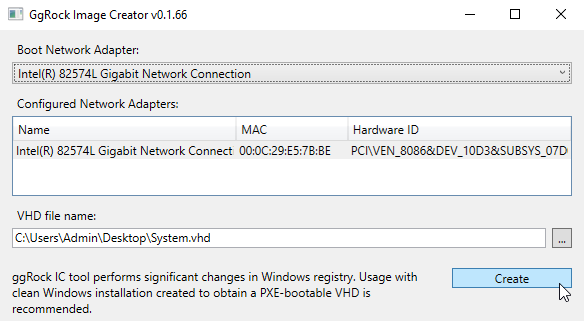
17. Launch ggRock IC Tool and Select your NIC.
Launch ggRock IC tool.
Expand the dropdown at the top of the window, then select the physical NIC that your client Machine has (not a WiFi or Bluetooth interface)
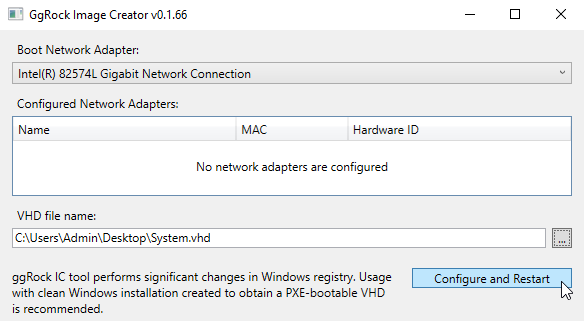
18. Configure and Restart.
Specify the path for the .VHD file that will be created and click "Configure and Restart"
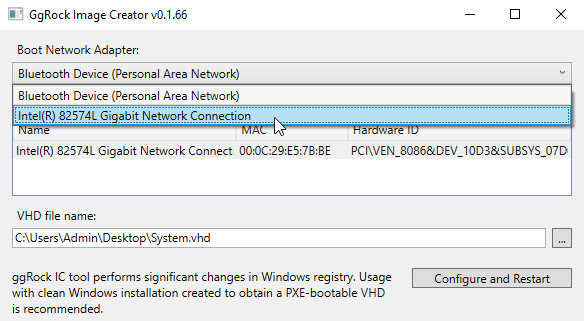
19. Launch the ggRock IC Tool again.
After restarting the Client Machine launch the IC Tool again, and select the same NIC interface as you have selected before.
You should also see that interface in "Configured Network Adapters" listbox.
20. Create VHD Image.
NOTE:
Stop here and visit the Adding a New Machine Type to a ggRock Image using the ggRock Image Creation Tool (Legacy Process) guide if you have more than one Machine Type (e.g. Network Card) in your center.
Observe that the "Configure and Restart" button is now a "Create" button - click this button to create the VHD image that we will upload to the ggRock server.
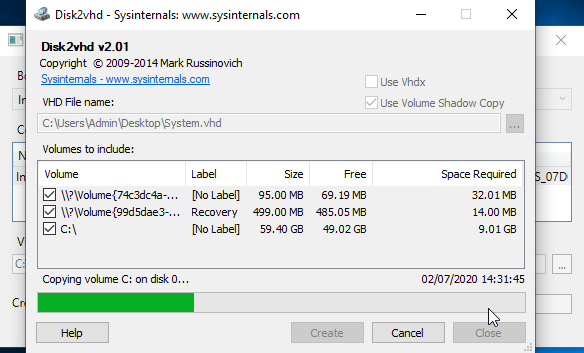
21. Disk2vhd.
Disk2vhd will run and create the VHD image file.
This process may take several moments to complete.
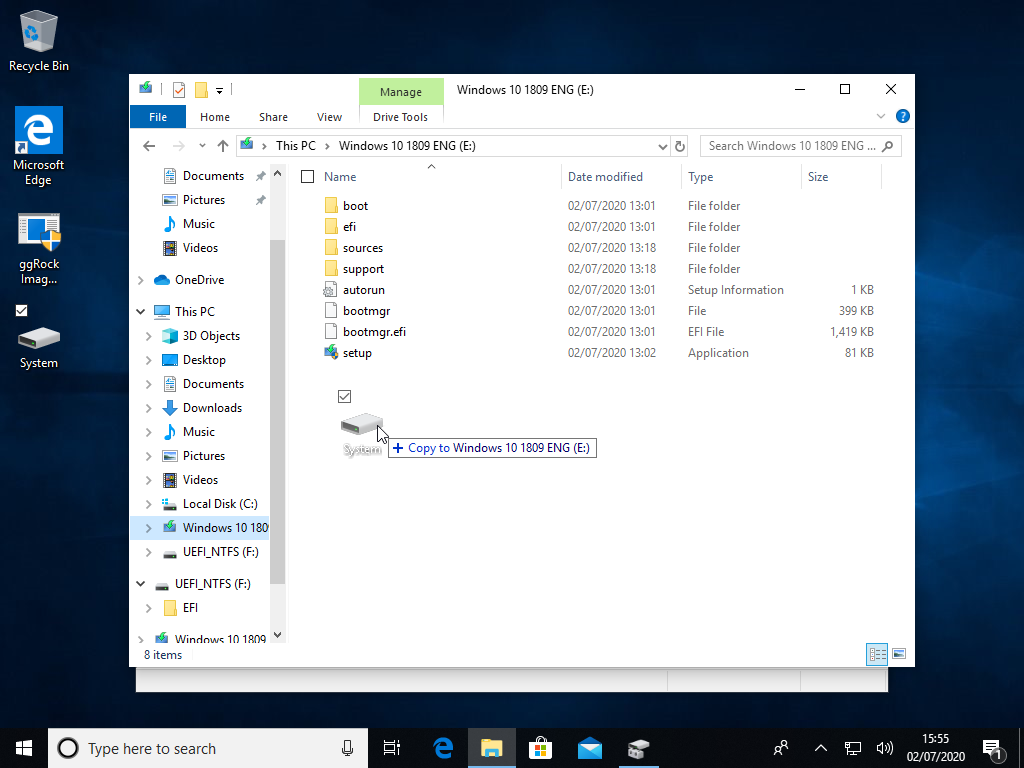
22. Copy System Image to Flash Drive.
You can connect the same USB we've used for Windows OS installation on paste System.vhd into the root (no folders) of the USB drive. USB 3.0 drives and ports are preferred.
Typically a System Image .vhd file has a size of 12-13 GB, depending on your Windows edition.
It might take up to 30 minutes to copy the image to your flash drive depending on your USB drive and Machine ports.
In the meantime you can start Phase 3. Configure Client Machines for Diskless (PXE) Boot.
If you are using 16Gb drive you will have to reformat it to fit the .vhd file.
Make sure to retain NTFS file system
23. Attach USB drive to your ggRock Server.
Plug the USB drive containing your System Image into any available USB port on your server.
It is preferred to use USB 3.0 drive and port on the server for faster transfer.
24. Import System Image.
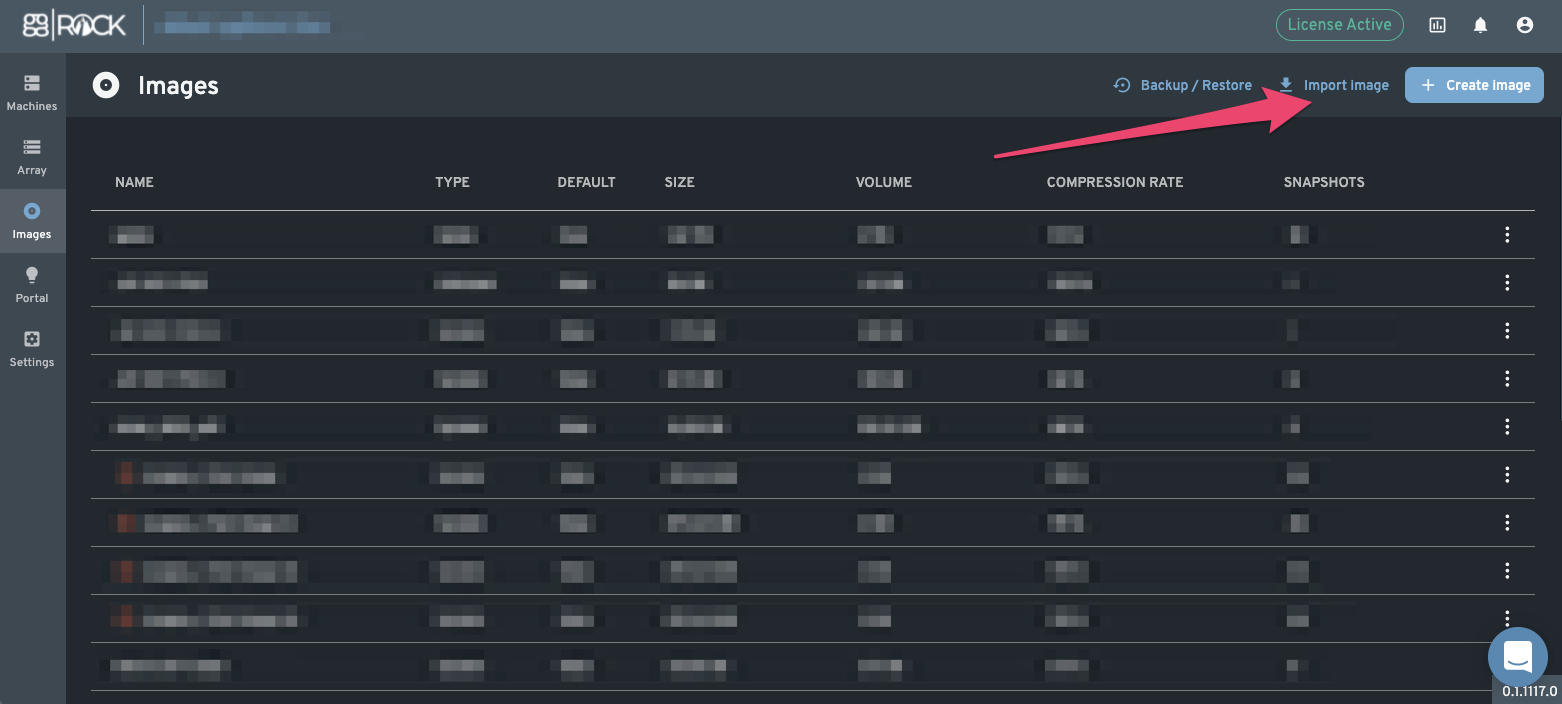
Log into the ggRock Web UI, then click the "Images" tab.
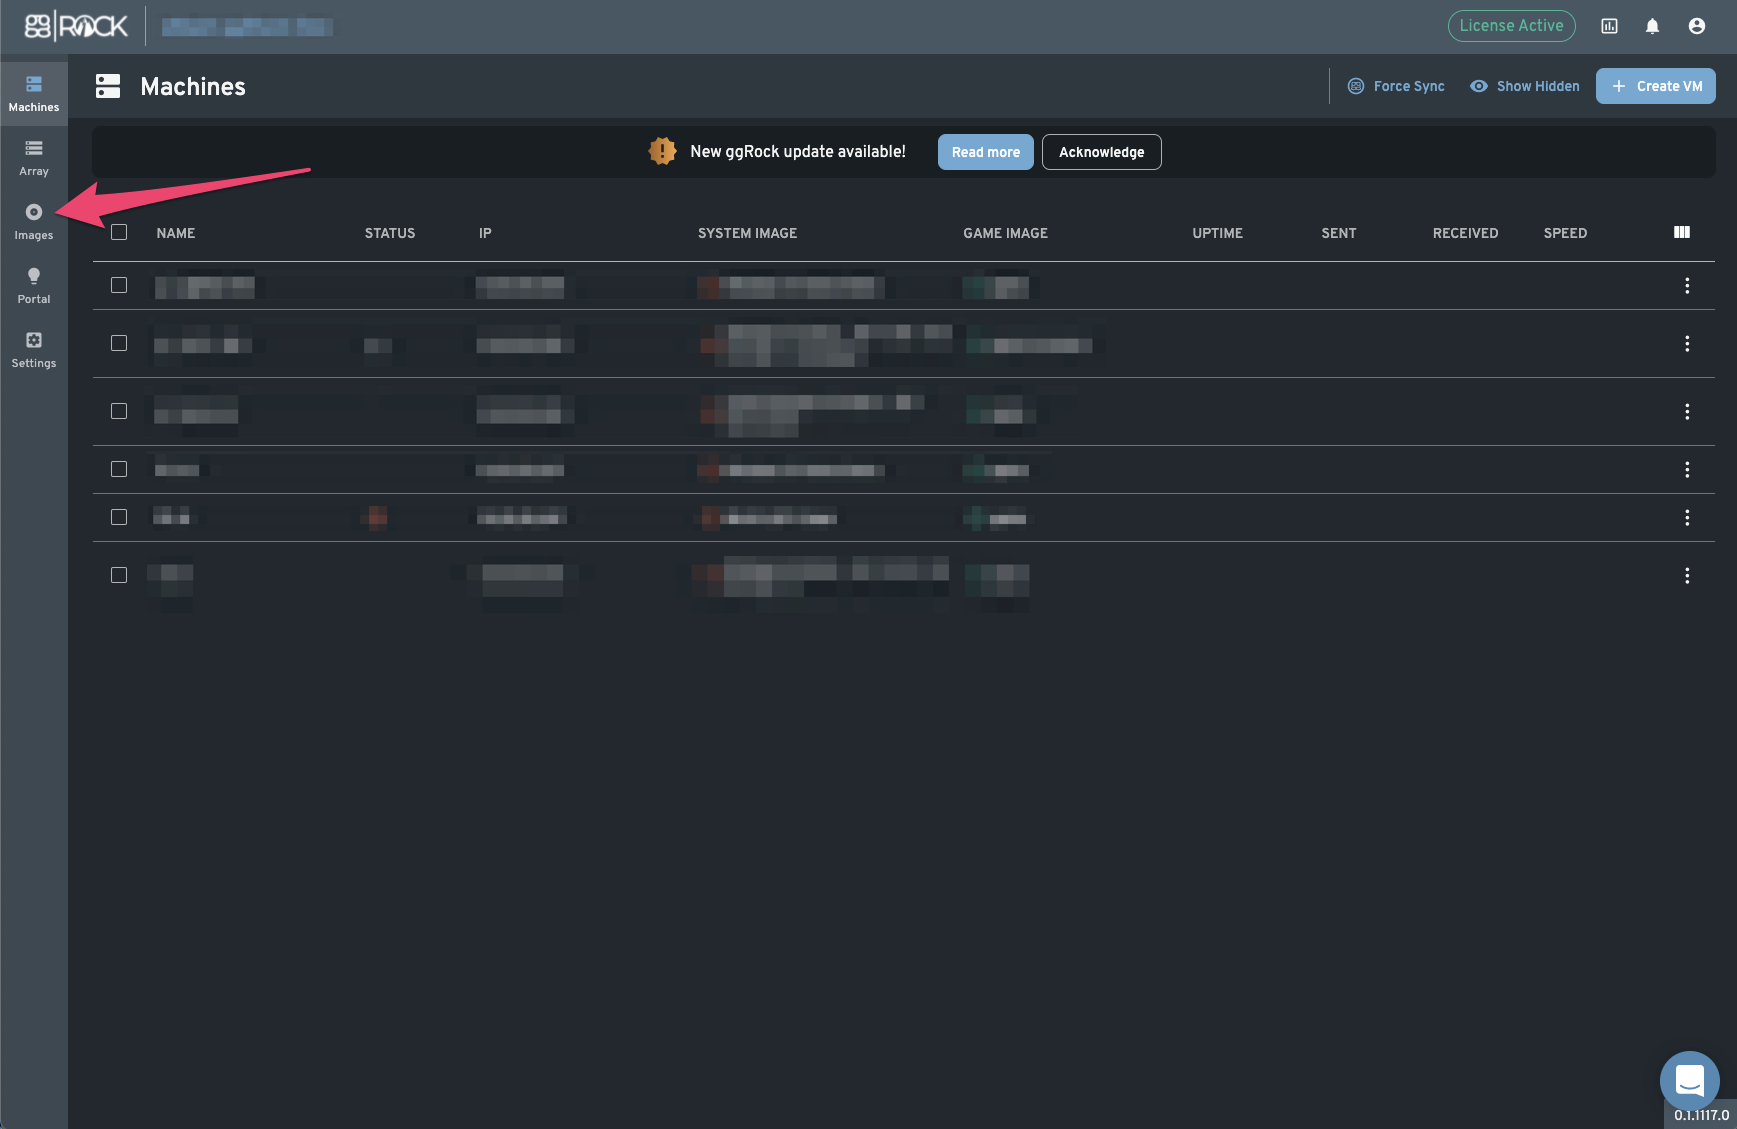
Within the "Images" tab, click the "Import Image" button.
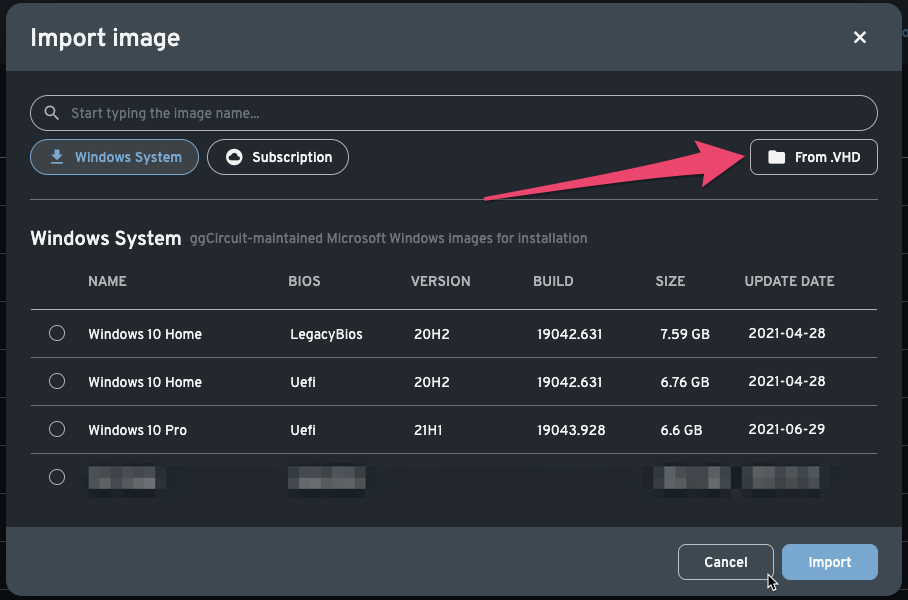
25. Initiate .vhd import.
Within the "Import Image" dialog, click the "From .VHD" button in the top-right corner.
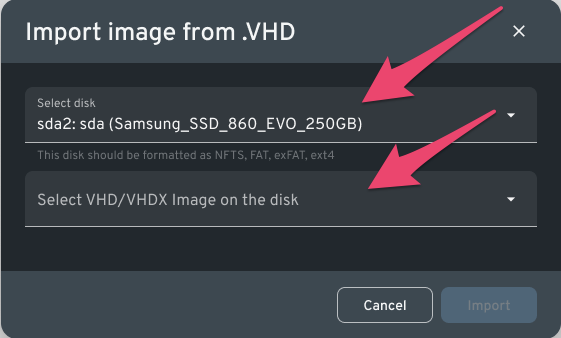
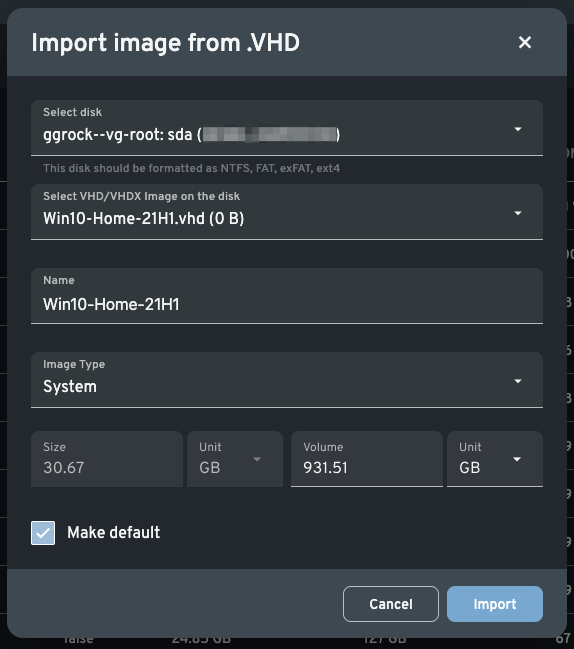
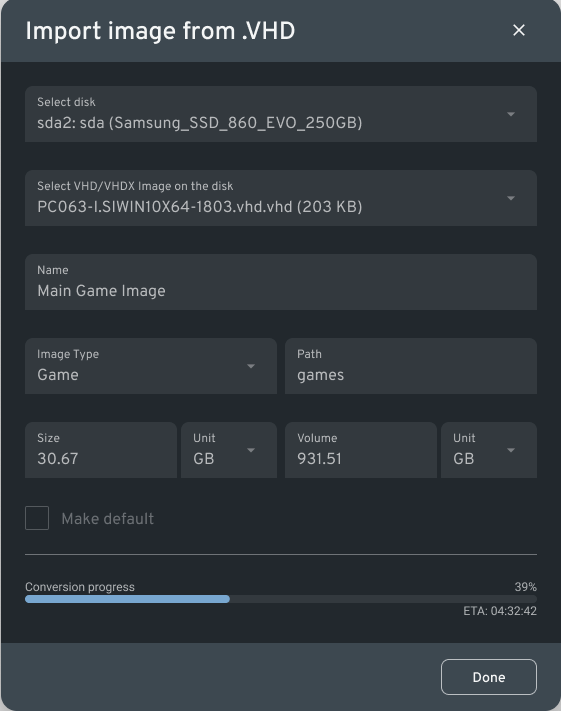
Within the "Import Image from .VHD" dialog, select the USB drive you inserted into the server earlier from the "Select disk" drop-down, then select the newly-created system image file from the "Select VHD/VHDX Image on the disk" drop-down.
Provide a name for your newly-created image, set Image Type to System and make it default.
26. Let ggRock import .vhd file.
Observe the import process.
In the meantime you can continue setting up your machines for diskless boot.
Note:
You can close the modal dialog and monitor the progress from the "Images" tab.
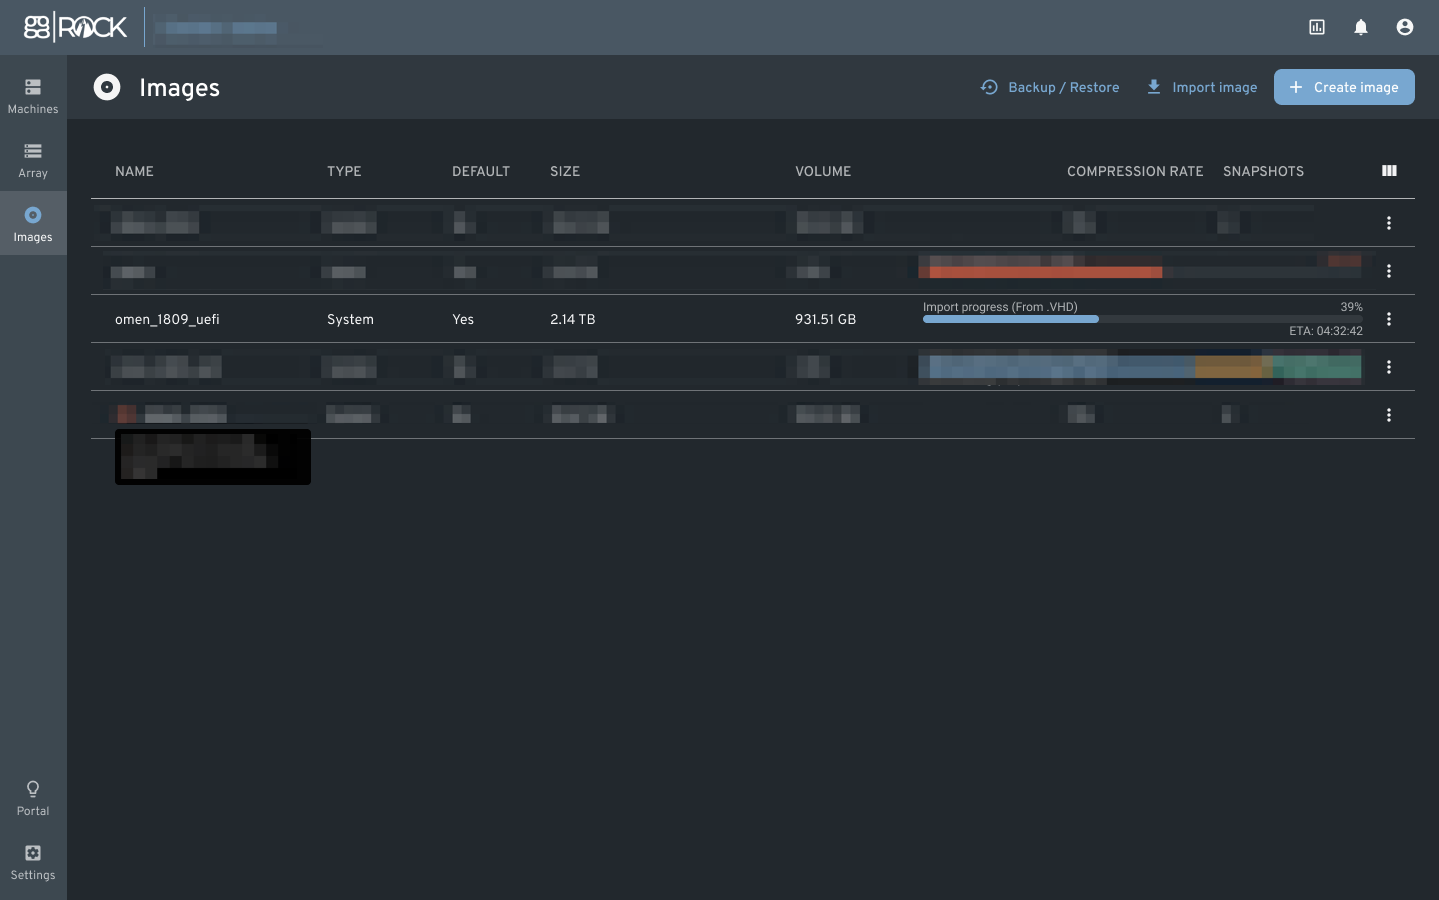
It will take ggRock, on average, around 30 minutes on a USB 3.0 device to import and convert a typical 13GB system image into the ggRock Image format.
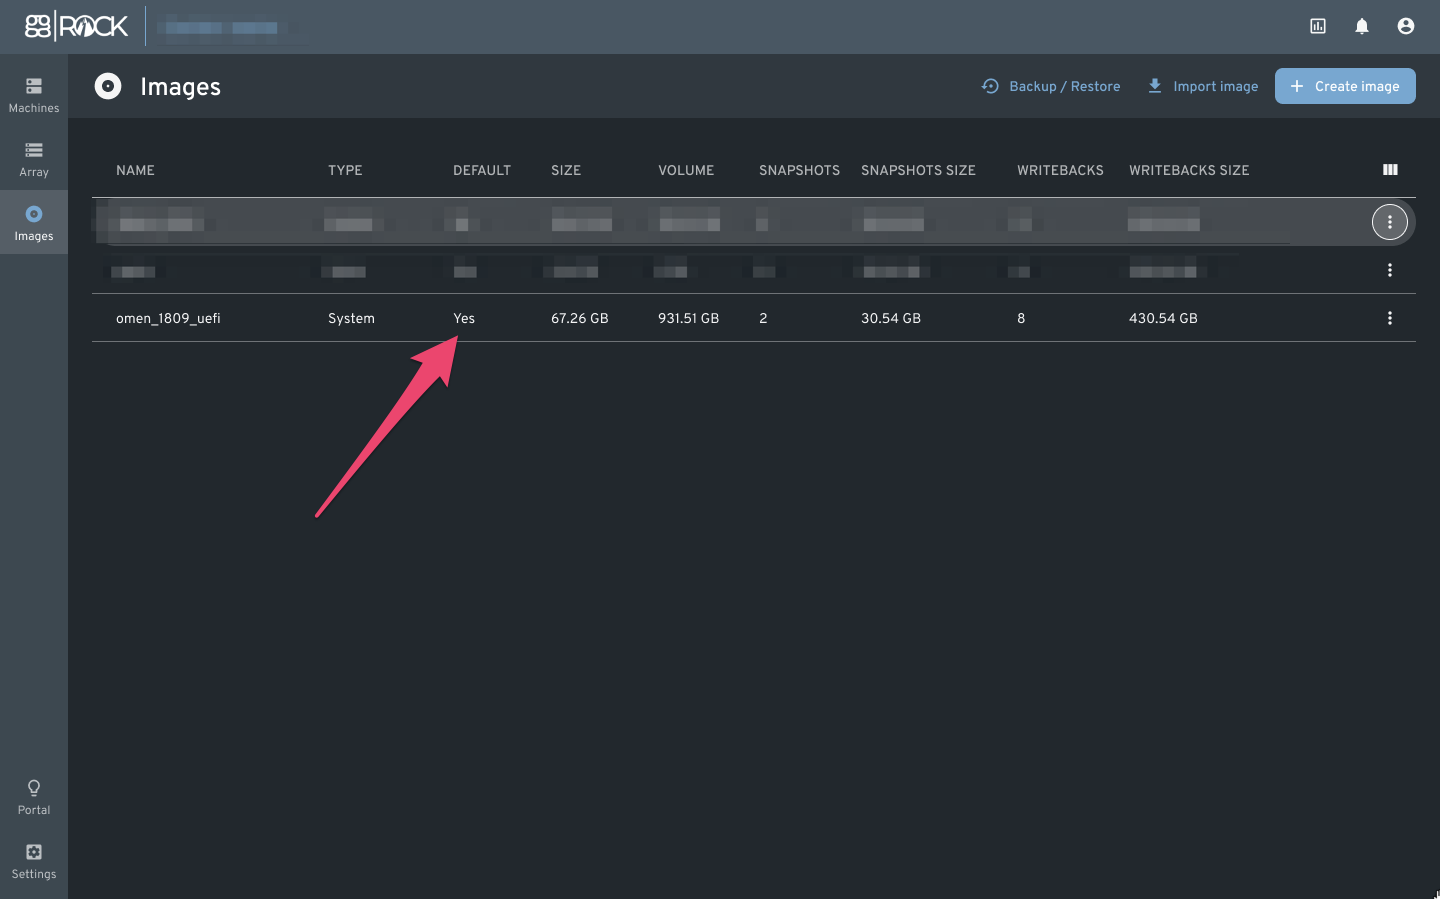
27. Confirm image import.
Confirm that the Image was successfully imported, has the expected size and is set to default.
28. Continue ggRock Configuration.
Continue with the Configure ggRock Manual at "Phase 5. Final steps, real boot and checks".