This article will discuss how you can organize and manage your shop items.
Table of Contents
Shop Configuration
This is where you can add all of the items that are sold in your venue, such as game time (GamePass), food, drinks, souvenirs, and more. Prizes that are redeemable by Coins can also be added here.
Adding a Category
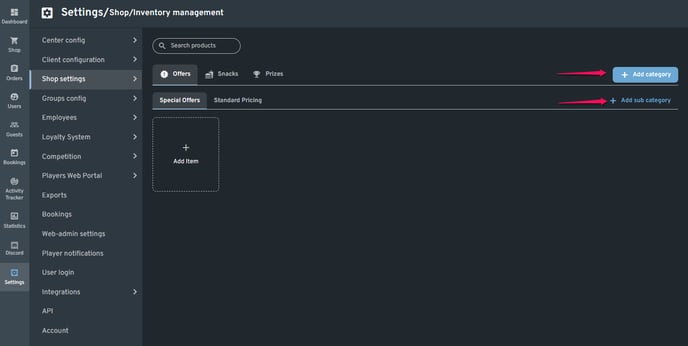
There are 3 default categories in the shop, they are Offers, Snacks, and Prizes. However, you can add your own category for other items that you may sell in your shop (e.g., Steam gift card).
To add a new category, simply click the "Add category" button on the right.
You may also add a subcategory under the main category to better organize your merchandise. Just click the "Add sub category" button to do so.
Adding a New Item
You can add a new item to your shop by clicking the "Add Item" button. To learn more about creating items, please refer to the articles listed below.
Stock Control
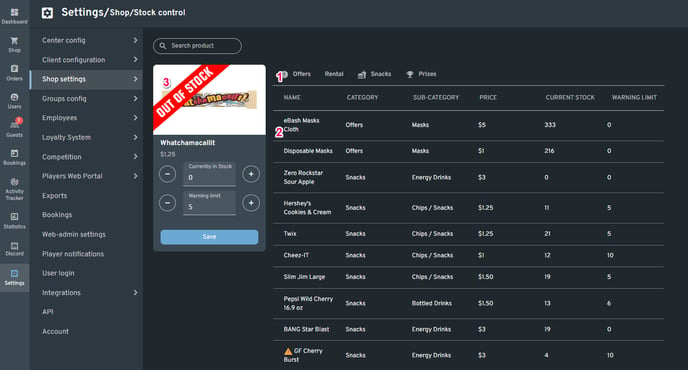
This is the section where you can monitor the inventory of some of your merchandise (e.g., soda or chips).
NOTE:
Make sure not to tick the Unlimited stock option when creating the item that you want to monitor in Stock Control. Refer to the list of articles above for more information.
- Select the category where an item you want to check is located.
- Click the item in the list to select it.
- The selected item will appear on the left side.
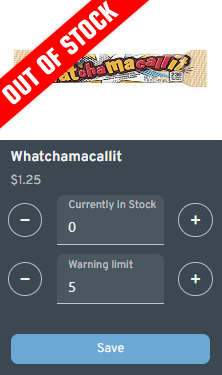
Currently in Stock
This is where you can enter the number of how much of that particular item you have in your inventory.
NOTE:
The Currently in Stock number automatically decreases when someone makes a purchase of that item.
Warning Limit
You can set a specific number that will warn you if the item needs to be replenished.