
This article helps guide the user through installation of Debian (Linux) OS on a RAID array
Overall installation flow
-
Make sure that your motherboard BIOS is set to Legacy boot
-
Start following Install Debian OS
-
Reach Step 5 in regular installation path
-
Return to this section of Installation Special Cases and start following steps described below
-
Finish all steps from Special case Step 11 - Install Debian to a RAID array depicted below
-
Return to Step 16 and finish following Install Debian OS
-
Reboot the server
-
Complete Install the boot loader (GRUB) steps detailed below
-
Reboot the server
For advanced users, there are other options that are theoretically possible but were not tested by our team:
Software BIOS RAID: https://wiki.debian.org/DebianInstaller/SataRaid
Hardware RAID: Check your raid controller settings
Setting up the RAID array (41 steps)
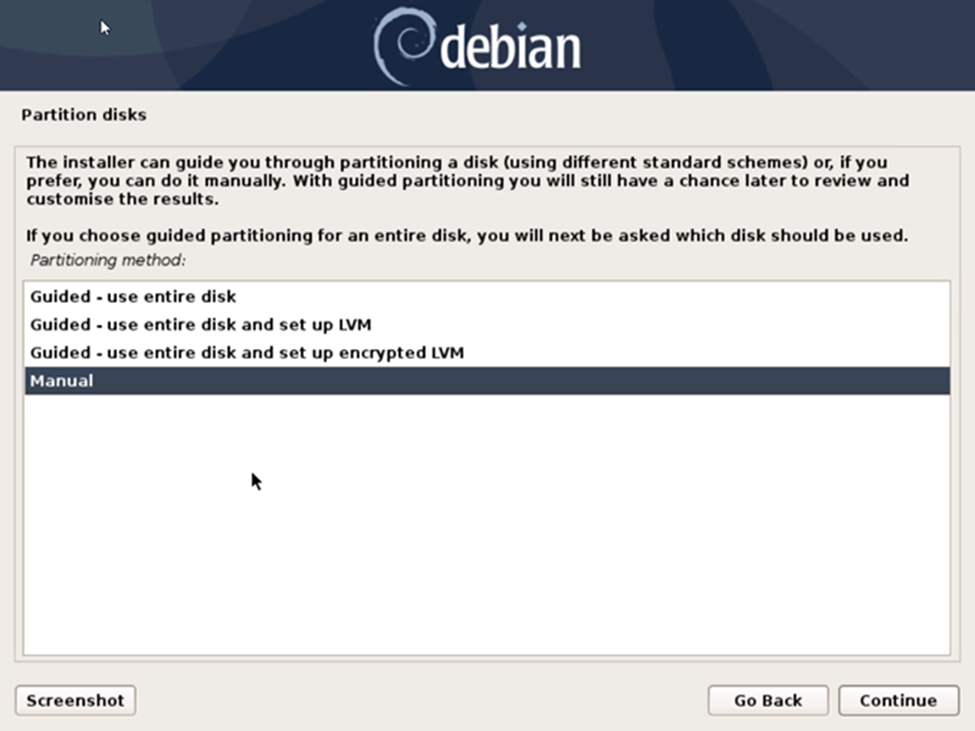
Step 11.1. Change partitioning type
Set the partition of the disk to "Manual"
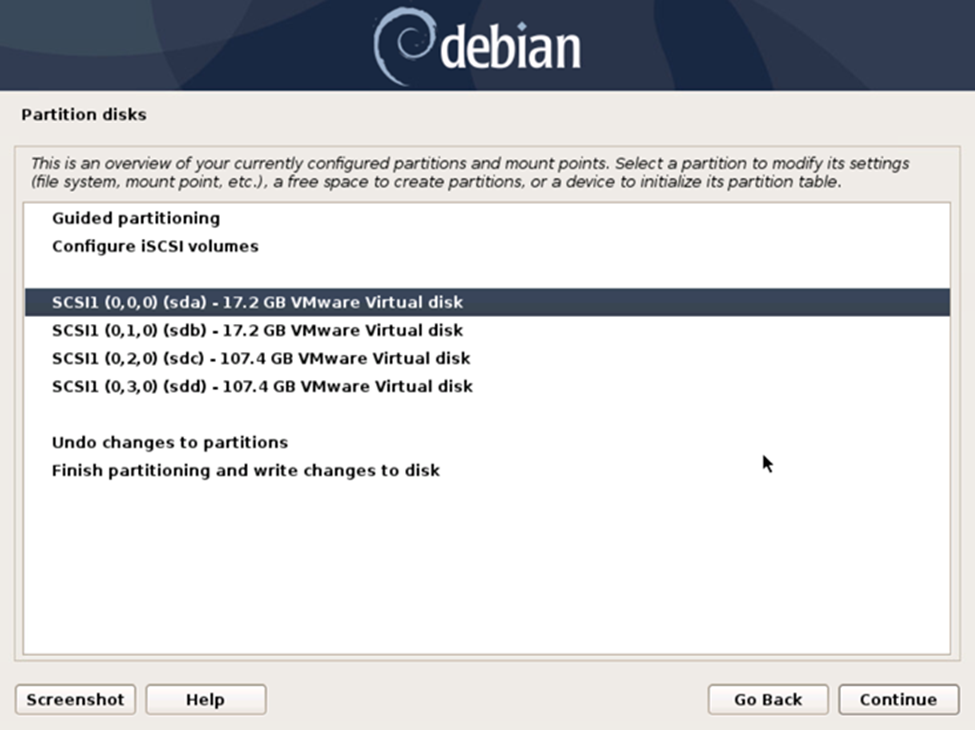
 Step 11.2. Select the first drive
Select the first drive that you're going to use in RAID1 array
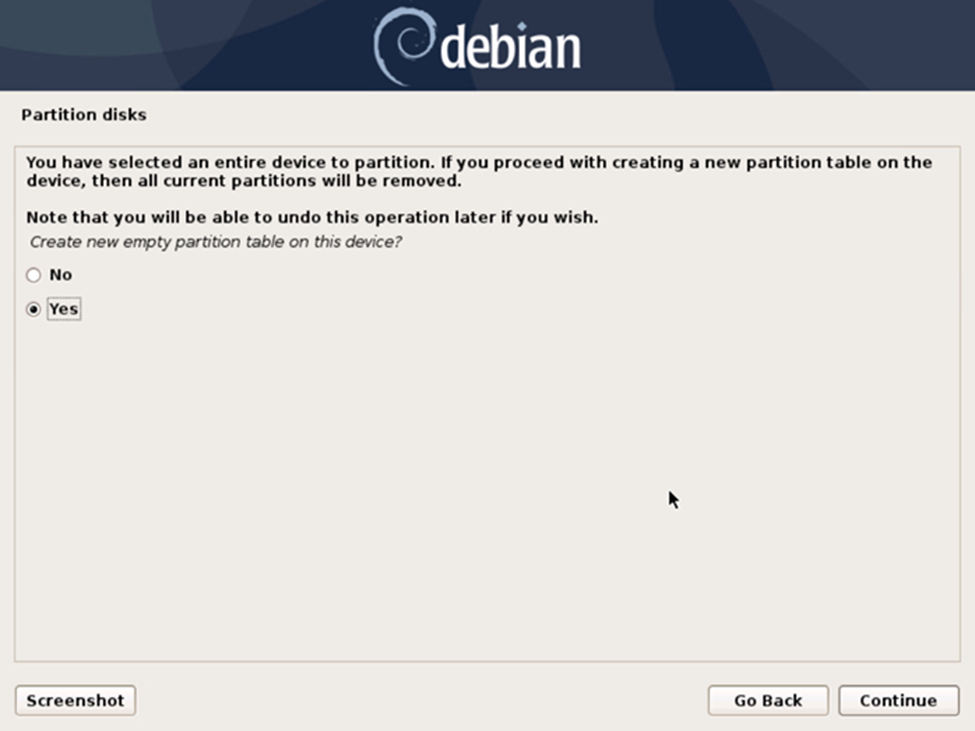
 Step 11.3. Create first empty partition table
Create the partitioning table for the first drive
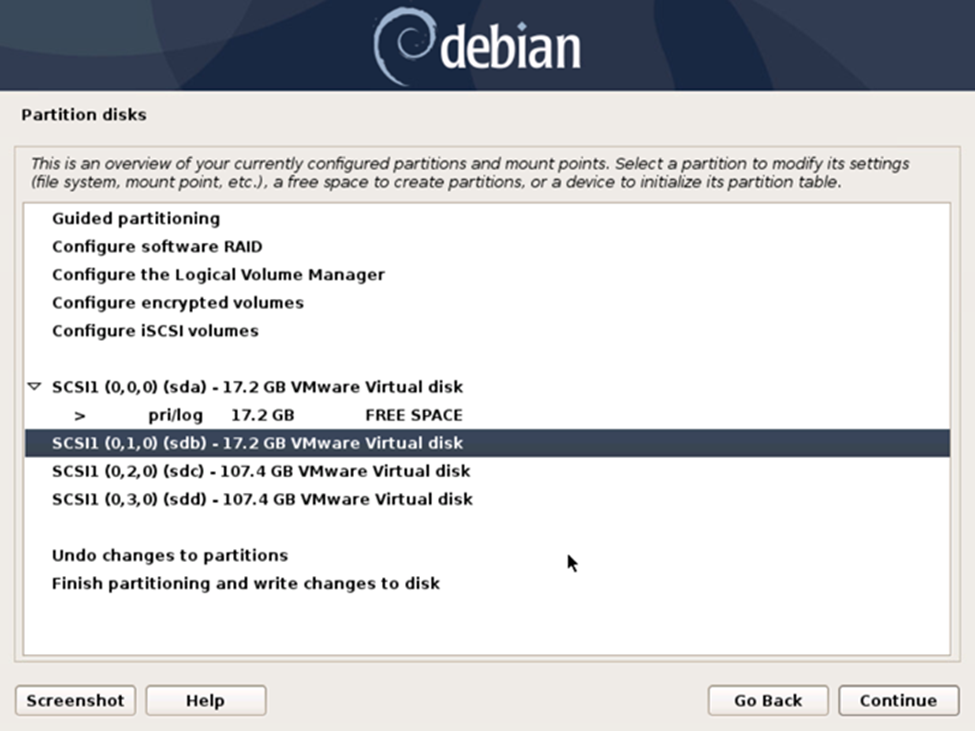
 Step 11.4. Select the second drive
Select the second drive for the RAID array
Step 11.5. Create second empty partition table
Create the partitioning table for the second drive
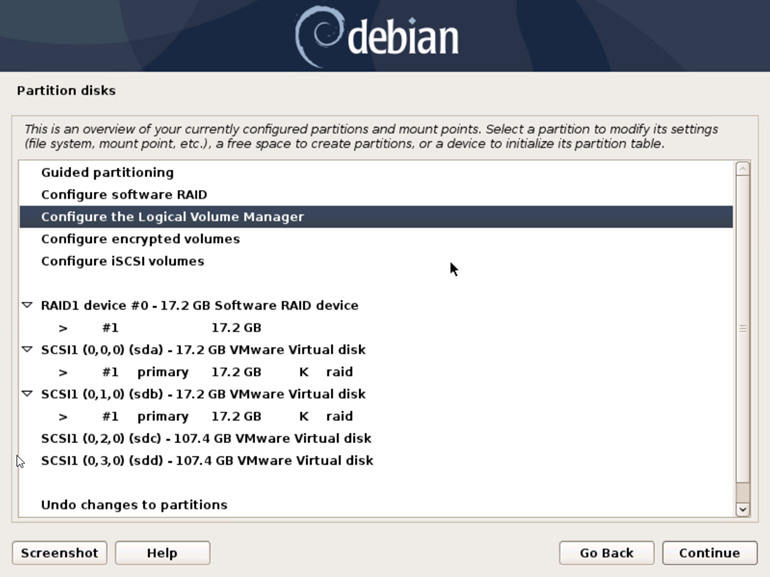
 Step 11.6. Configure software RAID
Now we need to configure software RAID. Select "Configure software RAID" option

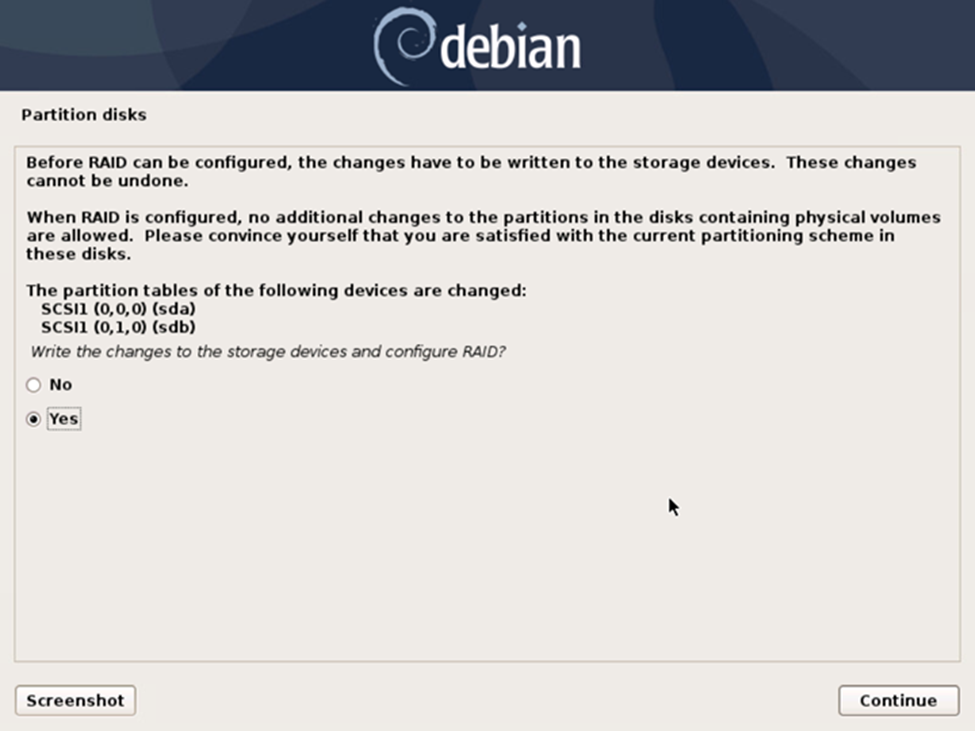
Step 11.7. Confirm RAID configuration
Confirm writing operations to the storage drives for RAID configuration
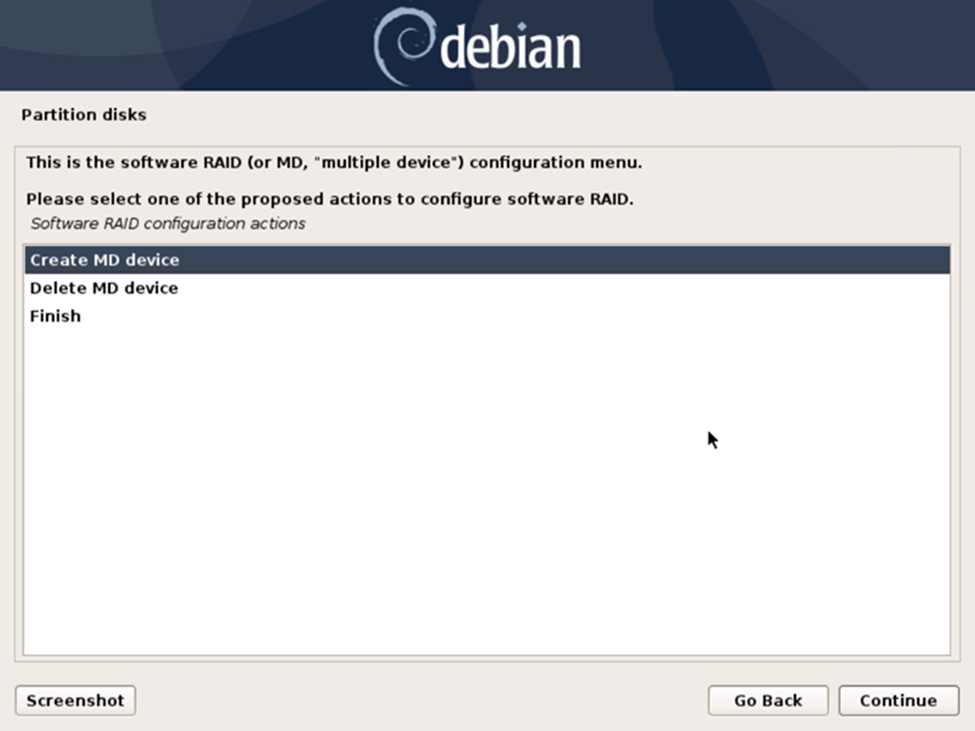
 Step 11.8. Start MD configuration
Select "Create MD device" option and proceed
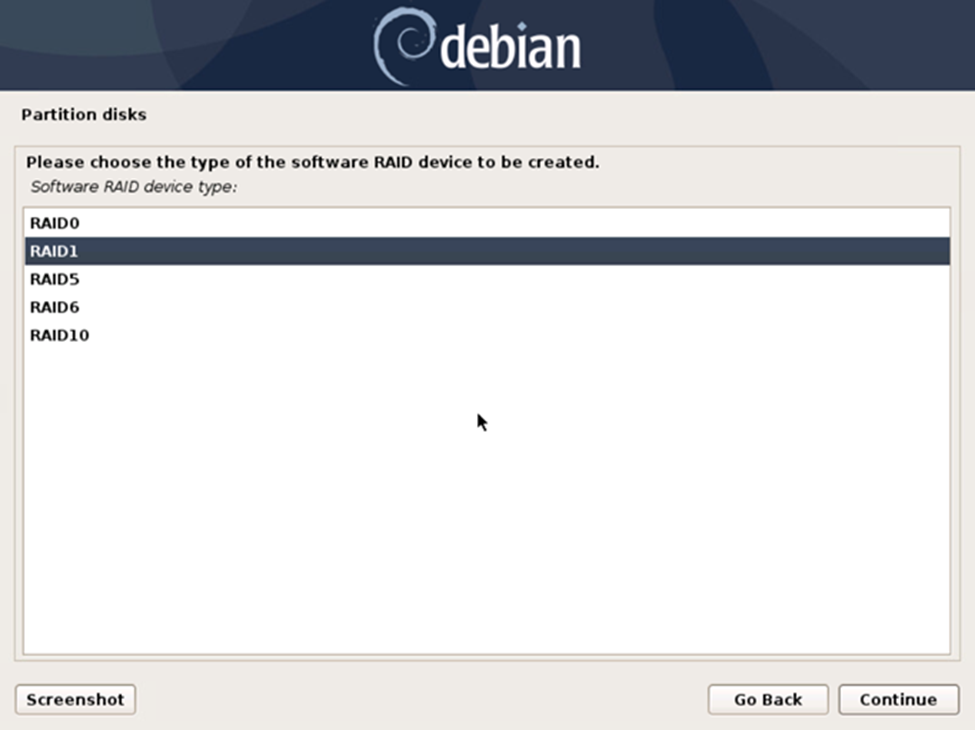
 Step 11.9. Select array type
Select RAID1 array type
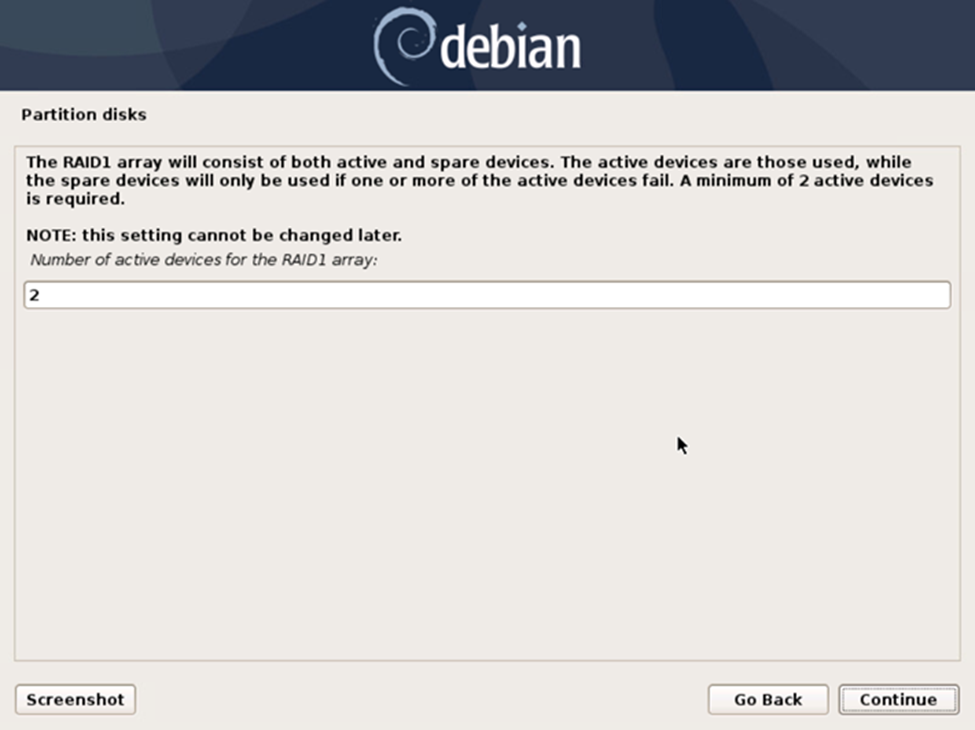
Step 11.10. Set the number of drives
Enter the number of drives in the array. Enter "2" if you are following our manual
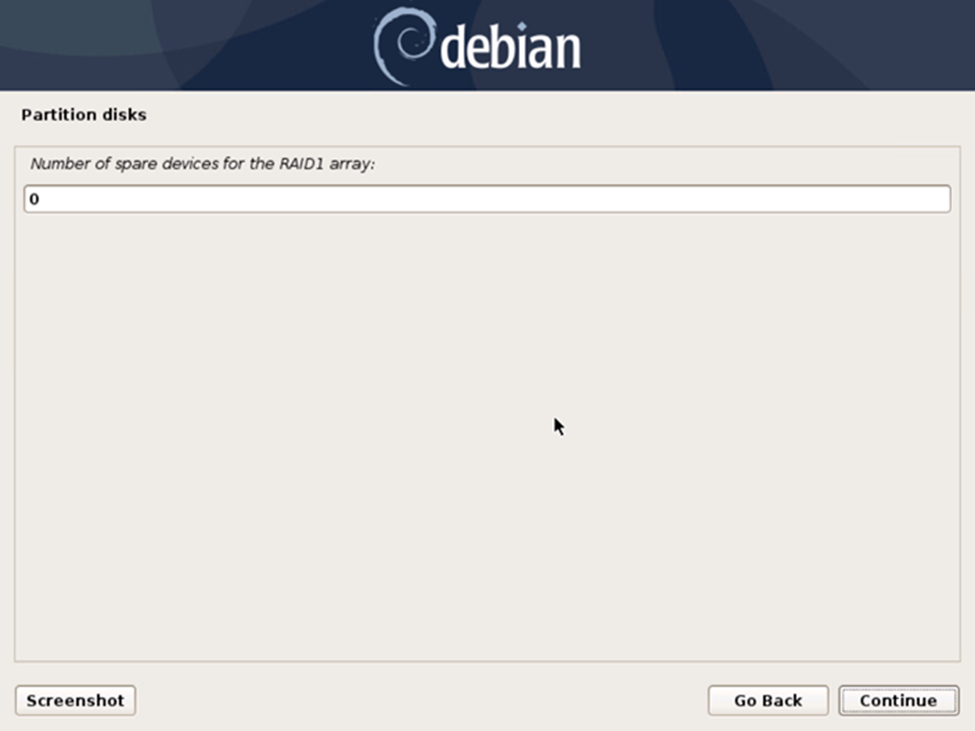
Step 11.11. Set the number of spares
Enter the number of spares in the array. Enter "0" if you are following our manual
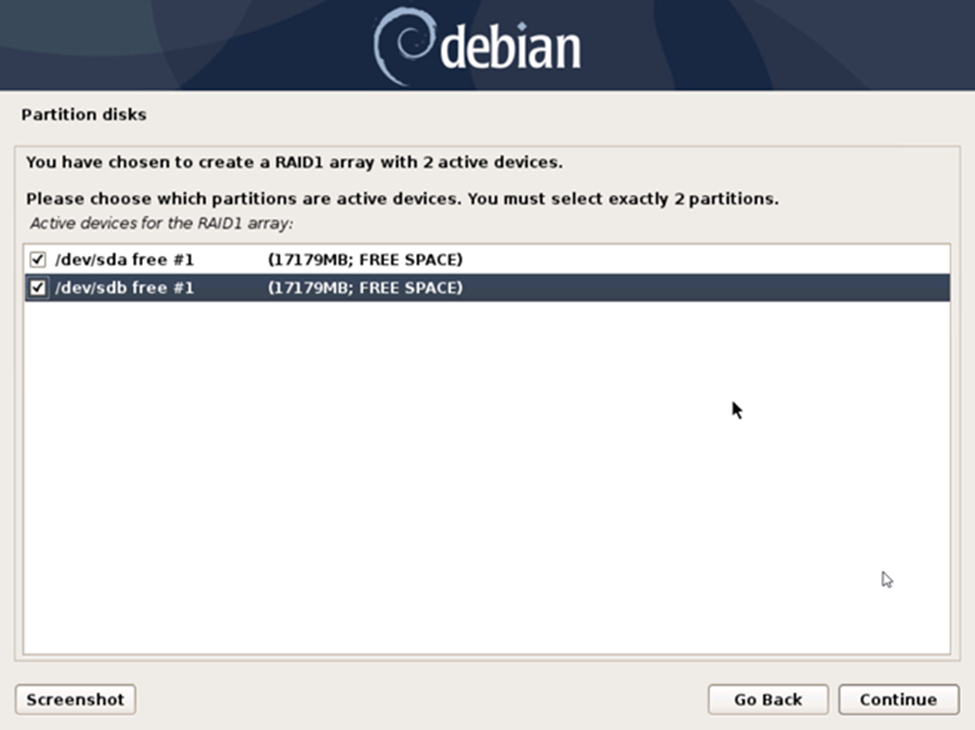
Step 11.12. Select drives for the array
Select drives you want added to the RAID1 array. Select all drives if you are following our manual
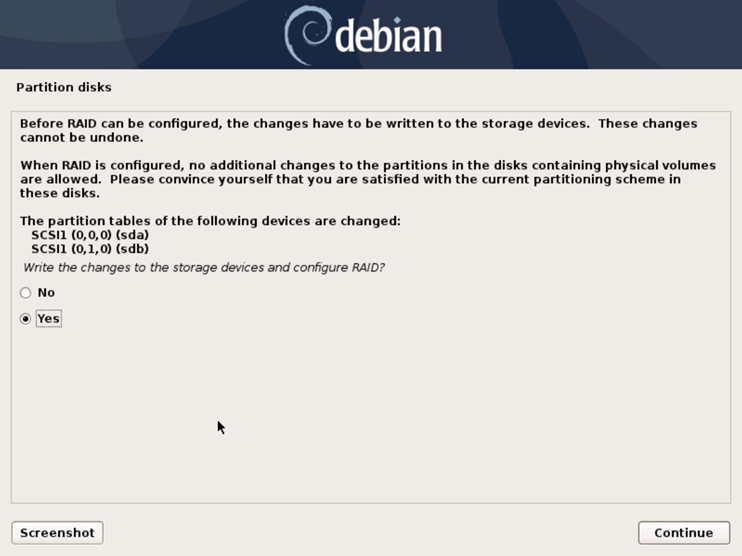
 Step 11.13. Confirm change of partitioning tables
Confirm writing operations to the storage drives for RAID configuration
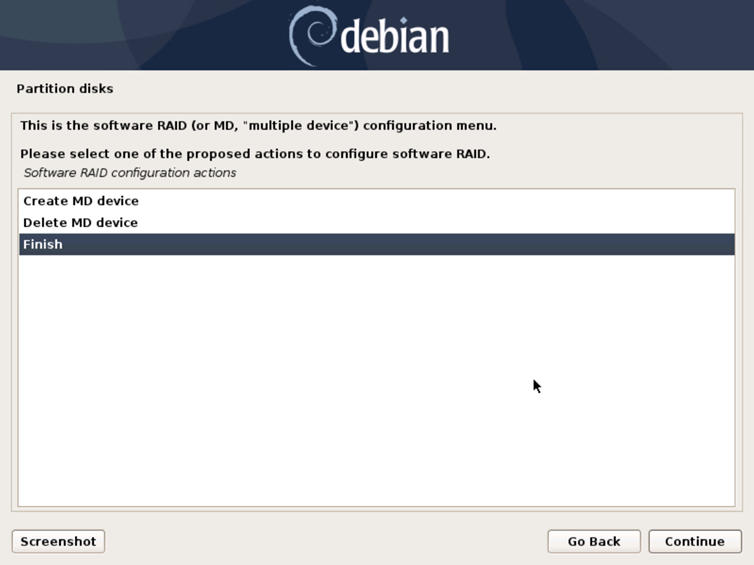
Step 11.14. Finish disk partitiong
Select "Finish" to finish disk partitioning
Step 11.15. Start LVM configuration
Start configuring the Logical Volume Manager (LVM)
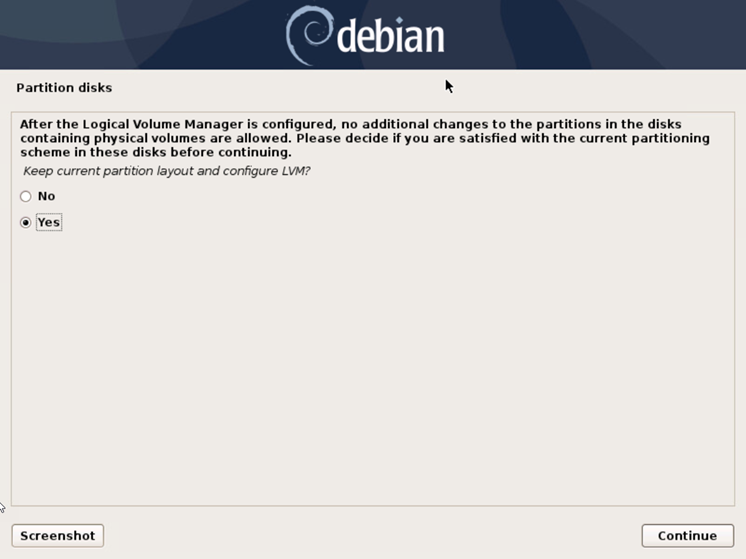
Step 11.16. Keep existing partitioning
Confirm keeping current partitioning layout for LVM
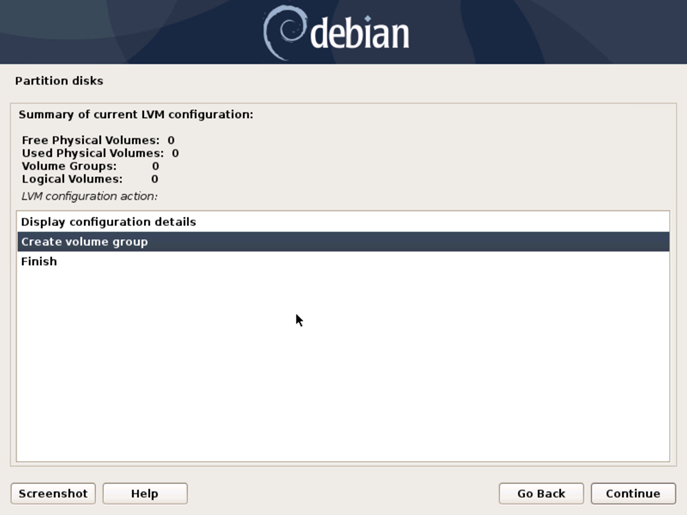
Step 11.17. Create volume group
Select "Create volume group" option
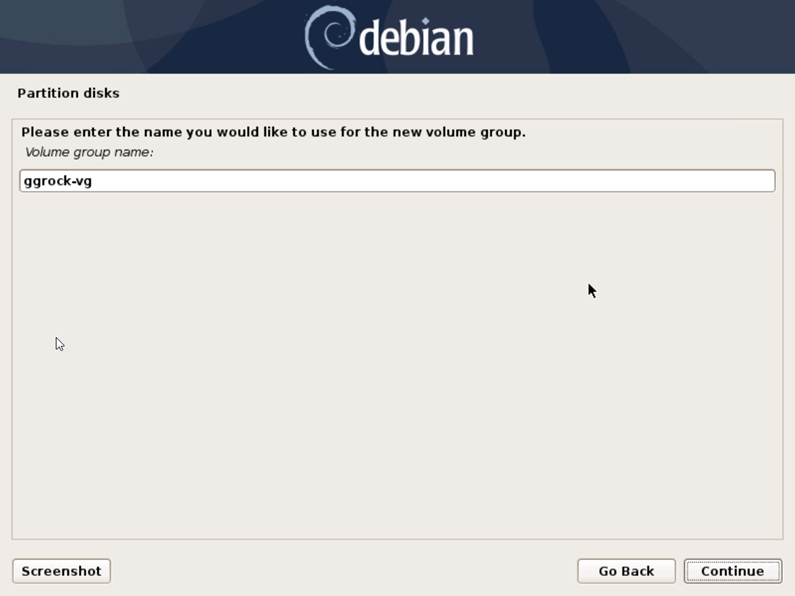
Step 11.18. Name the LVM group
Enter LVM group name."Ggrock-vg" is used in this installation
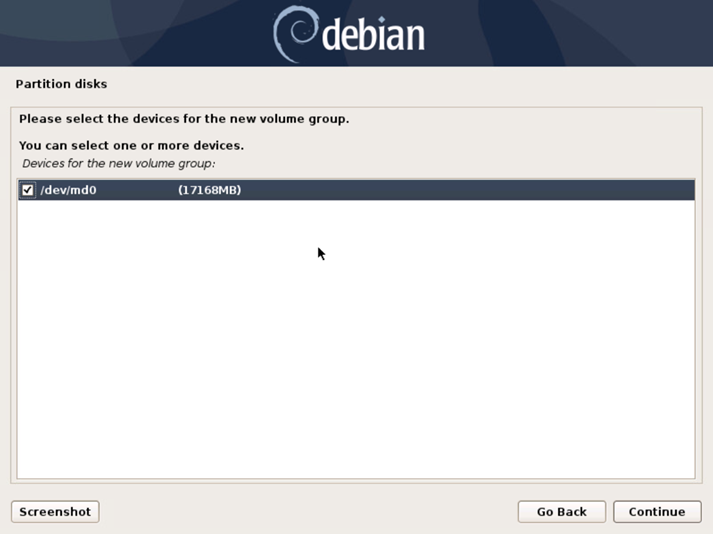
Step 11.19. Select previously created MD device
Select the MD device that we've created prior
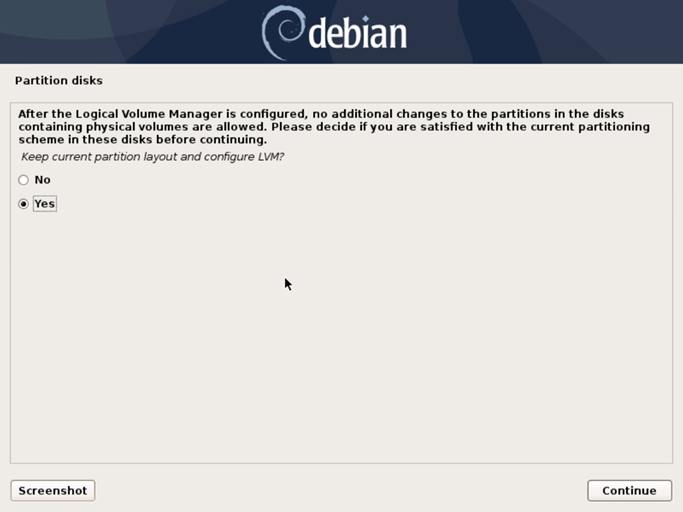
Step 11.20. Confirm keeping partitioning layout
Confirm keeping current partitioning layout for LVM
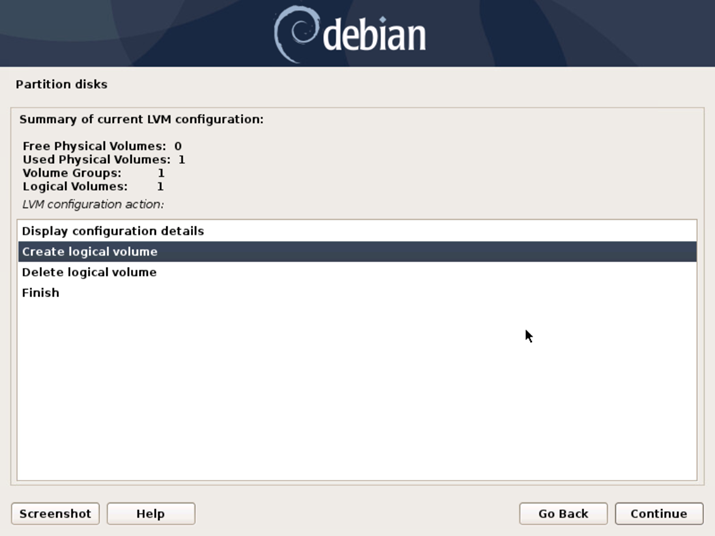
Step 11.21. Create the first LV
Creating first logical volume. Select "Create logical volume"

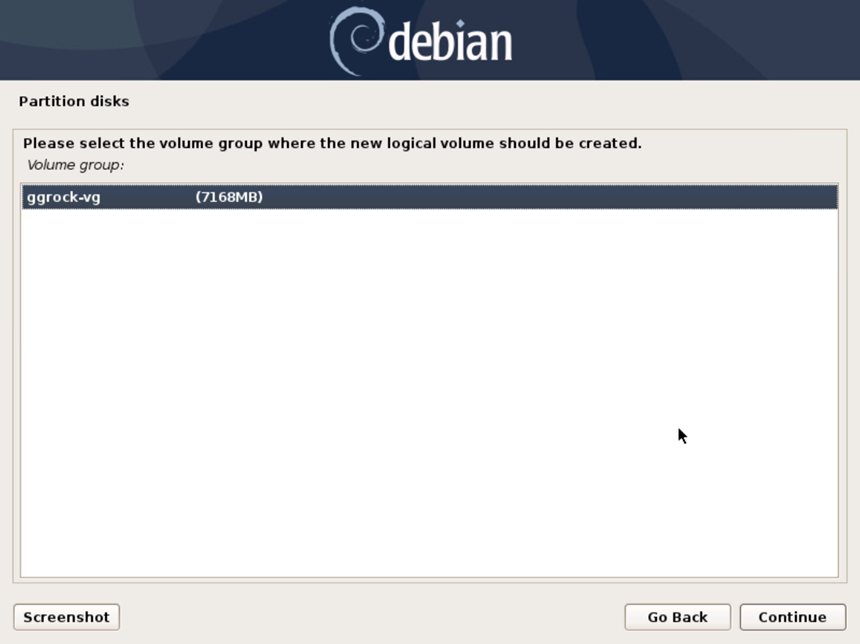
Step 11.22. Select the LVM
Select the LVM we have created previously

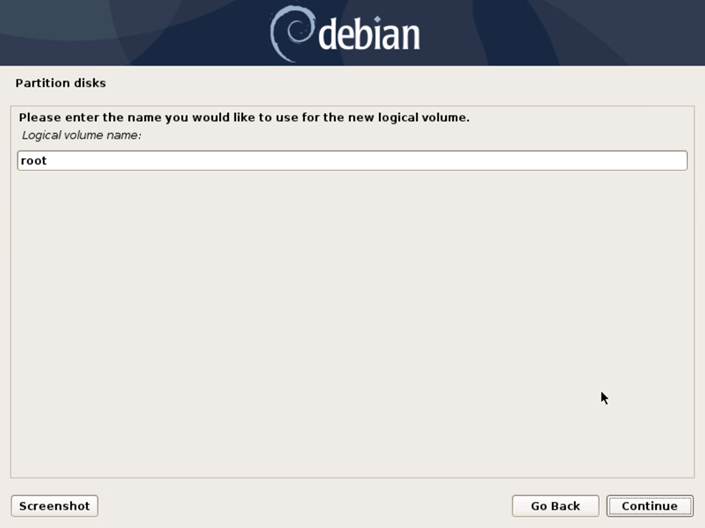
Step 11.23. Name the first LV
Enter logical volume name. "root" is used in this installation
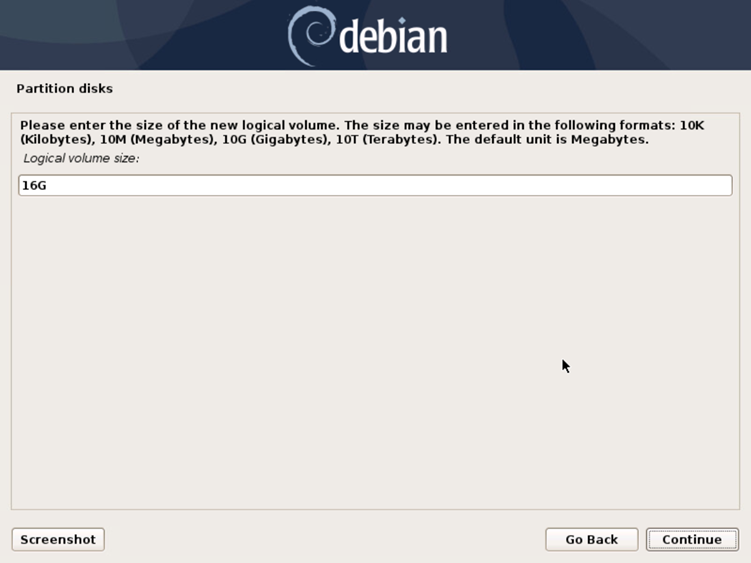
Step 11.24. Set first LV size
Enter "16G: value as the local volume size. 16G value is recommended
Step 11.25. Create the second LV
Creating the second logical volume. Select "Create logical volume"
Step 11.26. Select the LVM again
Select previously created LVM
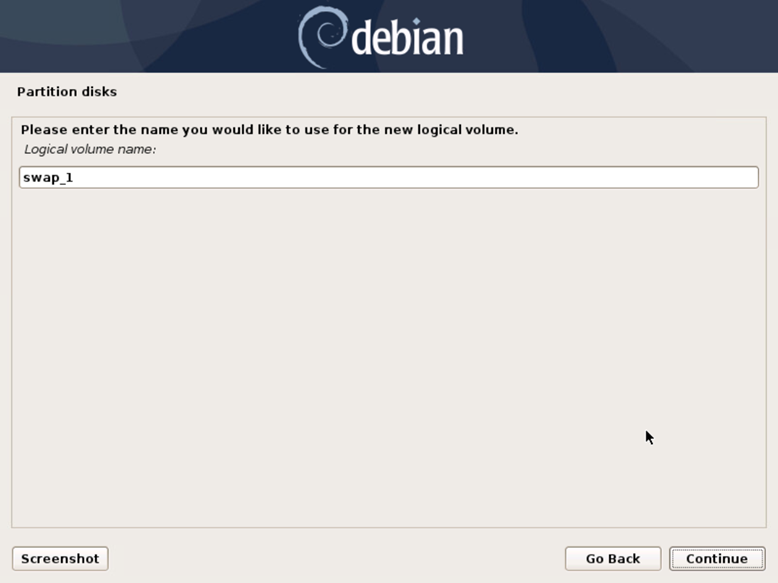
Step 11.27. Name the second LV
Enter logical volume name. "swap_1" is used in this installation
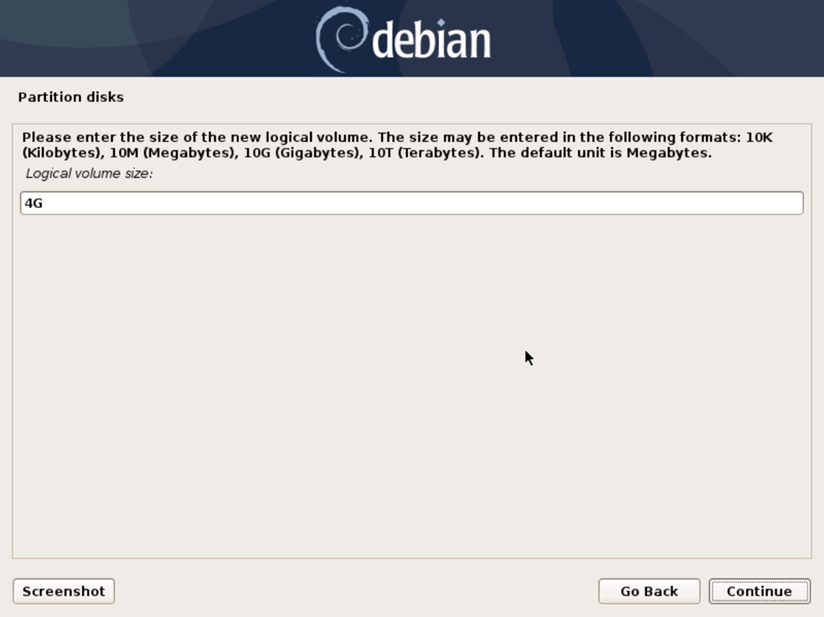
Step 11.28. Set second LV size
Enter "4G: value as the local volume size. 4G value is recommended
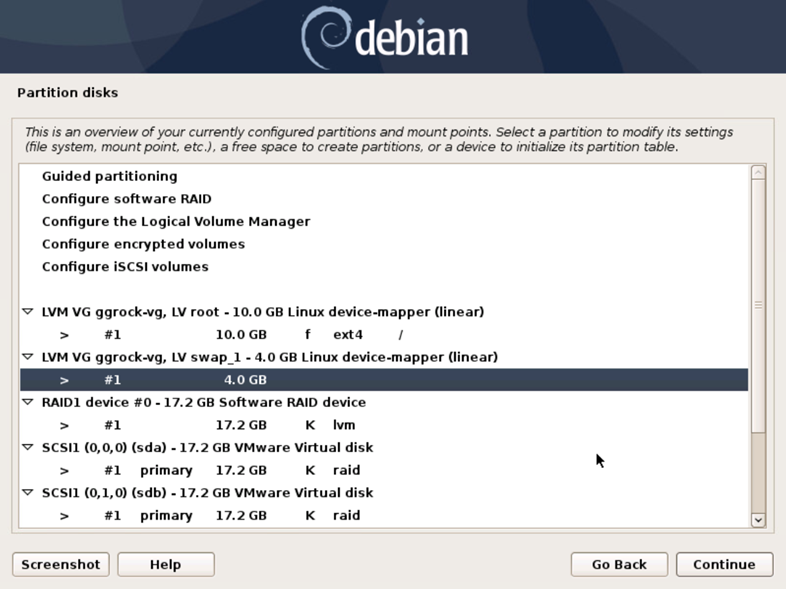
Step 11.29. Confirm all previous changes
Confirm the changes performed in the previous steps. Two partitions, one MD device, LVM group and two logical volumes created

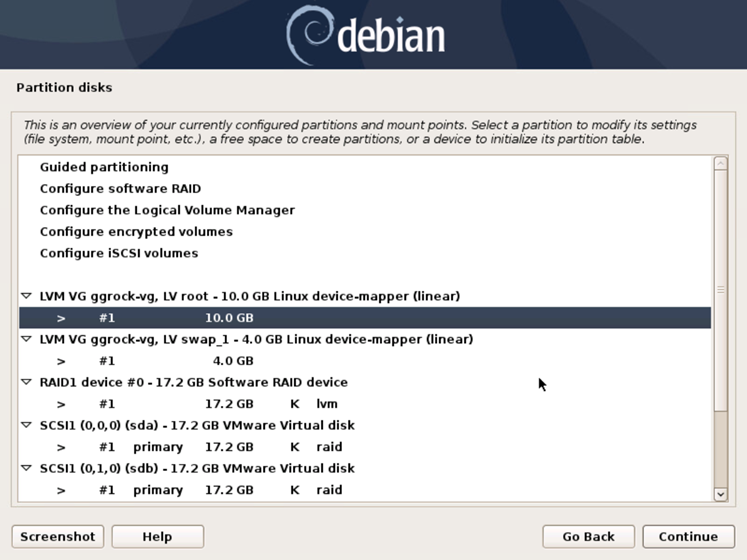
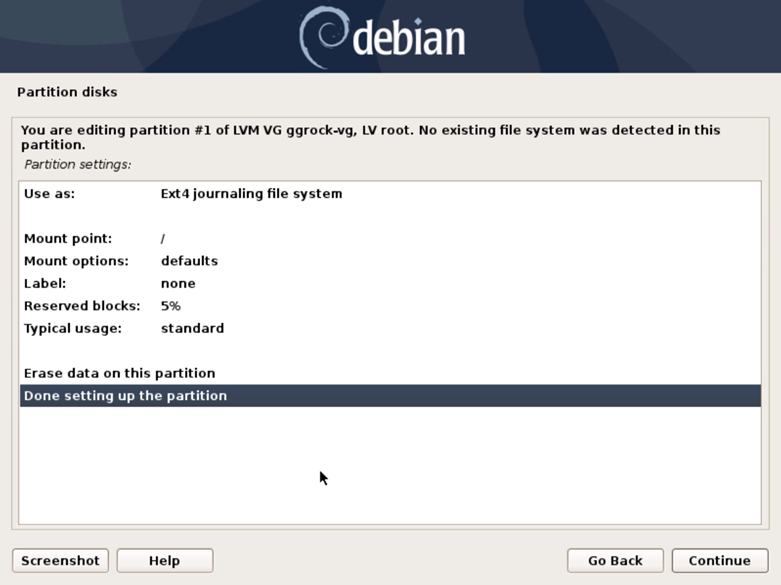
Step 11.30. Format the root volume
Format root volume. Select the root volume that was created previously. Pay attention to the name next to the LV. During this installation it should be "LV root"
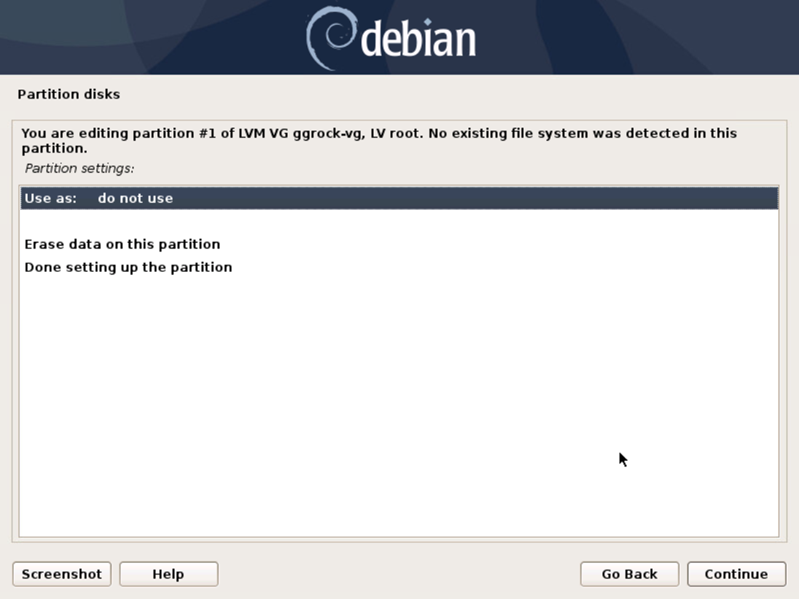
Step 11.31. Set "Use as" value
Select "Do not use" for the "Use as" setting for the partition
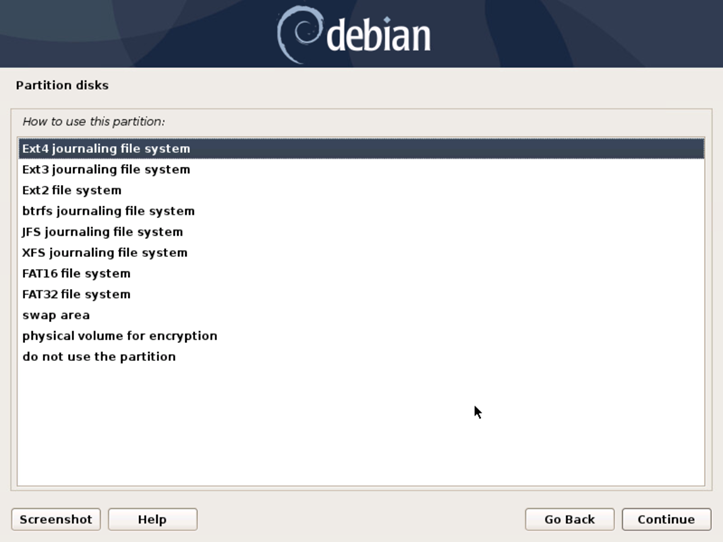
Step 11.32. Set the file system
Select "Ext4 journaling file system" as the partition format
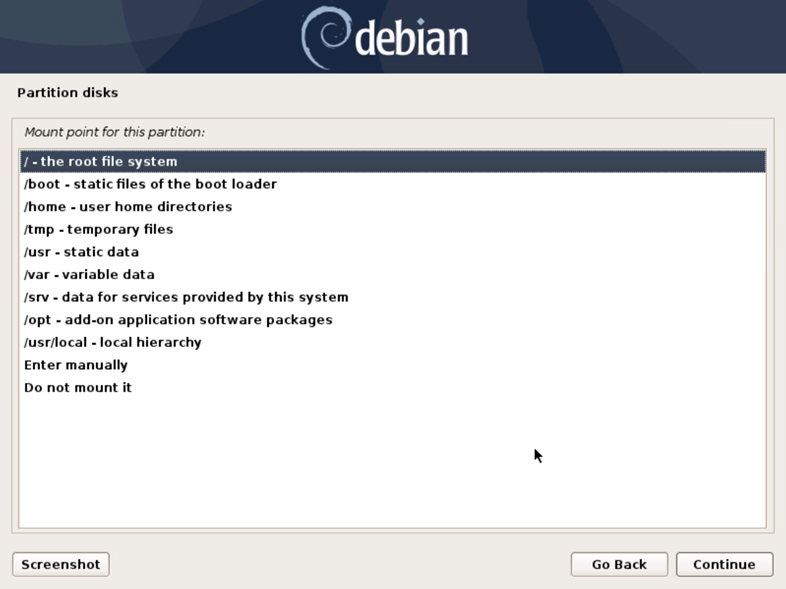
Step 11.33. Set mount point
Select Mount point as setting to set
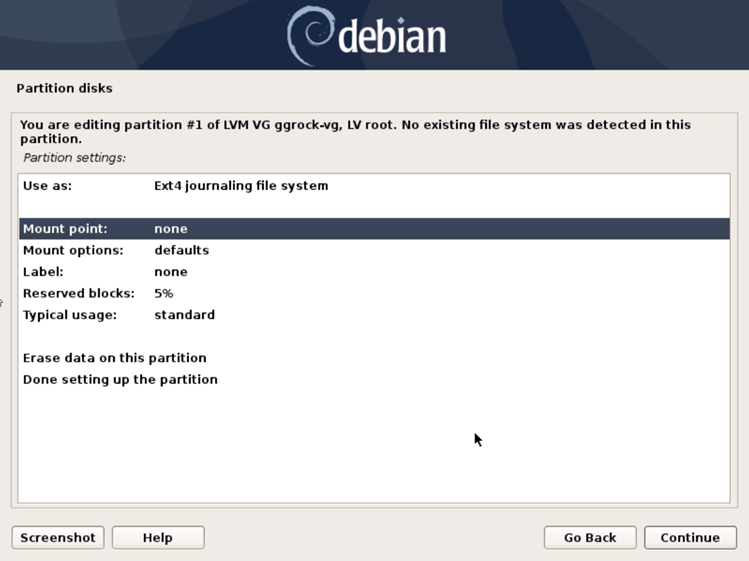
Step 11.34. Set mount point setting
Select "/ - root file system" value for the Mount point setting
Step 11.35. Confirm partition setup
Select "Done setting up the partition" option to confirm the changes
Step 11.36. Format swap volume
Select the swap volume that was created previously. Pay attention to the name next to the LV. During this installation it should be "LV swap_1"
Step 11.37. Set "Use as" value for second partition
Select "Do not use" for the "Use as" setting for the partition
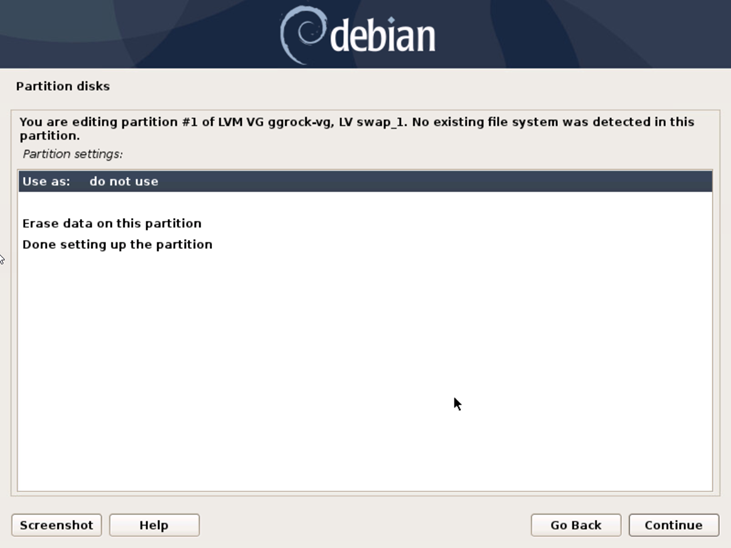
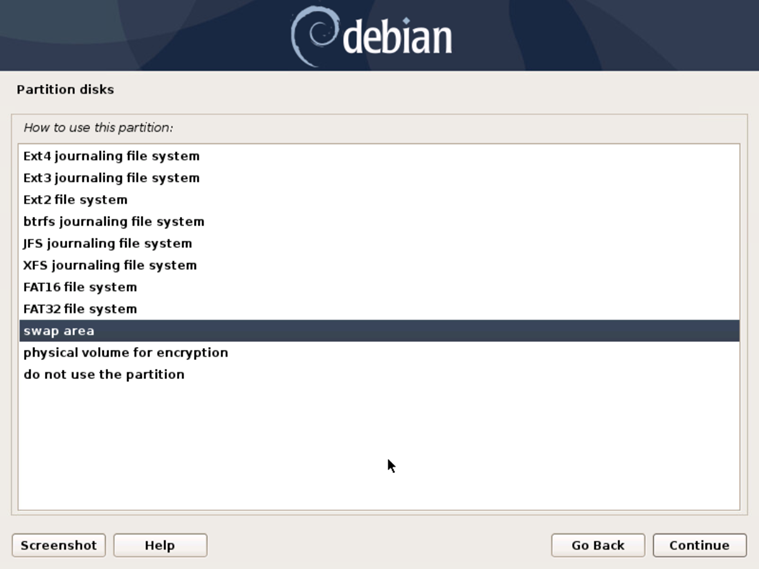
Step 11.38. Set swap area format
Select "swap area" as the partition format
Step 11.39. Confirm second partition setup
Select "Done setting up the partition" option to confirm the changes

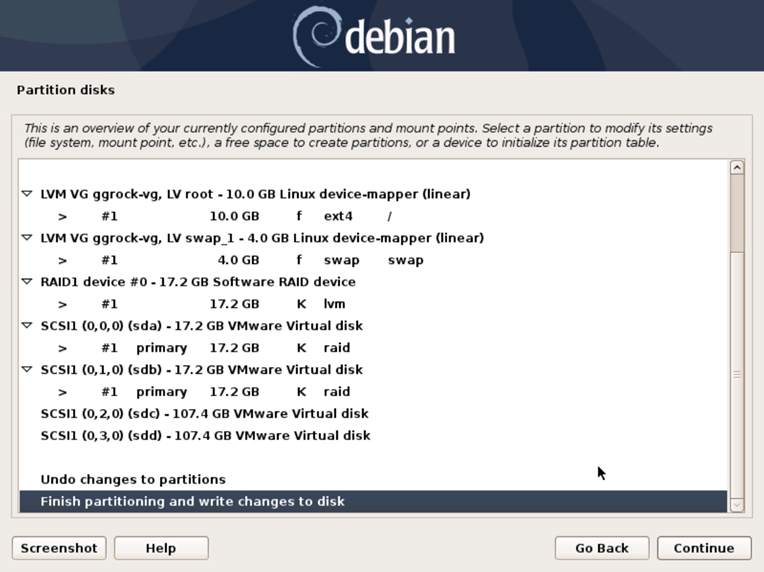
Step 11.40. Finish the partition setup
Finish partitioning by selecting "Finish partitioning and write changes to disk" option
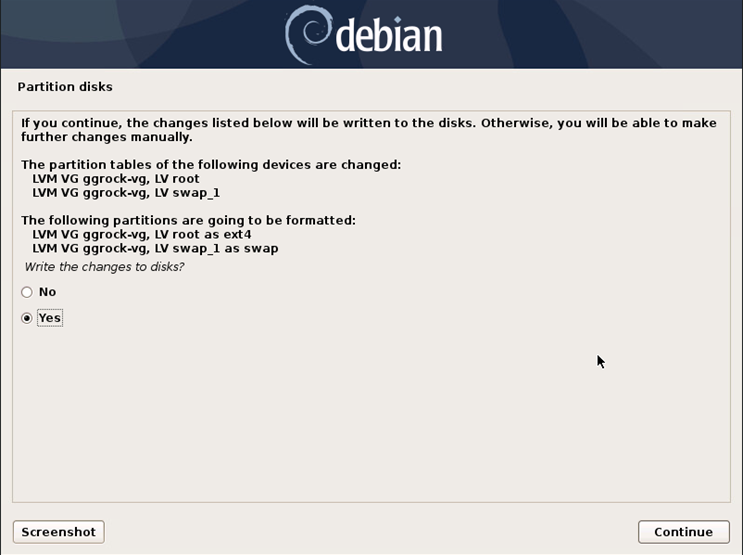
Step 11.41. Confirm all changes
Finally, confirm all of the changes made above
Upon completing this step you should resume the main Debian Installation flow from Step 17. Configure package manager
Install the boot loader (GRUB, 6 steps)
After the installation is completed you should install the boot loader to all disks in your RAID array. By default Debian installer installs the boot loader only to one disk in the RAID array. You should install the boot loader to all other disks in your array to allow booting on disk failures, as well as in case when you reorder your drives.
Step 1. Login
Login as the root user.
Your login is: root
Your password is: whatever you set in Step 7. Set your root password.
It is okay to not see the password characters as you enter them. Enter the password and press Enter

Depending on your platform firmware (BIOS or UEFI) execute one of the commands below
---
Step 2.1. BIOS mode
Enter this in the console:
1 dpkg-reconfigure grub-pc
And press Enter
--- or ---
Step 2.2. UEFI mode
Enter this in the console:
1 dpkg-reconfigure grub-efi-amd64
And press Enter
---
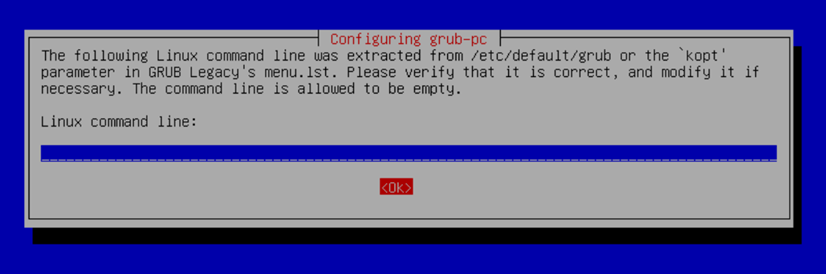
Step 3. Start GRUB PC configuration
Press "ok" when presented with this modal. Linux command modal should remain empty
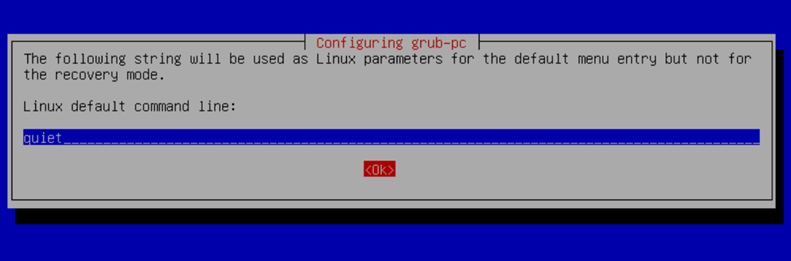
Step 4. Supply GRUB parameters
Press "ok" when presented with this modal. Linux command modal should read "quiet"
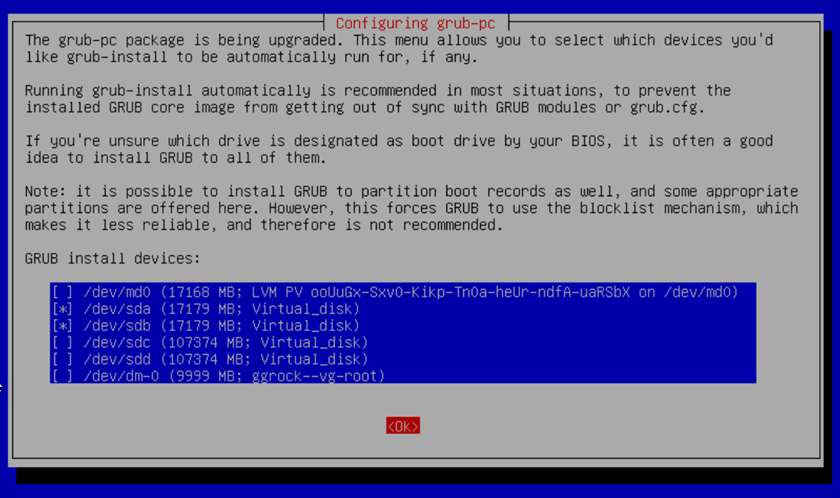
Step 5. Select RAID drives
Select all drives that you have been added to the RAID array during the Installing OS on RAID array steps and press "OK"
Step 6. Reboot the server
After this you should be all good and set up with the Debian Software RAID.