Array Addition, Removal, and Configuration of disks, management of arrays.
Table of Contents
About
All data added to a ggRock server is stored on the physical disks in the server.
The Array tab is where these disks are configured.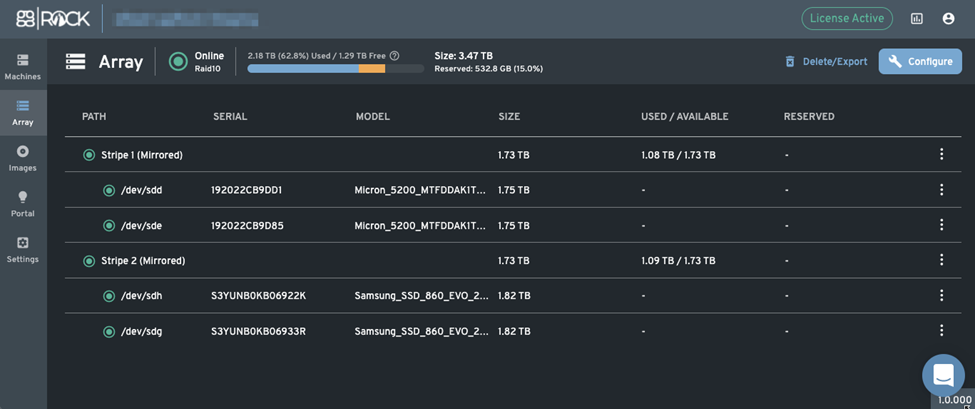
Within ggRock, all storage devices (drives) are combined into a single storage pool automatically. Storage pools are a mechanism of the underlying technology of ggRock that allows the ggRock application to use drives most effectively based on technical specifications.
System Images and Game Images are both stored physically on the same disks within the array, which means you do not have to be concerned with certain drives being used only for certain kinds of images.
The recommended default configuration is a RAID0 SATA 2.5” SSD setup for optimal ggRock performance.
An example configuration might use Micron 5200 ECO 1.92Tb drives (2.5in form-factor, SATA 6Gb/s speed, TLC NAND Flash technology).
Two disks of the above specifications will provide you with approximately four terabytes of raw capacity (which will translate to about three terabytes usable pool capacity once formatted).
Array Status
ggRock Array Status is displayed at the top of the "Array" tab via an "Online/Offline" indicator at the top-left as well as a bar chart displaying total array size, used space, free space, and system reserved space.

Array Health Indicator
-
Online Indicator - If the array status LED is green, Array status is normal
-
Offline Indicator - If the array status LED is red, Array status is offline
-
Degraded Indicator - If the array status LED is amber, Array status is Degraded
-
RAID Type Indicator - Displays the RAID type of the Array
Array Usage Indicator

-
Size - Displays the total formatted (usable) storage space available in your array
-
Used - Displays the total (and percentage) space used in the array (this includes images, snapshots, and writebacks)
-
Free - Displays the total free space in the array (does not include used or reserved space)
-
Reserved - Displays the total (and percentage) system reserved space in the array
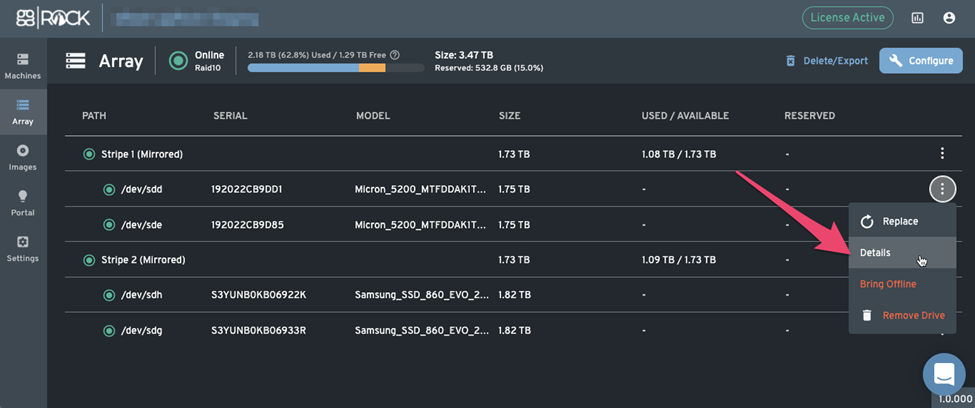
Viewing Drive Information
For maintenance purposes, it may be useful to view information on a given drive such as the serial number or model.
To view information on a drive:
1. Click the overflow menu (three vertical dots) to the right of a drive in a stripe for which you would like to view information, then click the "Details" context menu item.
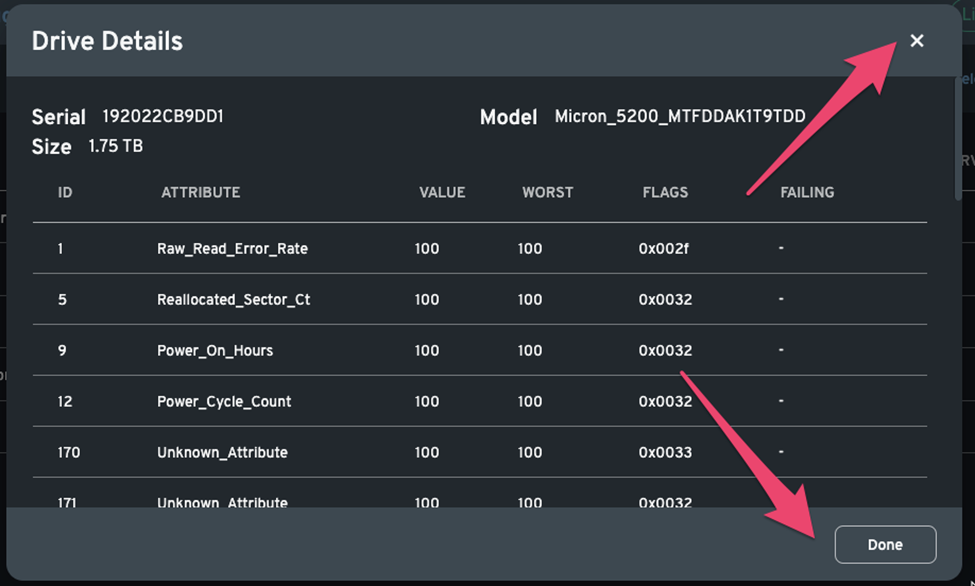
 2. Click the "x" in the upper-right corner of the "Drive Details" dialog, or the "Done" button to close it when finished.
Adding Disks
If you want to add a disk at a later stage you can press “Add disk” and check new disk just like you did in Configure the ggRock Array.
Note:
Upon adding a new disk (or even re-adding a previous disk) there will likely be a period of degraded performance whilst the array is re-built.
In order to add a disk to your stripe (e.g. logical grouping of data on the drives in your system), follow these steps:
1. Click the overflow menu (three vertical dots) to the right of the stripe to which you would like to add a newly-installed disk, then click the "Add Drive" context menu item.
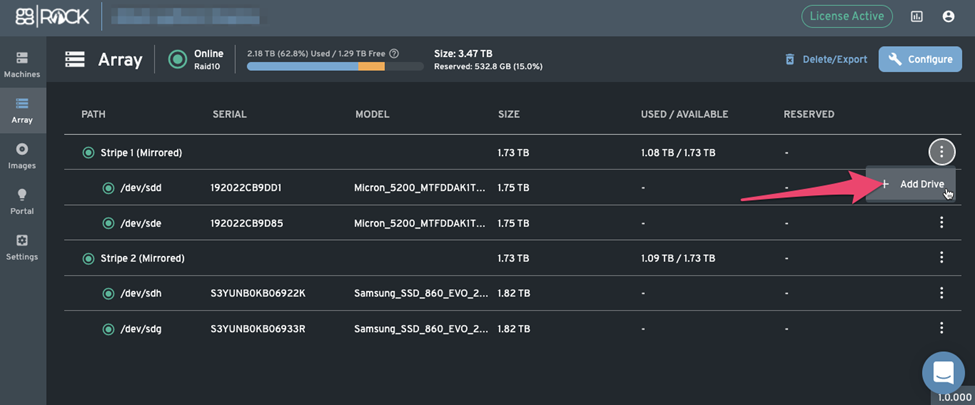 2. Click the "Add drive to stripe Stripe #" drop-down, then select the disk you wish to add to the stripe.
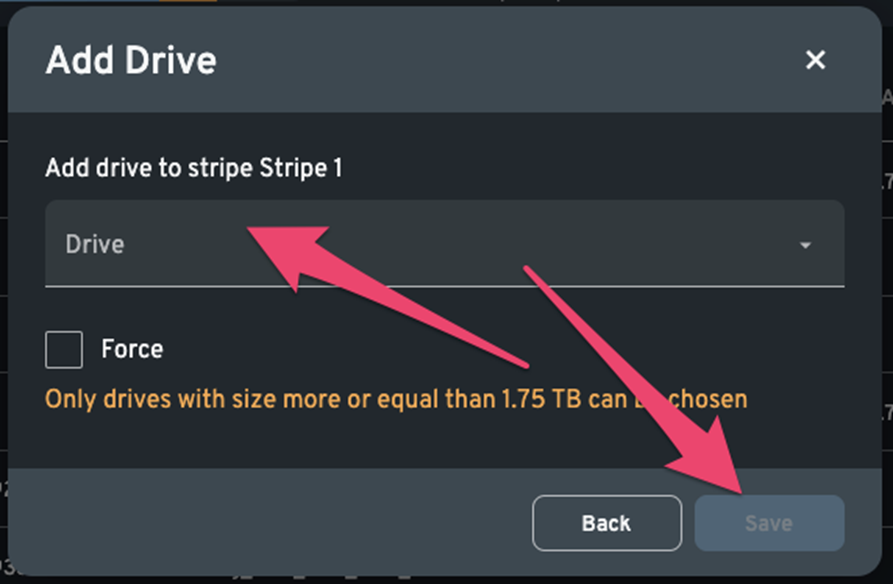
NOTE:
Any drive added to a stripe must have a capacity larger than the size of the largest drive in your array, then click the "Save" button.
Removing Disks
Depending on the type of RAID configuration you choose when creating your array, you may (or may not) have the option of removing a disk from the array.
For example, if you are using a RAID0) (striped) array, you can only delete the entire pool due to underlying functionality of a RAID0 type array.
If you are using a RAID1 (mirrored) array, you may be able to delete single disks from the array.
To delete a drive from a stripe:
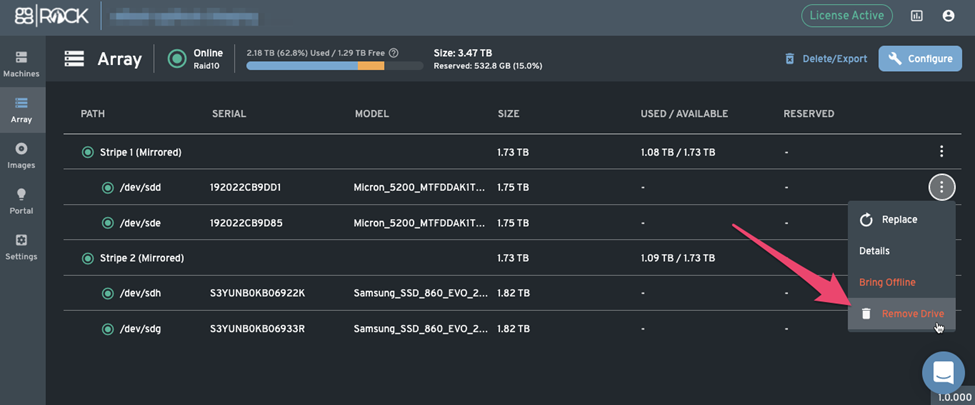
1. Click the overflow menu (three vertical dots) to the right of the drive you wish to remove, then click the "Remove Drive" context menu item.
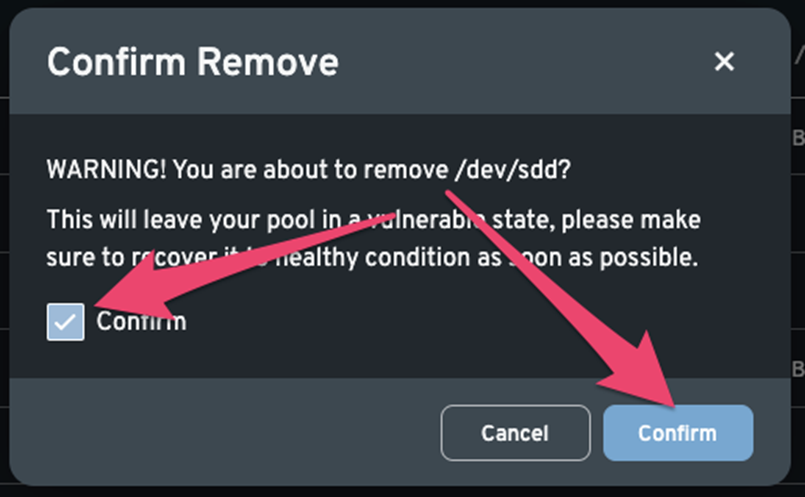
 2. Read the confirmation message, then place a check in the "Confirm" checkbox and click the "Confirm" button to remove a disk from the stripe.
Replacing Disks
When one of the disks in your array fails, you may replace the disk with a new one by installing the new drive in your ggRock server, then replacing the drive in the array.
Note:
Upon adding a new disk (or even re-adding a previous disk) there will likely be a period of degraded performance whilst the array is re-built.
1. Click the overflow menu (three vertical dots) to the right of the drive of a given stripe you wish to replace, then click the "Replace" context menu item.
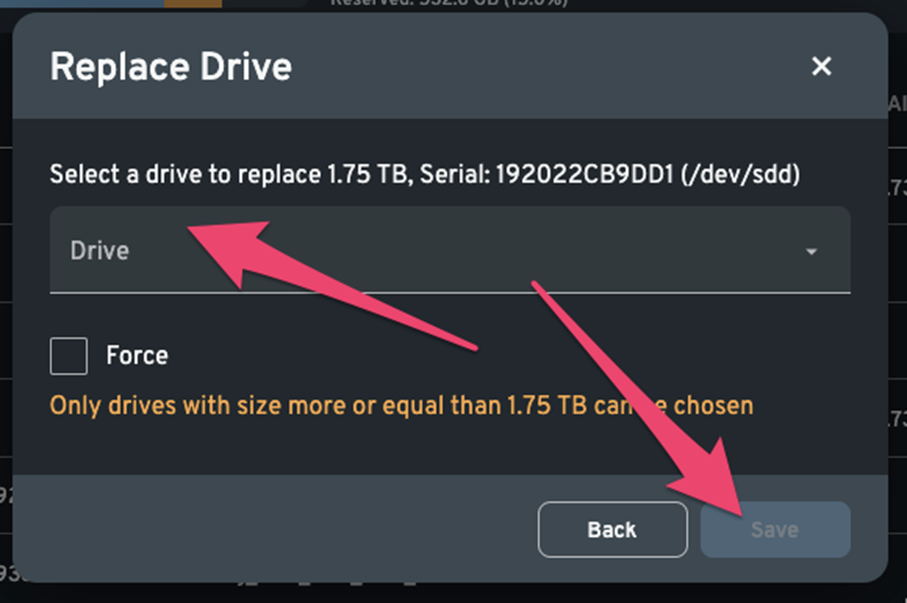
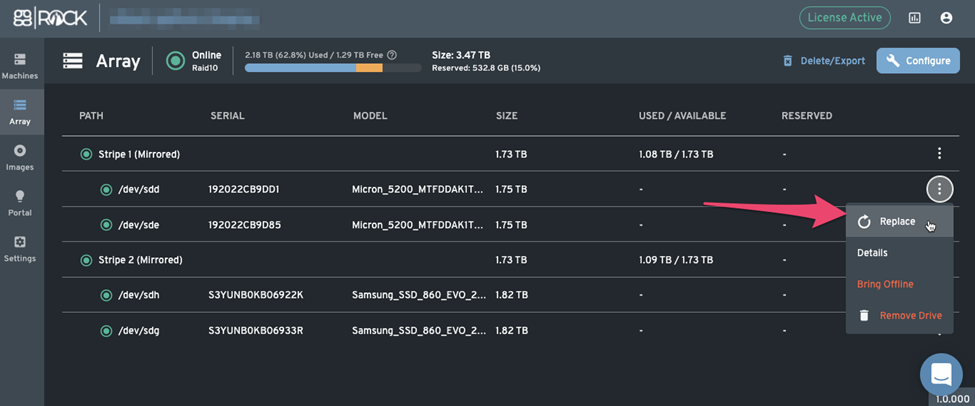 2. In the "Replace Drive" dialog, select the drive you wish to use, then click the "Save" button.
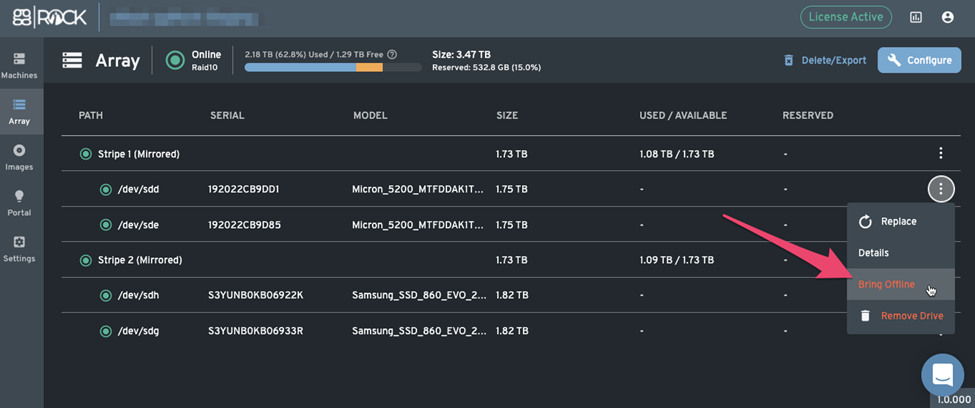
Taking a Drive Offline
Certain situations may require taking a drive in a stripe offline.
One such situation is if a drive in your stripe is known to be failed, in which case you should bring the drive offline to prevent attempts to write data to or read data from that drive until such time that you are able to replace it.
To take a drive offline:
1. Click the overflow menu (three vertical dots) to the right of the drive you wish to take offline, then click the "Bring Offline" context menu item.
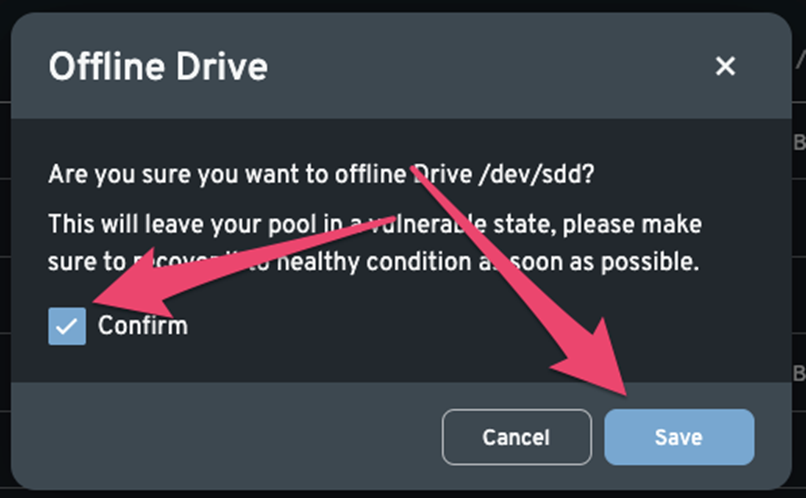
 2. In the "Offline Drive" dialog, place a check next to "Confirm", then click the "Save" button.
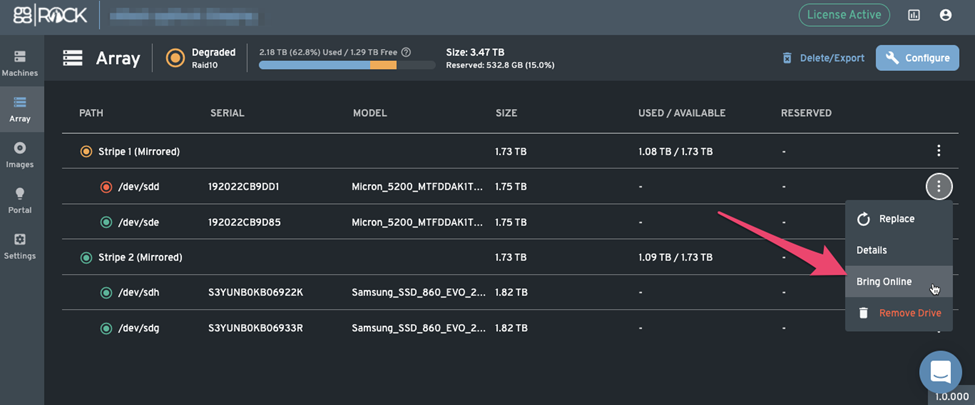
Bringing a Drive Online
If a drive is offline, it may be brought back online.
To bring a drive online:
1. Click the overflow menu (three vertical dots) to the right of the drive you wish to take offline, then click the "Bring Online" context menu item.
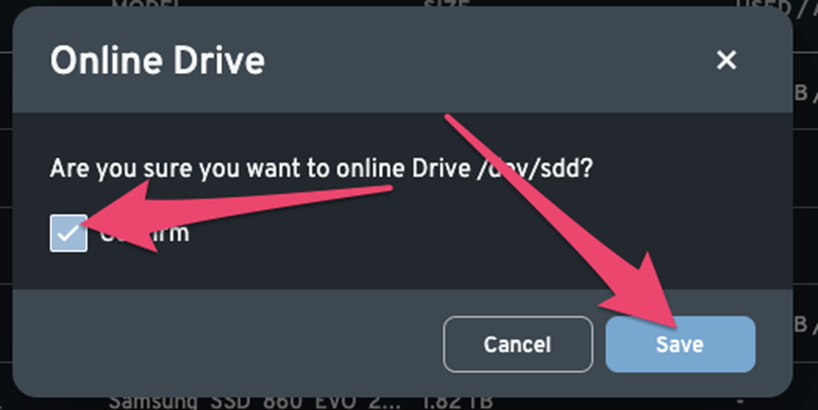
 2. In the "Online Drive" dialog, place a check next to "Confirm", then click the "Save" button.
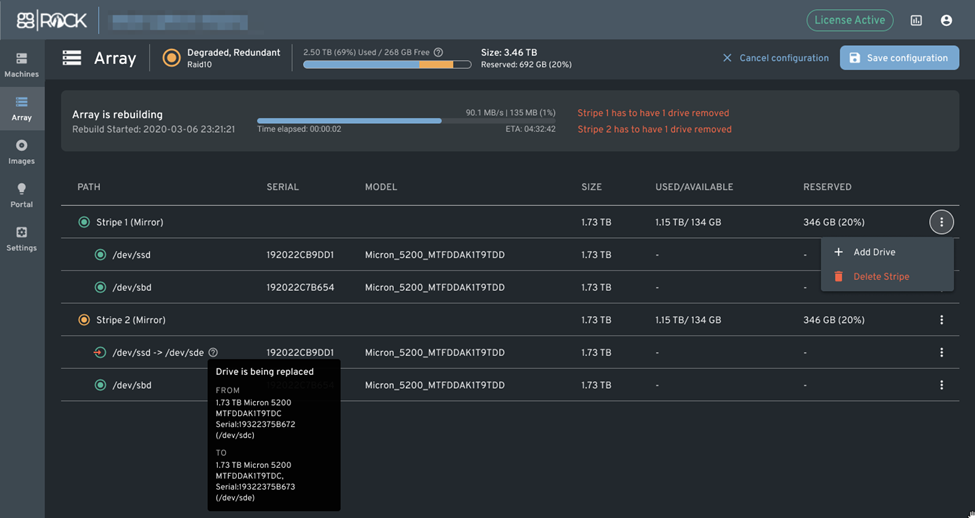
Array Re-building
Most operations on a RAID array will require the array to be re-built. During the period of re-building, there will be degraded performance and increased risk of data loss. Please ensure that you do not power off or reboot the server, or otherwise interrupt the array re-build operation at the risk of data loss.
During re-building "Array is rebuilding" will appear in on the "Array" tab.