This article covers the process of installing custom secure boot keys on an ASRock BIOS on an HP Omen PC.
Problem
Secure Boot is a security feature that ensures the integrity of the boot process by only allowing signed executables to run during startup. This is particularly important for certain games and applications that require a secure network boot process. While this requirement is more common in Windows 11, there are cases where it may also be necessary in Windows 10.
To enable Secure Boot and make use of these signed executables, you must load the public certificate associated with them. This certificate acts as a verification mechanism to confirm the authenticity of the software being executed. By following the steps outlined in the solution provided, you can ensure that your system is configured to meet the Secure Boot requirements for running specific games and applications.
Current List of Games/Applications Known to Require Secure Boot:
- Valorant
- ESportal Anti Cheat
- FACEIT Anti Cheat
Solution
Enable Secure Boot and install the ggRock Secure Boot certificates.
NOTE:
Each BIOS manufacturer has their own unique procedure to install secure boot certificates - please consult with your motherboard manufacturer for more information.
A generalization of this process is available here:
Simulated BIOS Screens: Secure Boot Certificate Enrollment
1. Download the ggRock Secure Boot certificates to any computer and copy them to the root of a freshly formatted USB drive with no other files present.
2. Connect the USB drive to one of your machines.
3. Boot your machine to its BIOS configuration utility (Usually F2, F10, F12, or ESC during boot time).
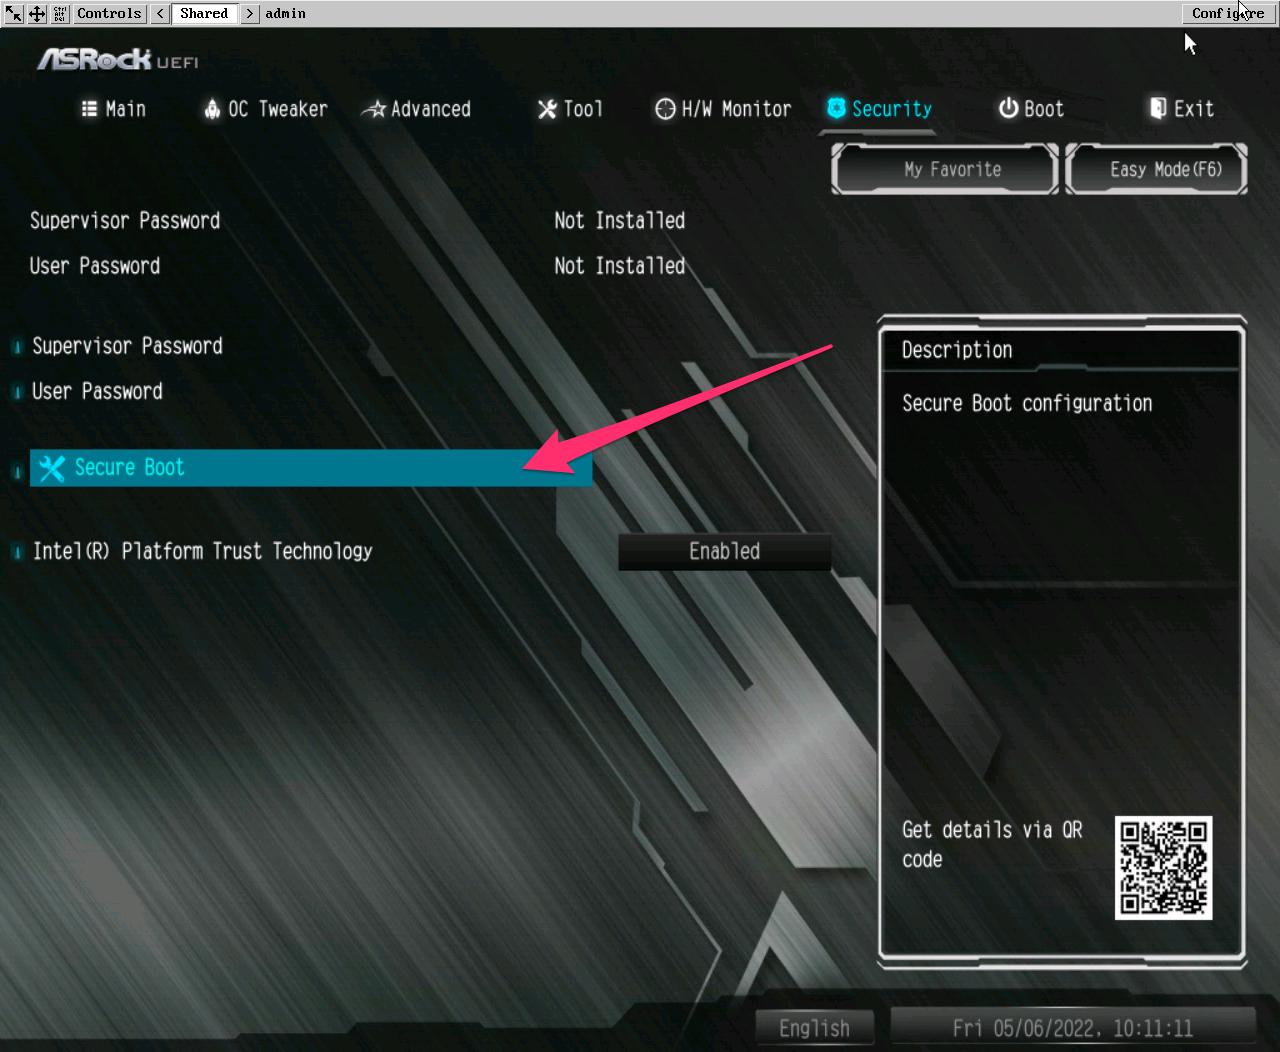
4. Navigate to the "Security" tab, then navigate to the "Secure Boot" menu item and press <Enter>.
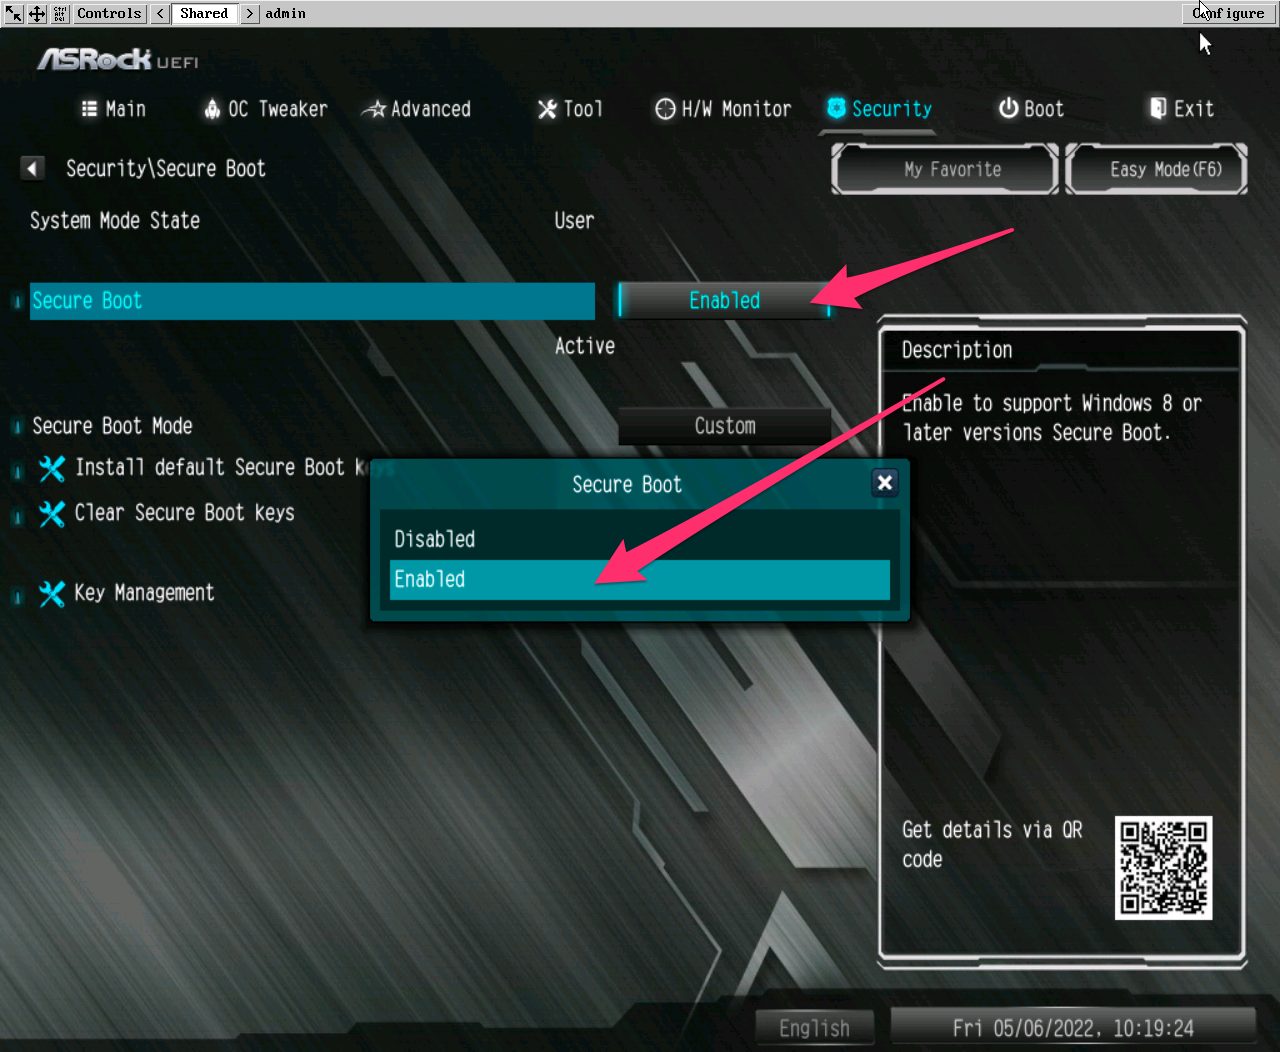
2. Enable Secure Boot, if it is not already enabled.
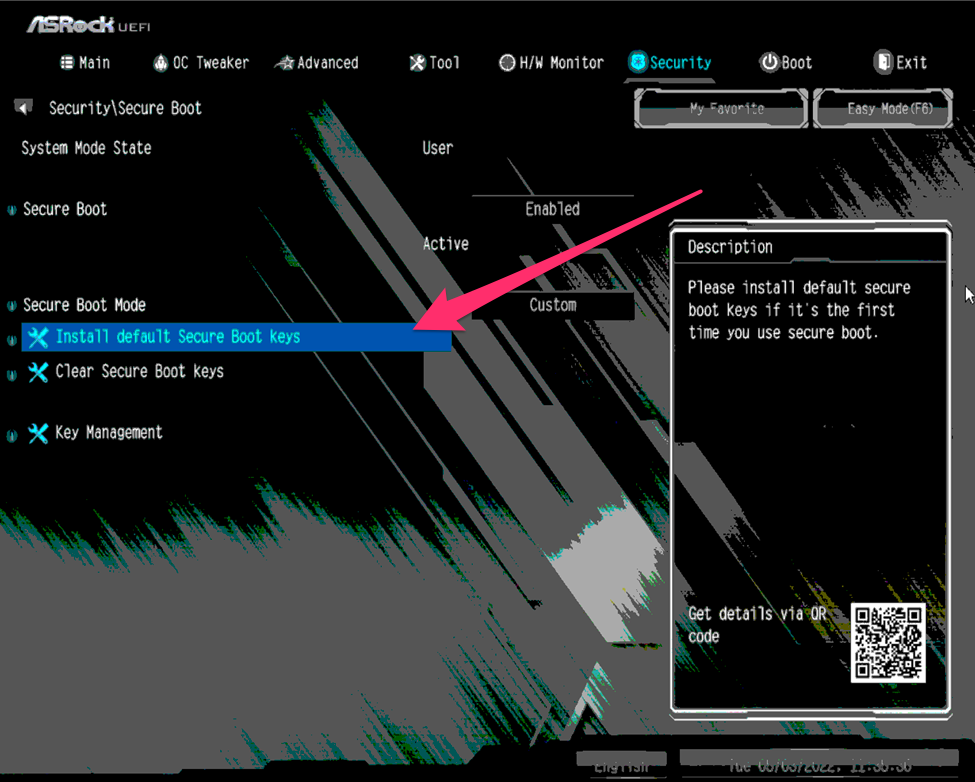
3. Install the default Secure Boot keys supplied with your motherboard (this is typically a built-in feature of your BIOS).
NOTE:
This step is necessary because if at some point during the lifetime of your machine the secure boot keys have been cleared or altered, it may not be possible to successfully boot Windows.
If the certificates are not successfully loaded and secure boot remains enabled, the BIOS will prevent boot with a message as outlined in the following article:
Secure Boot Violation
4. Append the ggRock toolchain certificate to your BIOS database - it may be called "db", "Authorized Signatures", but NOT "dbX".
NOTE:
Each of the files downloaded previously is the same certificate, just in a different format because different BIOS manufacturers have different certificate formatting requirements.
The most popular format is ".cer", but your mileage may vary.
NOTE:
If you are unable to import the ggRock certificate, you may need to use a .esl file which may also be referred to as a "Authenticated variable" or "Uefi secure variable" for some manufacturers.
a. Within the Secure Boot Security Menu, navigate to the "Key Management" menu item and press <Enter>.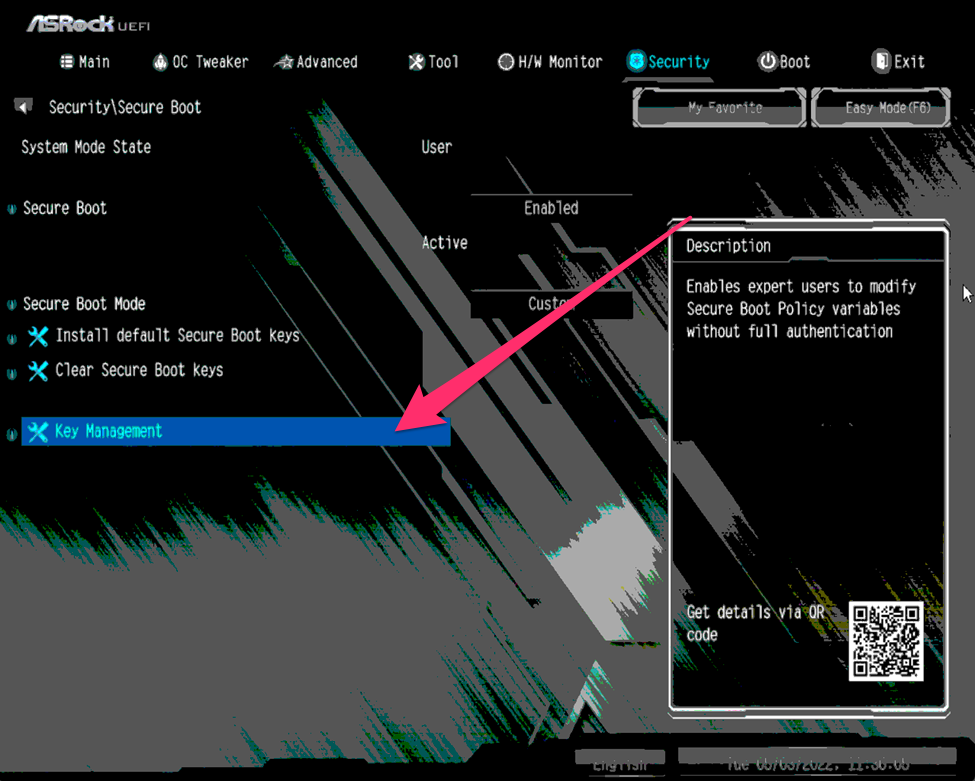
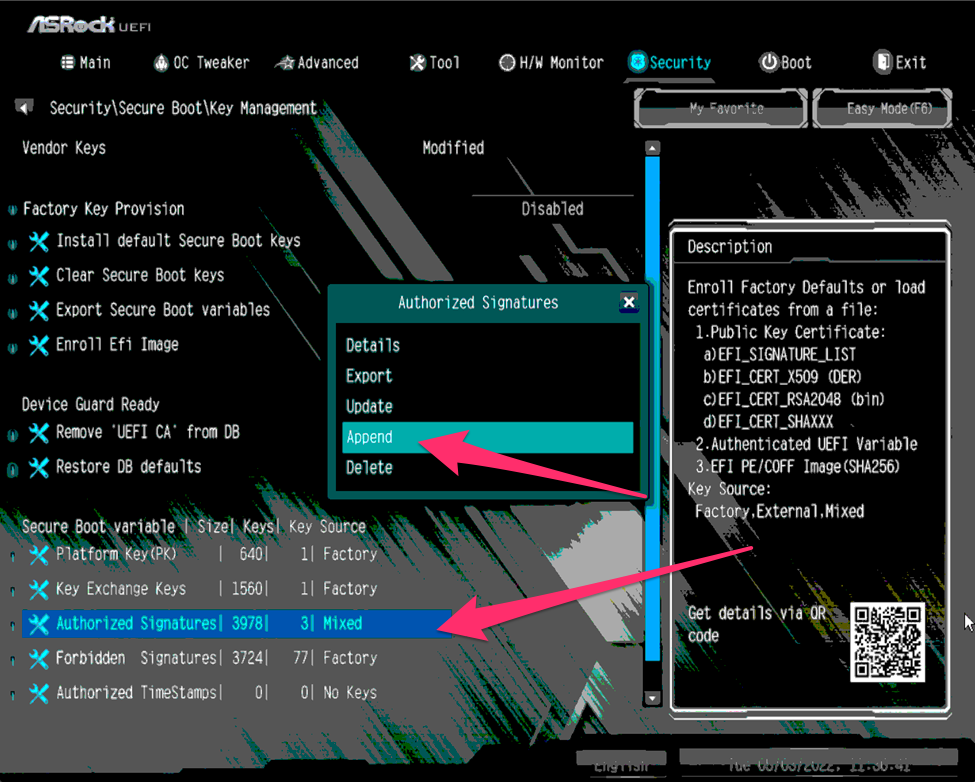
b. Navigate to "Authorized Signatures", and press <Enter> to select the menu item to "Append" to the database.
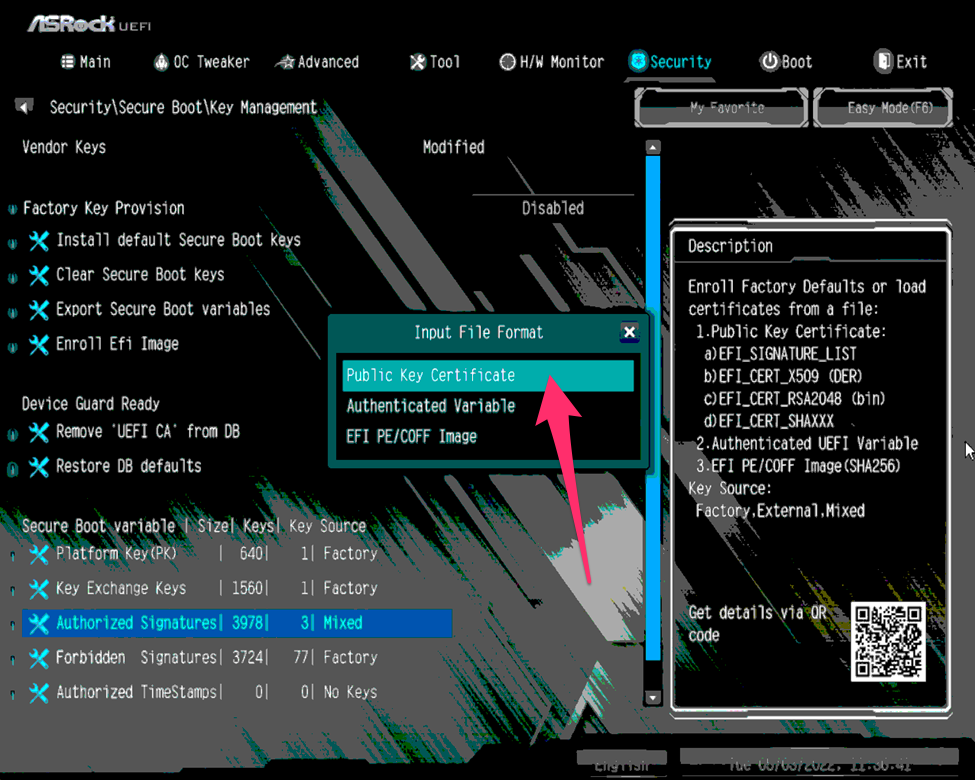
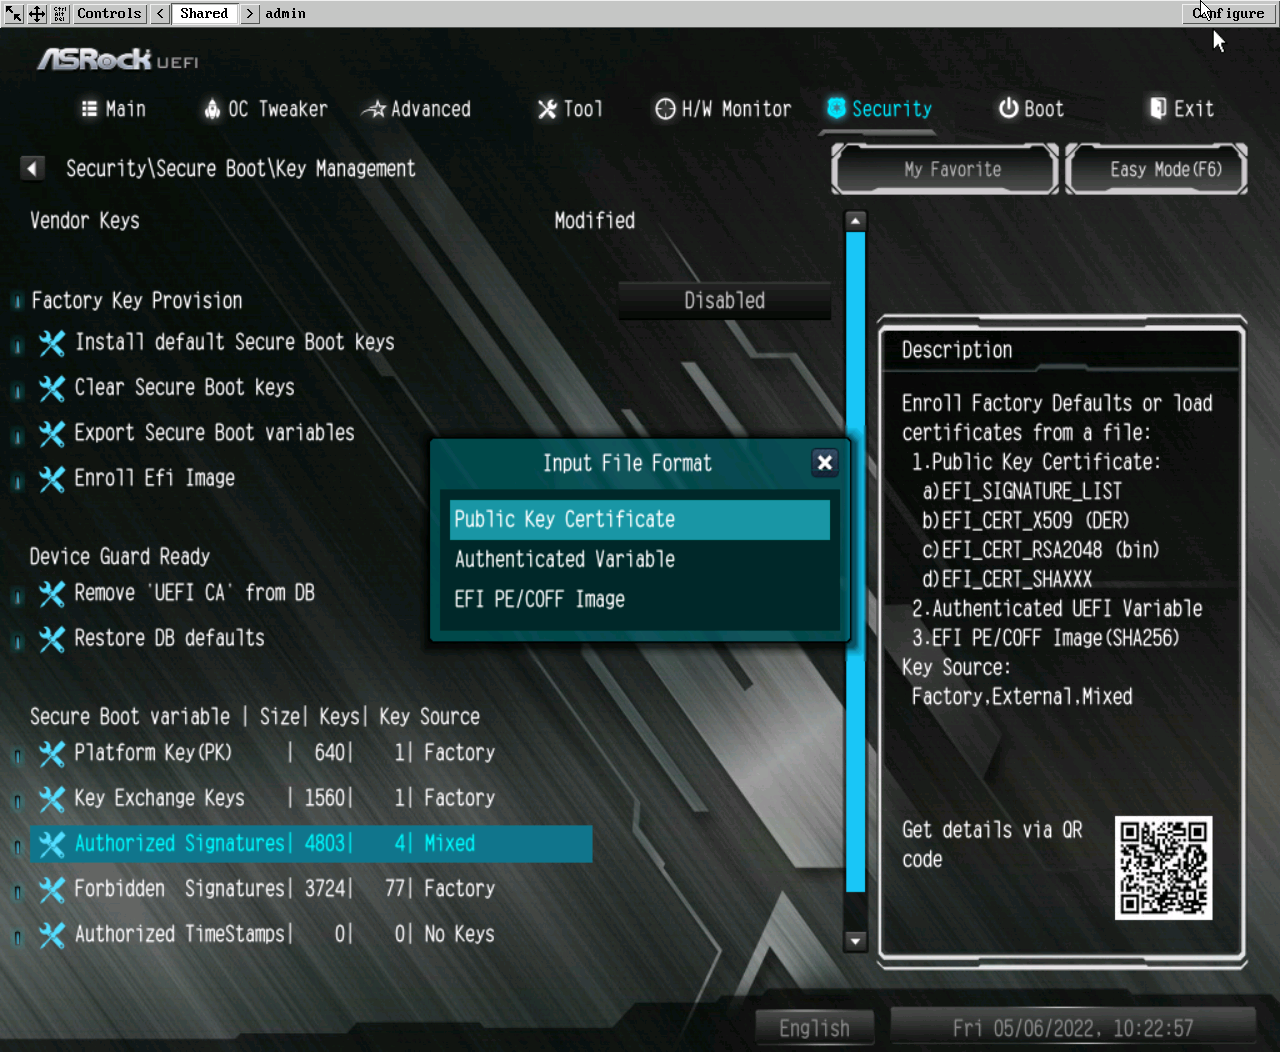
c. Press <Enter> to select the appropriate Input File Format based on the requirements of your motherboard.
Your manufacturer may require a specific file type (.cer, or other format) based on the option selected. If one option does not work, try the other options presented.
NOTE:
For the purposes of this example, "Public Key Certificate" was selected.
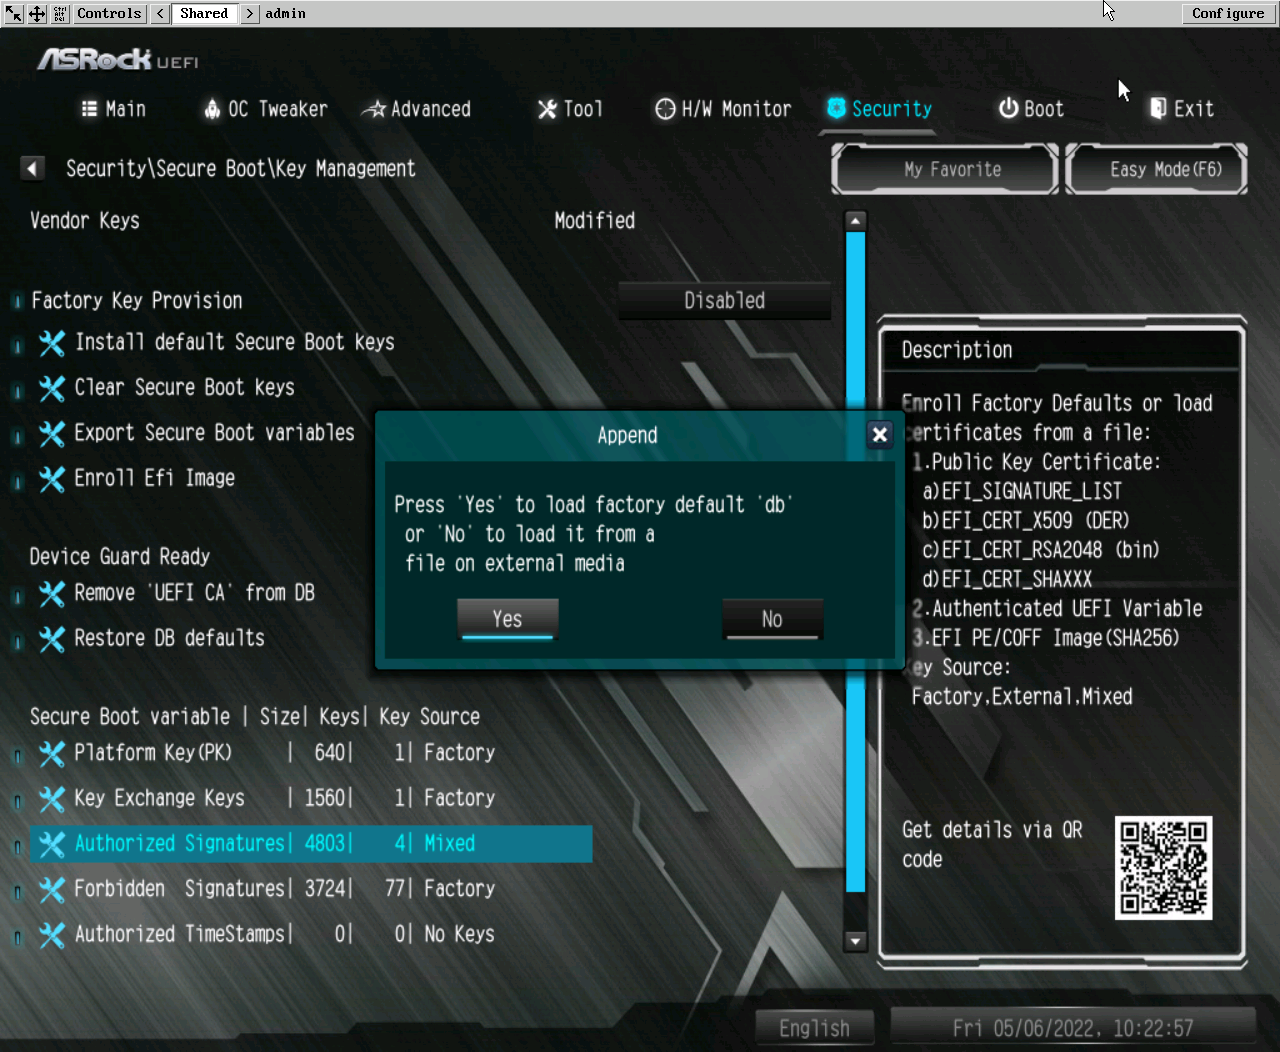
d. When prompted, select the "No" button to load certificate files from the attached USB drive
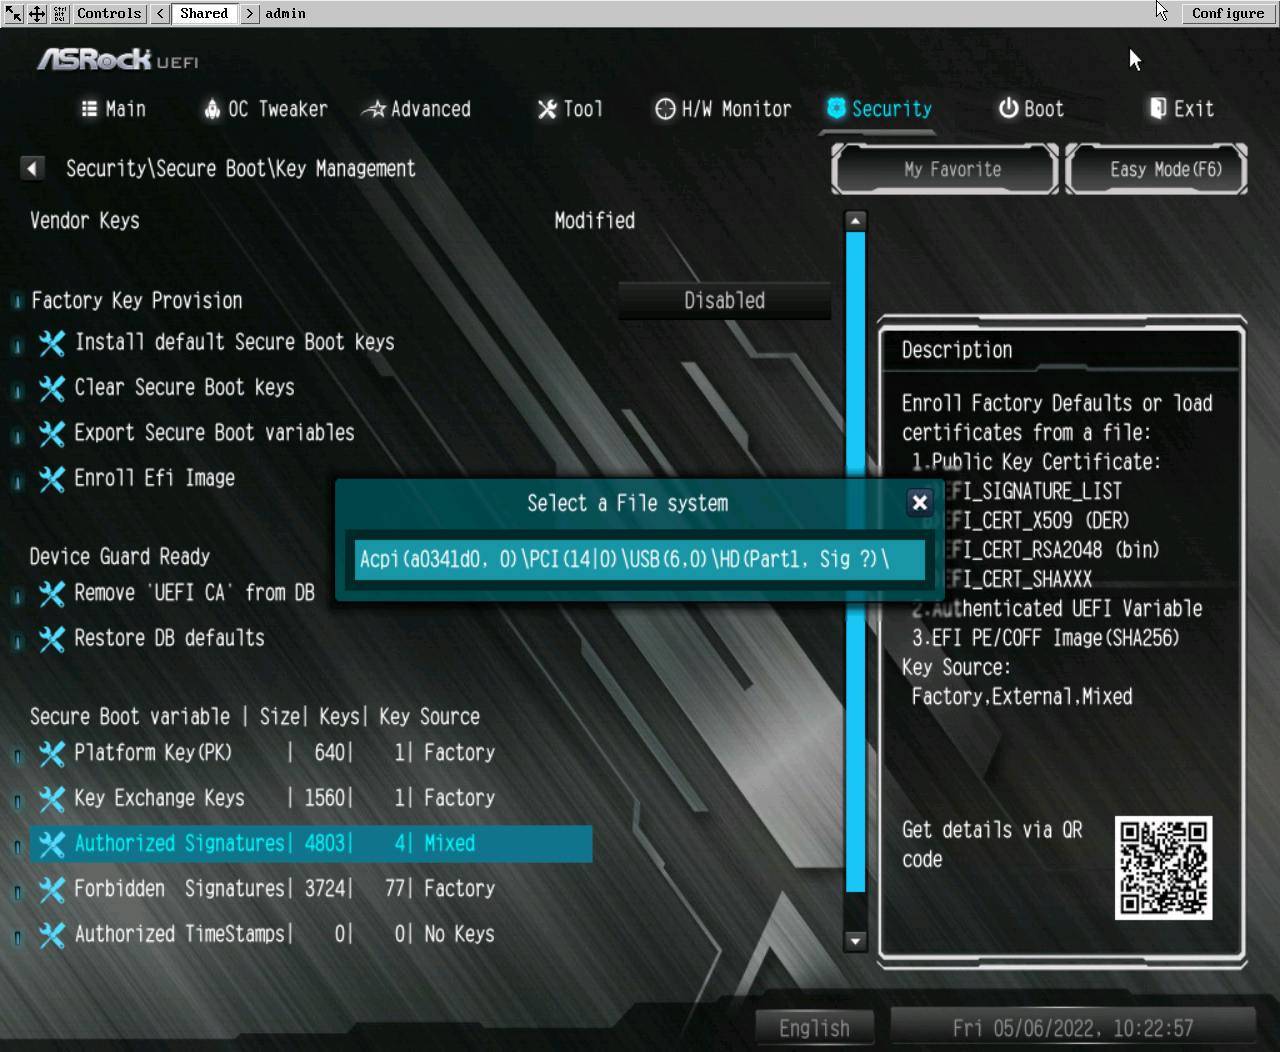
e. Select the attached USB drive containing the ggRock Secure Boot certificate files from the "Select a File system" menu.
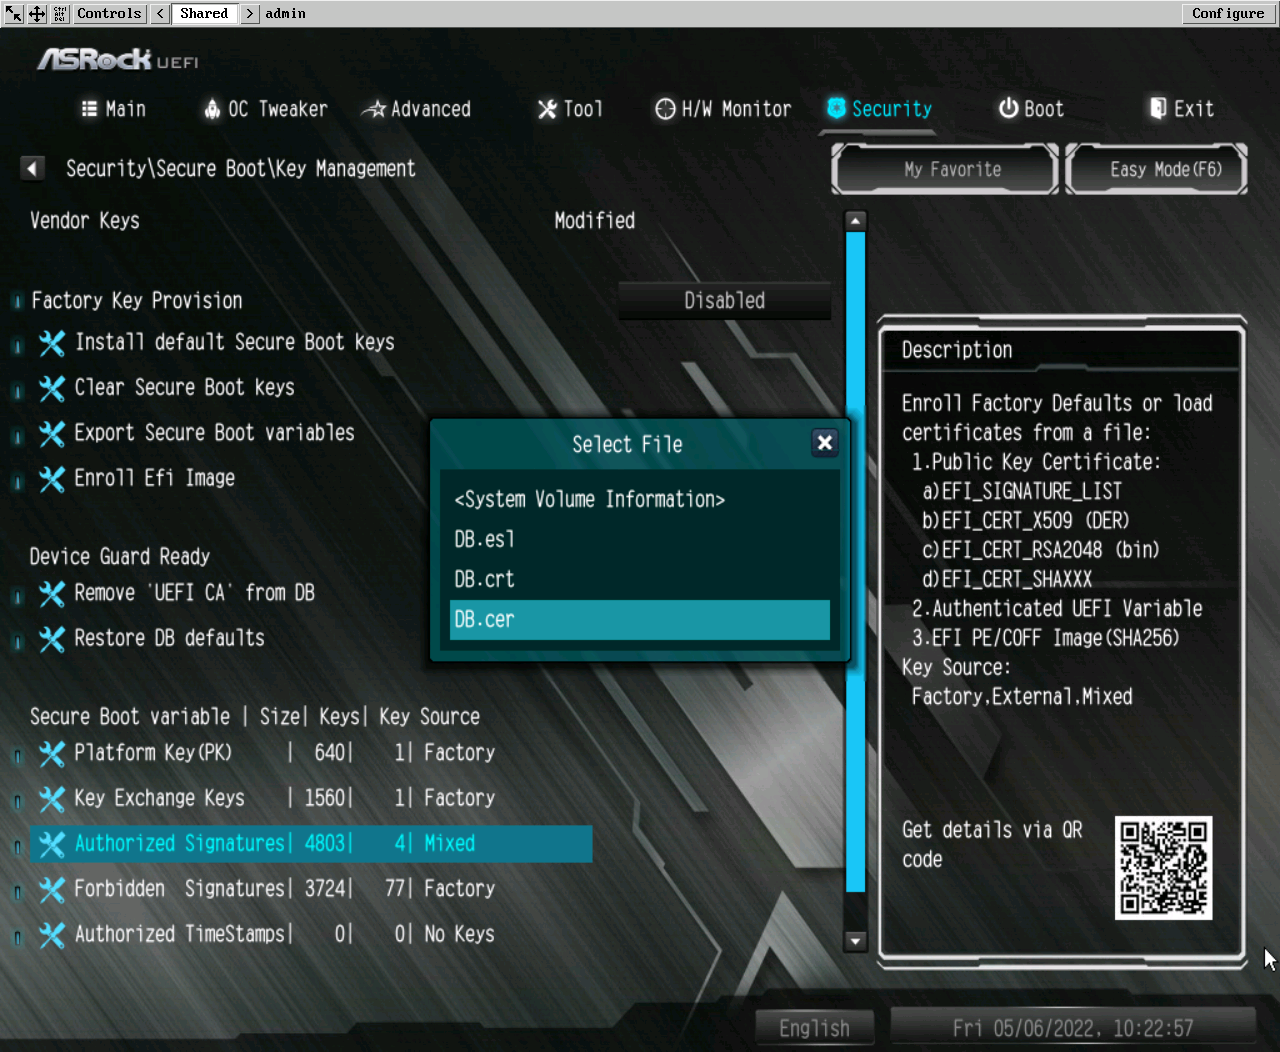
f. Select the appropriate certificate file (most likely .crt or .cer) according to your motherboard specifications.
g. From the "Input File Format" menu, select "Public Key Certificate" if you are using the .crt or .cer file format, or "Authenticated Variable" if you are using the .esl file format.
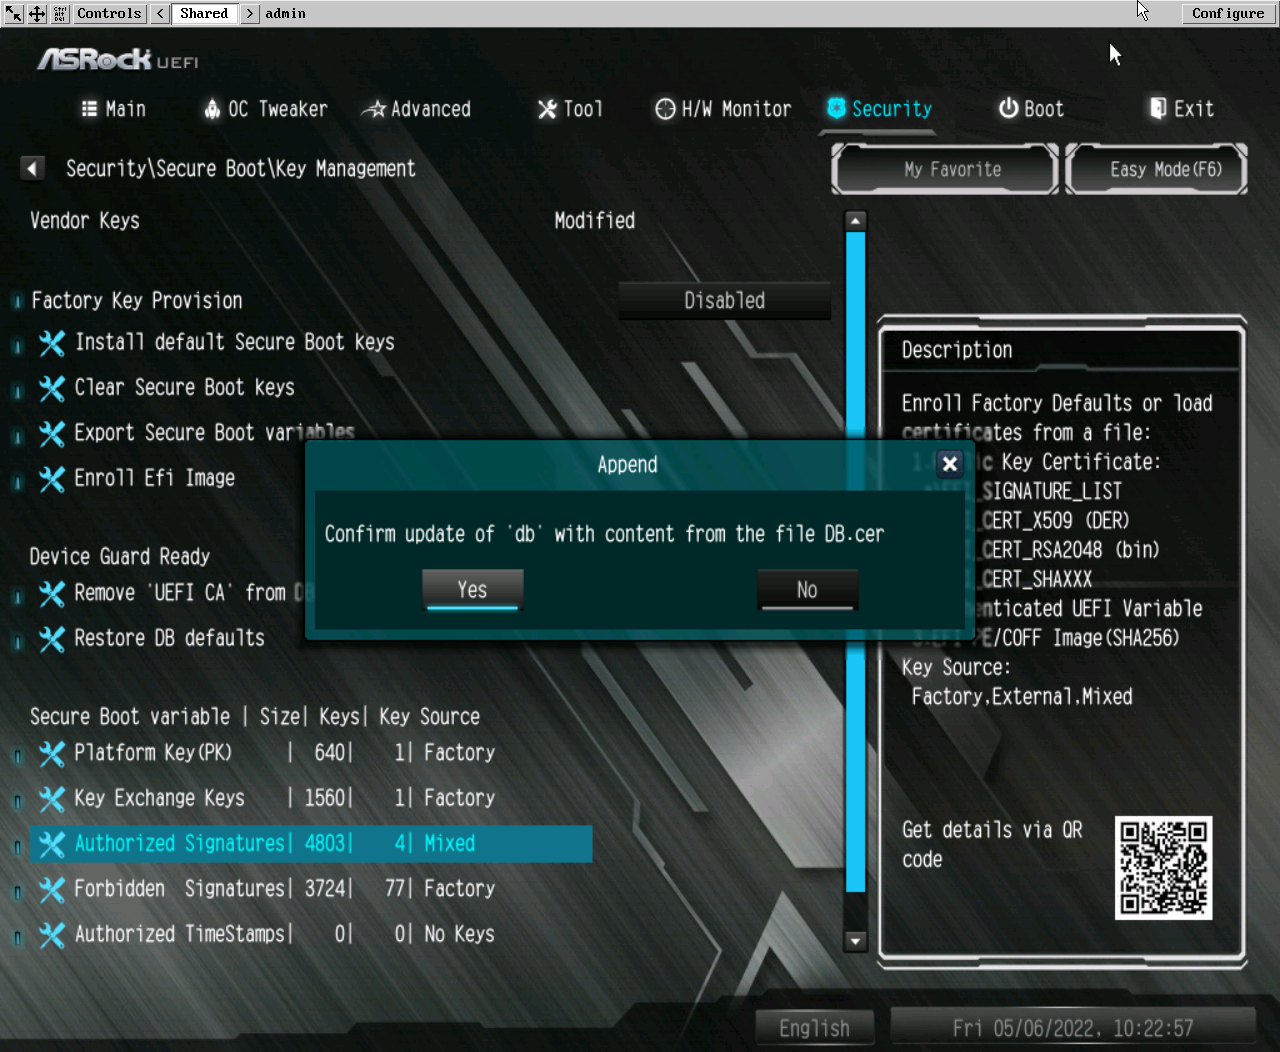
h. Select the "Yes" button to confirm appending the ggRock Secure Boot certificate to your motherboard's Authorized Signatures database.
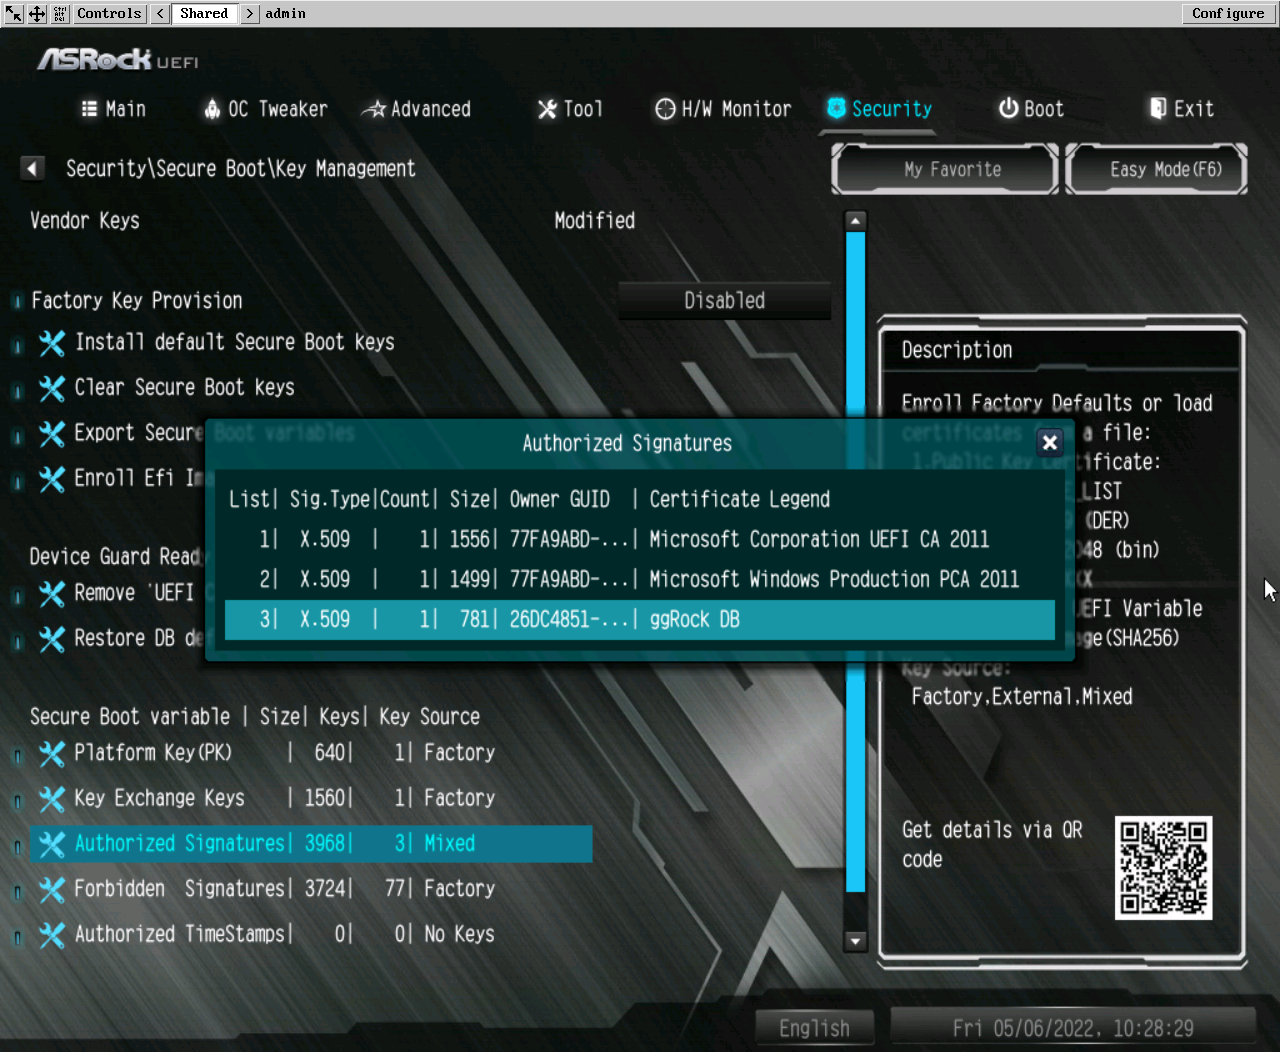
5. (Optional) Confirm successful import of the ggRock Secure Boot Keys.
a. (Optional) Select the "Details" menu item within the "Authorized Signatures" menu and press <Enter>.
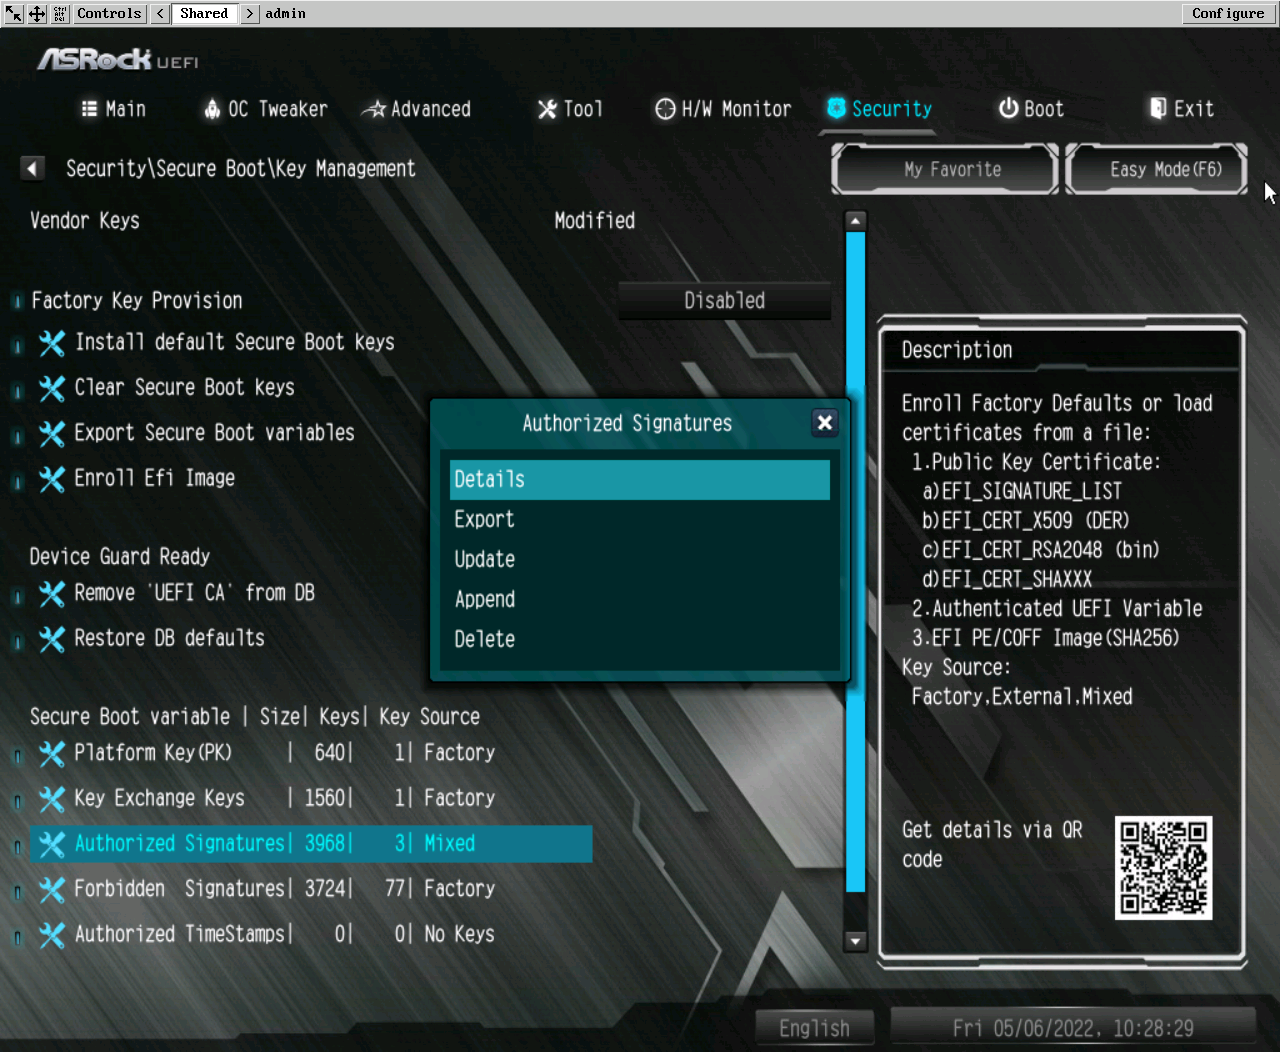
b. (Optional) Confirm the existence of the "ggRock DB" entry within the "Authorized Signatures" dialog.