
User Details Configuration is where you can add/edit/delete User Detail fields in the web admin. You can set in these settings if you want the user detail fields to be visible and/or to be required in the web admin and client computers when creating a new user.
You can view these settings in the web admin in Settings > Center config > User details configuration.
Shortcut Link: https://admin.ggleap.com/settings/center/user-details
-
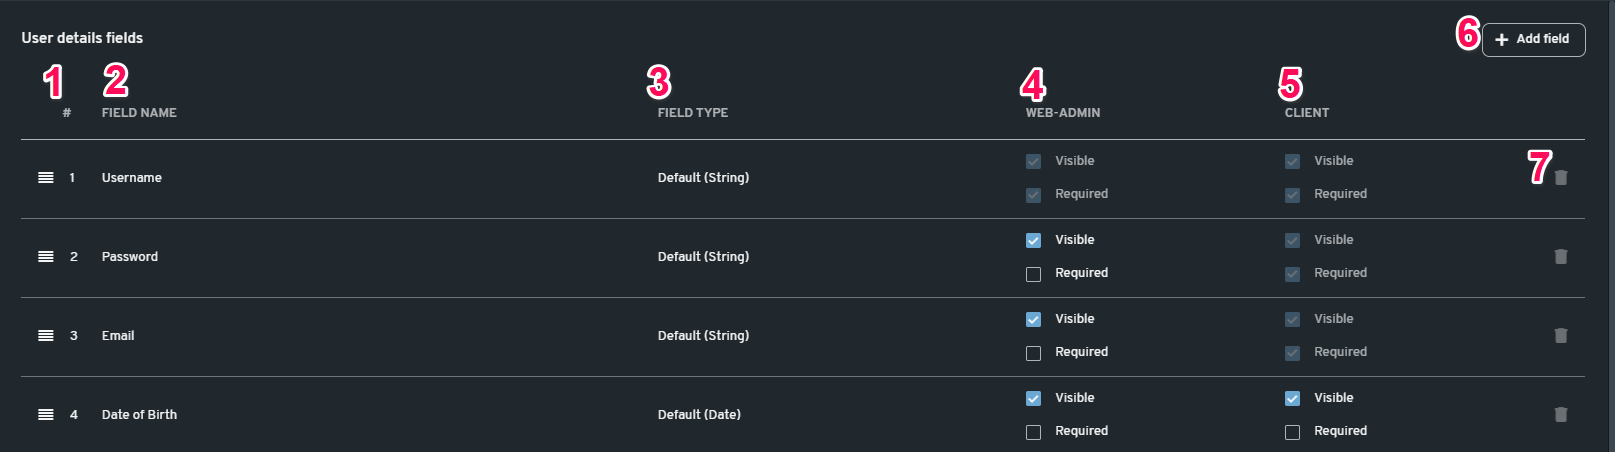
# - This is the position of the field in user registration (top-bottom). You can drag each field to arrange how you would like them to appear during user registration.
-
Field Name - The name of the user detail field. e.g. Username, Password, Date of birth, etc.
-
Field Type - This is where the type can be selected (String, Number, Date, and Picture). Note that the default fields' type cannot be changed.
-
Web-admin - This section is where you can set the field to be visible and/or required in web admin user registration.
-
Client - This section is where you can set the field to be visible and/or required in user registration on the client's PC.
-
Add Field - Click this button to add a new user detail field.
-
Delete icon - This will remove the field from the list. Note that there are fields that cannot be removed.
How to create a new custom user field:
-Click on the "+ Add field" button.

-Fill out the field name and select the field type if it is a String, Number, Date, or Picture.

-Set the field to be visible or required in the web admin or client user registration.

-Set the arrangement of where the new field will appear (optional).

7. Click on the "Save changes" button.