
This article details processes for adding a new PC/motherboard type to an existing ggRock system image using the ggRock Image Creation Tool.
Problem
A new Machine type or motherboard type appears within your game center.
This new type of system is unable to boot.
Solution
In most cases you will be able to simply update your existing System Image, thus preserving all of the data currently written to it (installed launchers, games, etc).
General Process Outline
-
Use a working Machine via ggRock, boot it and clone your C drive (to preserve data, if you have any) to a had drive using the ggRock IC tool.
-
Move that hard drive in a NEW Machine that doesn't work with ggRock and proceed from Step 4.
Full Process
1. Connect an empty physical drive to a working client Machine.
2. Boot the Machine via ggRock (PXE).
3. Download the ggRock IC Tool here.
4. Use the ggRock IC tool to clone the C:\ drive to the connected hard drive.
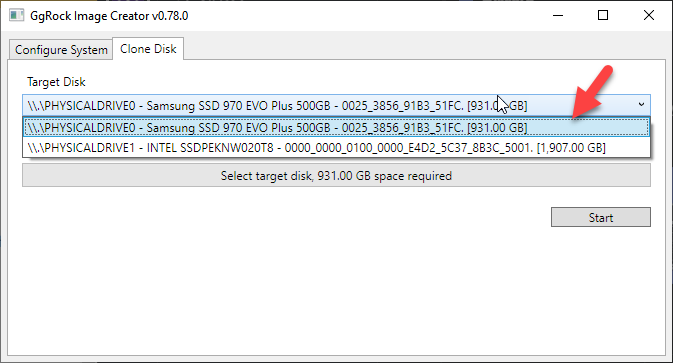
Open the ggRock IC Tool, navigate to the Clone Disk tab and select the drive you've installed to be a destination for the current OS. The drive will be formatted.
Leave the checkbox Complete disk transfer unchecked.
Begin Optional Step: Shrink the source (C:\) partition to speed up the process
-
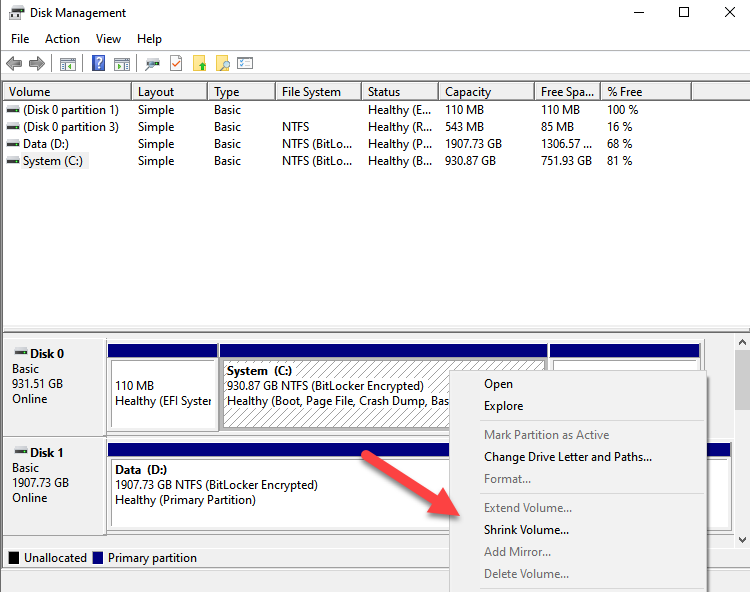
Open the Disk Management snap-in (diskmgmt.msc) from the start menu or run box.
-
Right-click the System (C:) partition and choose "Shrink Volume" from the context menu.
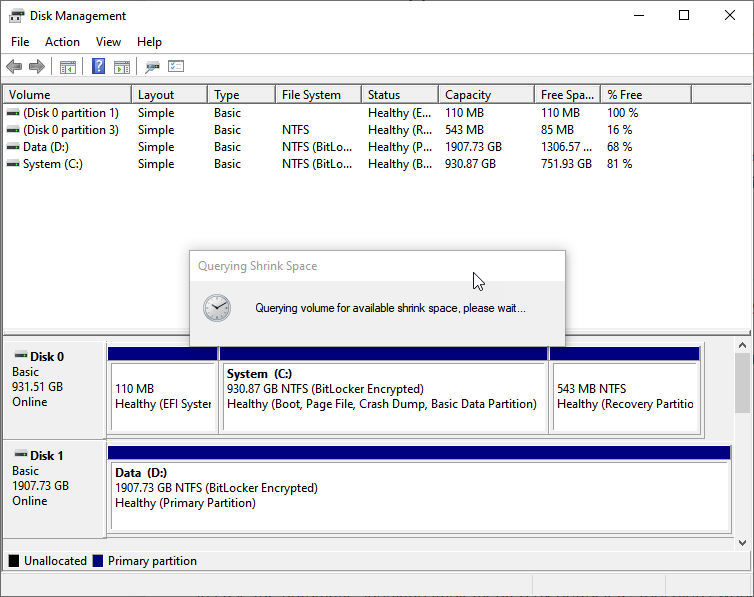
3. A status window appears indicating that the volume is being queried for available shrink space.
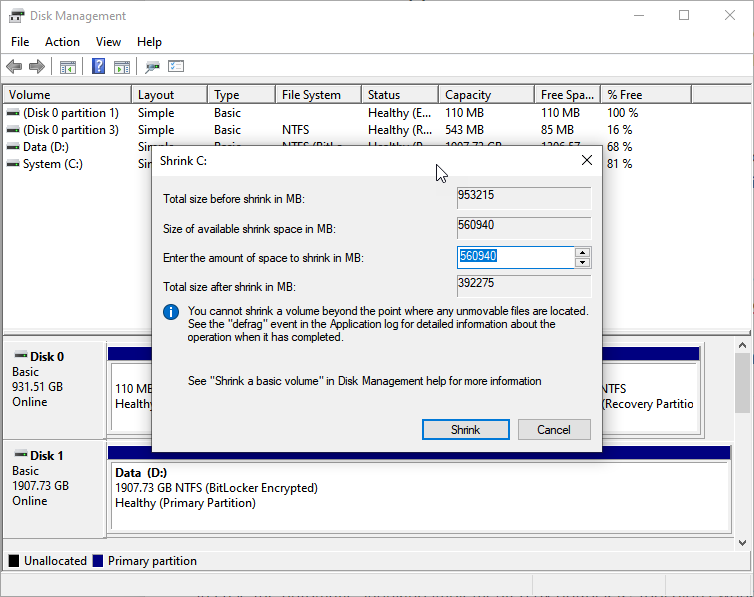
4. Within the "Shrink C:" window, accept the default values by clicking the "Shrink" button.
End Optional Step: Shrink the source (C:\) partition to speed up the process
Note:
In the event that there is an issue with the disk cloning operation, you may select the "Complete disk transfer" option within the ggRock IC Tool. This will disable any optimization in the transferal process and will clone the entire disk raw.
6. Reboot the PC, setting BIOS to boot from the internal drive to which you cloned your ggRock system image.
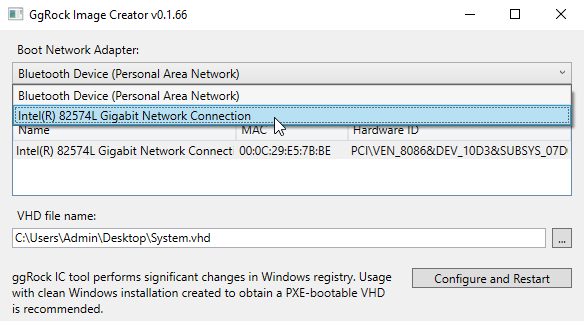
7. Generate VHD using the ggRock IC Tool, capturing the network driver for the new PC or motherboard and thusly adding it to your system image.
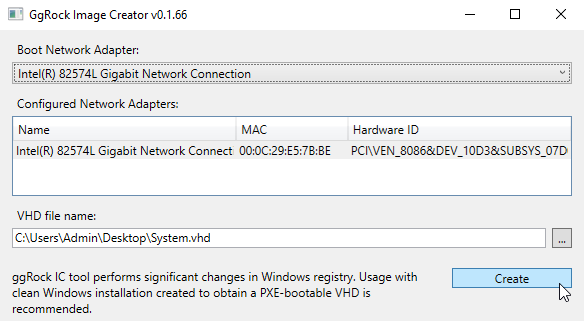
8. Reboot the system and then create the VHD once all NICs (ignore the Wi-Fi ones if any) are in Configured Network Adapters:
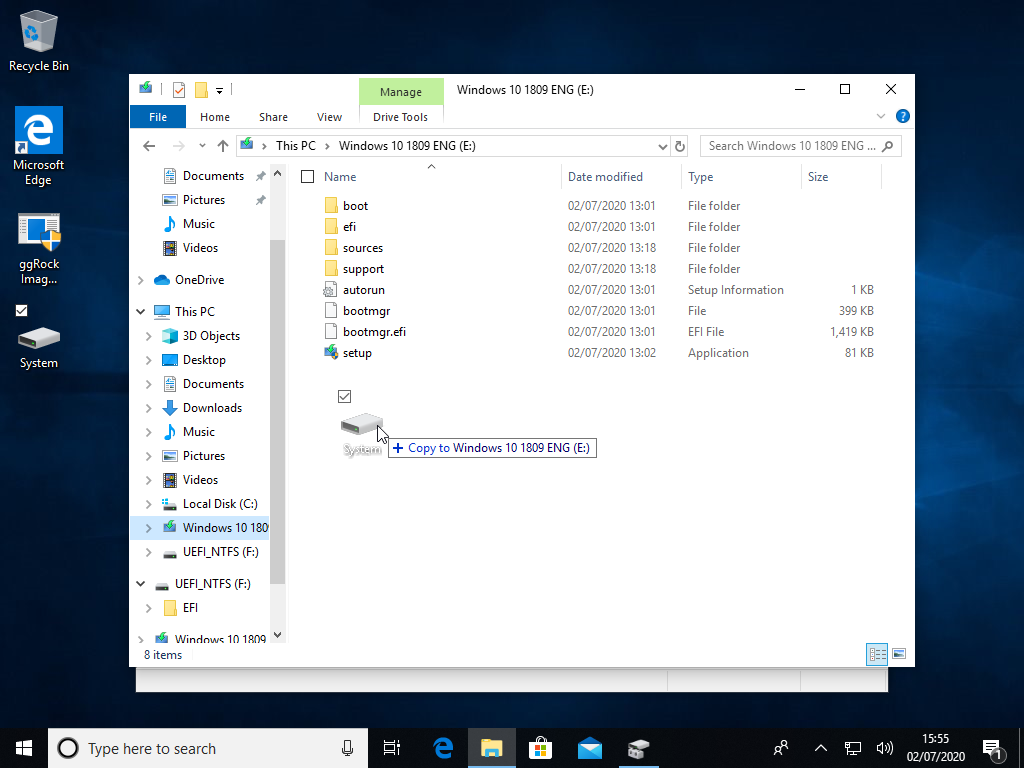
9. After image creation, copy the newly-generated System Image to a sufficiently-large external USB drive.
Note:
For the purposes of importing the image to ggRock, please ensure that the newly-created system image is copied into the root (no folders) of the USB drive. USB 3.0 drives and ports are preferred to save time during the copy process.
Usually .vhd file has a size of 12-13 GB, depending on your Windows edition. It might take up to 30 minutes depending on your USB drive and Machine ports.
10. Plug the USB drive containing the newly-created system image directly into your ggRock server.
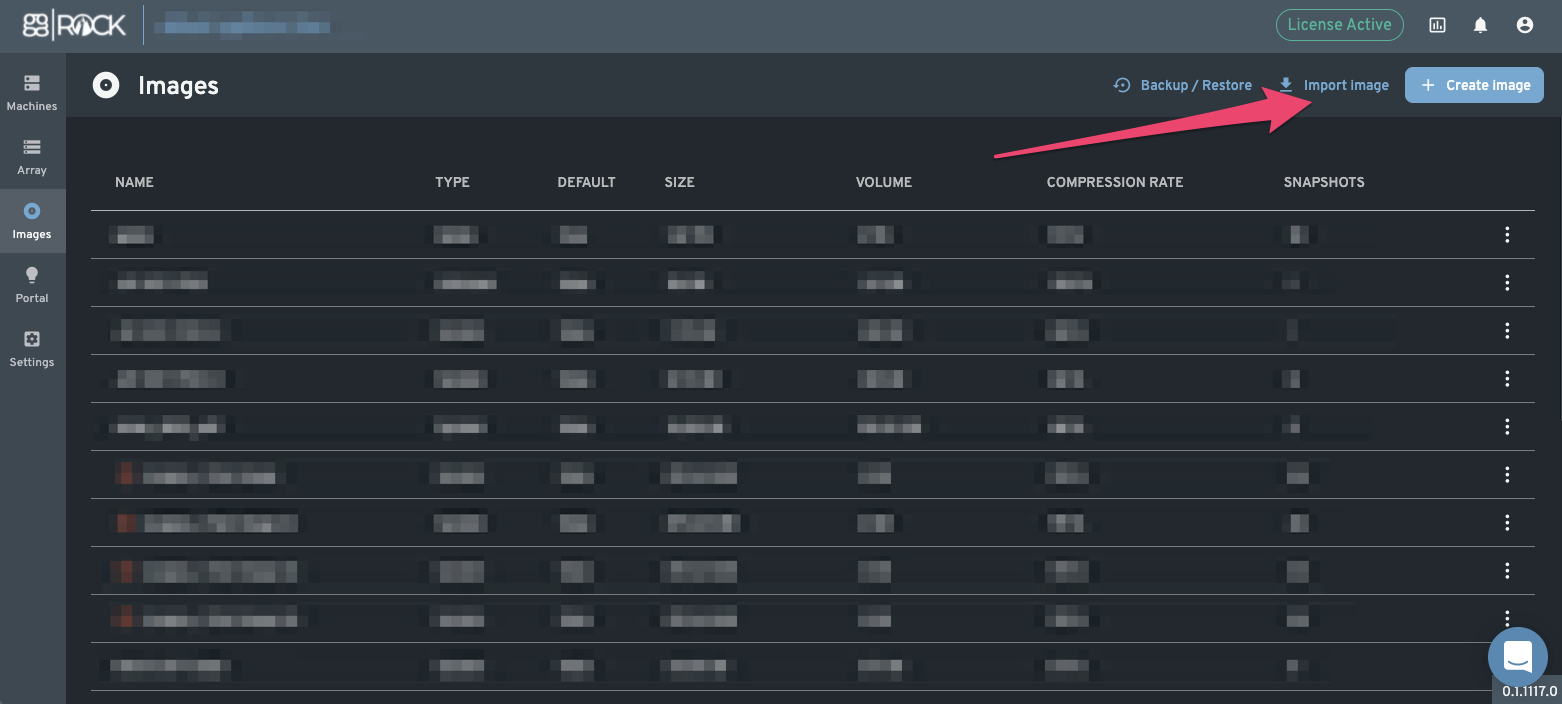
11. Log into the ggRock Web UI, then click the "Images" tab.
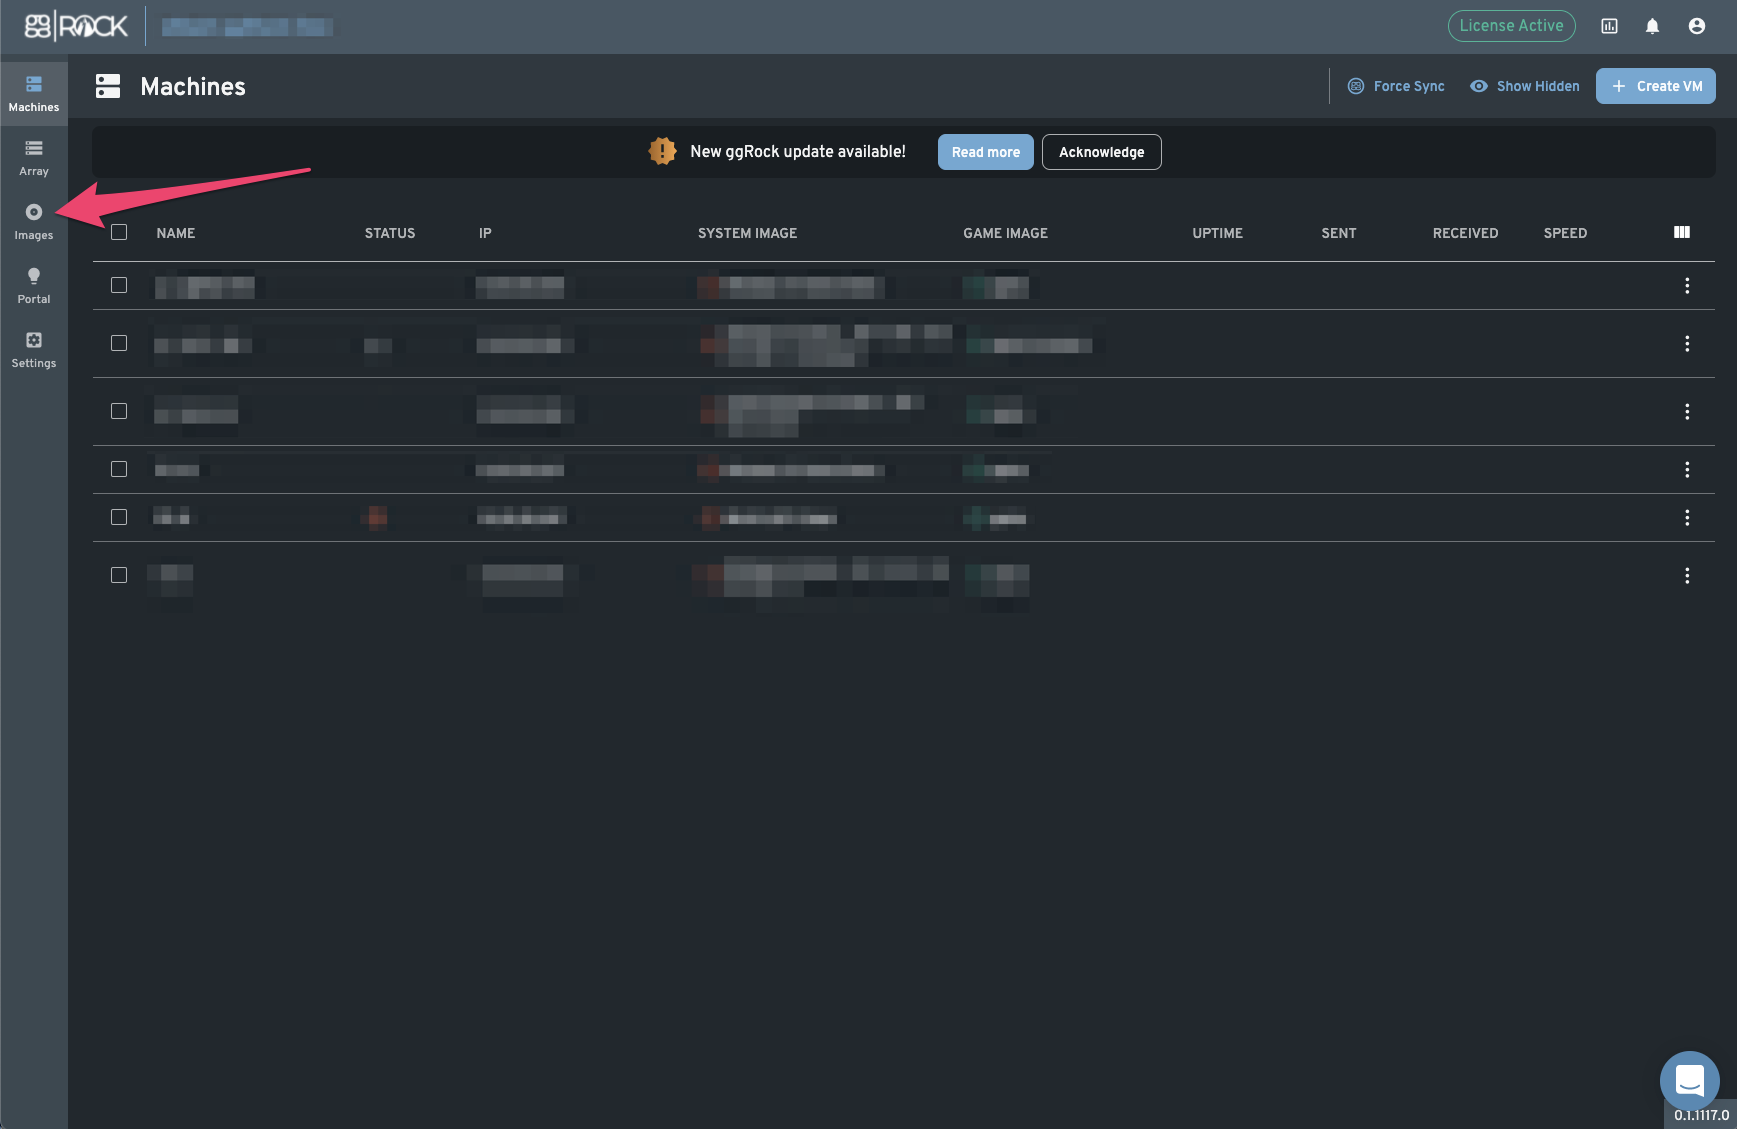
12. Within the "Images" tab, click the "Import Image" button.
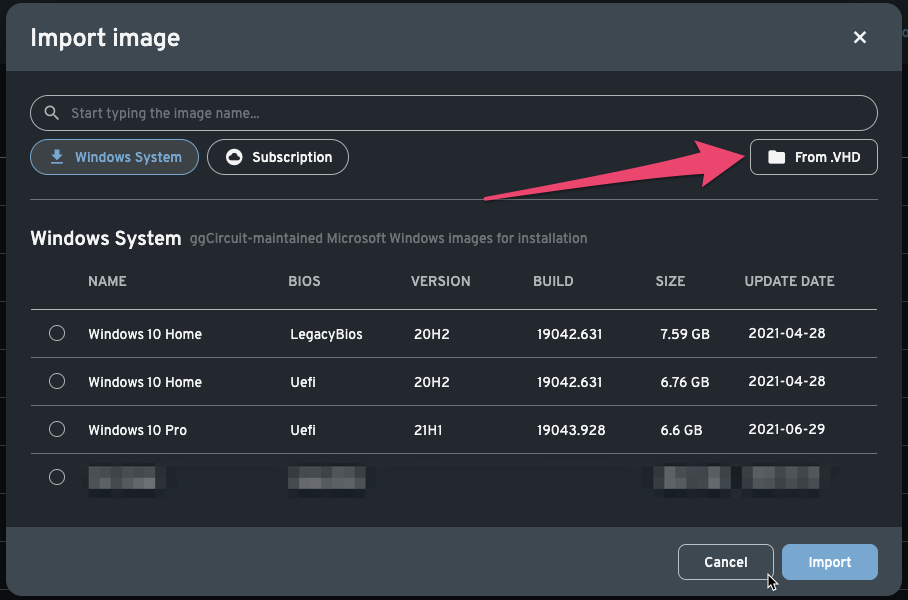
13. Within the "Import Image" dialog, click the "From .VHD" button in the top-right corner.
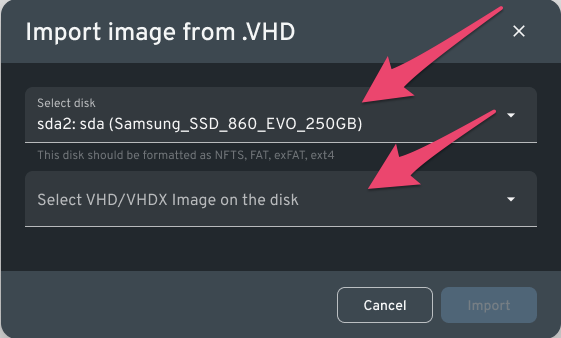
14. Within the "Import Image from .VHD" dialog, select the USB drive you inserted into the server earlier from the "Select disk" drop-down, then select the newly-created system image file from the "Select VHD/VHDX Image on the disk" drop-down.
13. Provide a name for your newly-created image, set Image Type to System and make it default.

14. Observe the import process.

Note:
You can close the modal dialog and monitor the progress from the "Images" tab.
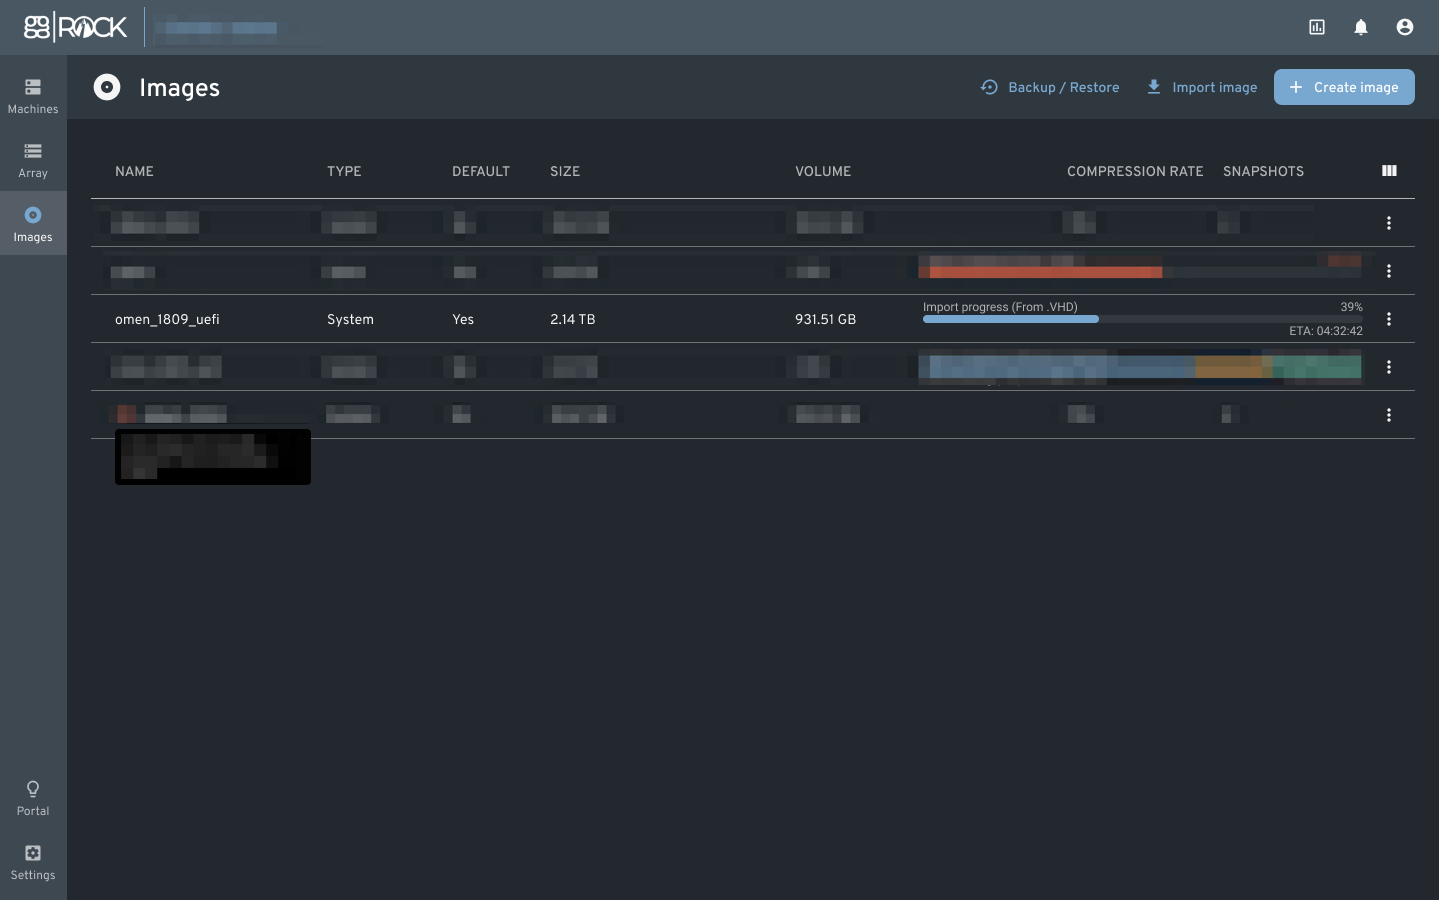
It will take ggRock, on average, around 30 minutes on a USB 3.0 device to import and convert a typical 13GB system image into the ggRock Image format.
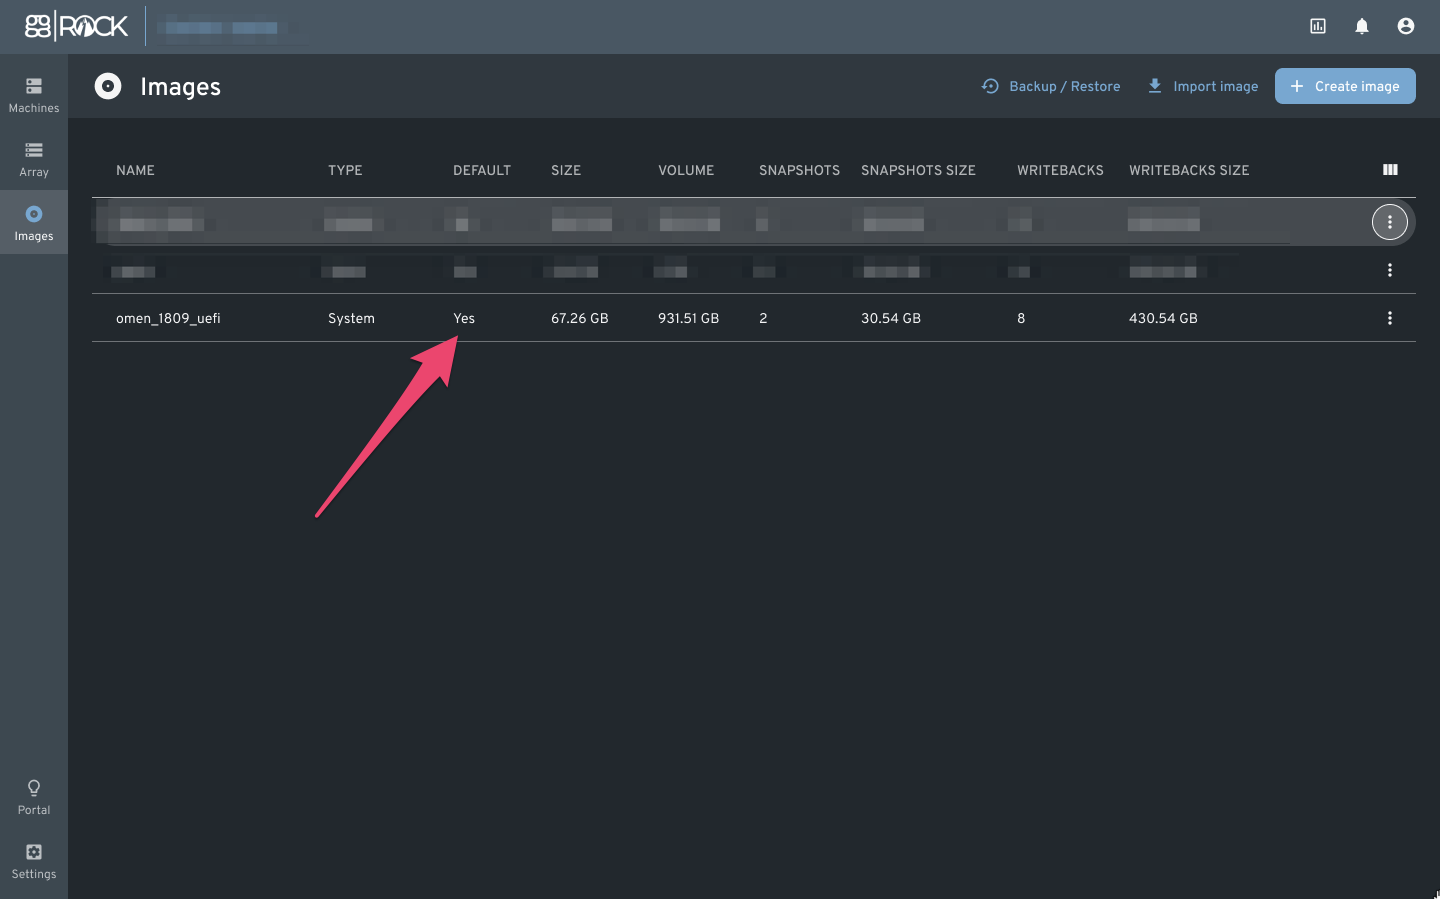
15. Confirm that the Image was successfully imported, has size and is set to default.
16. Test booting a client machine to confirm that both motherboards are now supported by your system image.
Additional Information
When adding a new motherboard type (even if it appears similar) please be sure to connect the network cable to the network card for at least some period of time so that Windows has the opportunity to check for and install drivers for the device.
If you do not connect a network cable, the driver might not be installed or fully initialized and therefore it may appear that the motherboard/network card of your new system has the same network device as the ggRock IC tool cannot detect the card unless the driver is installed and the device is initialized.